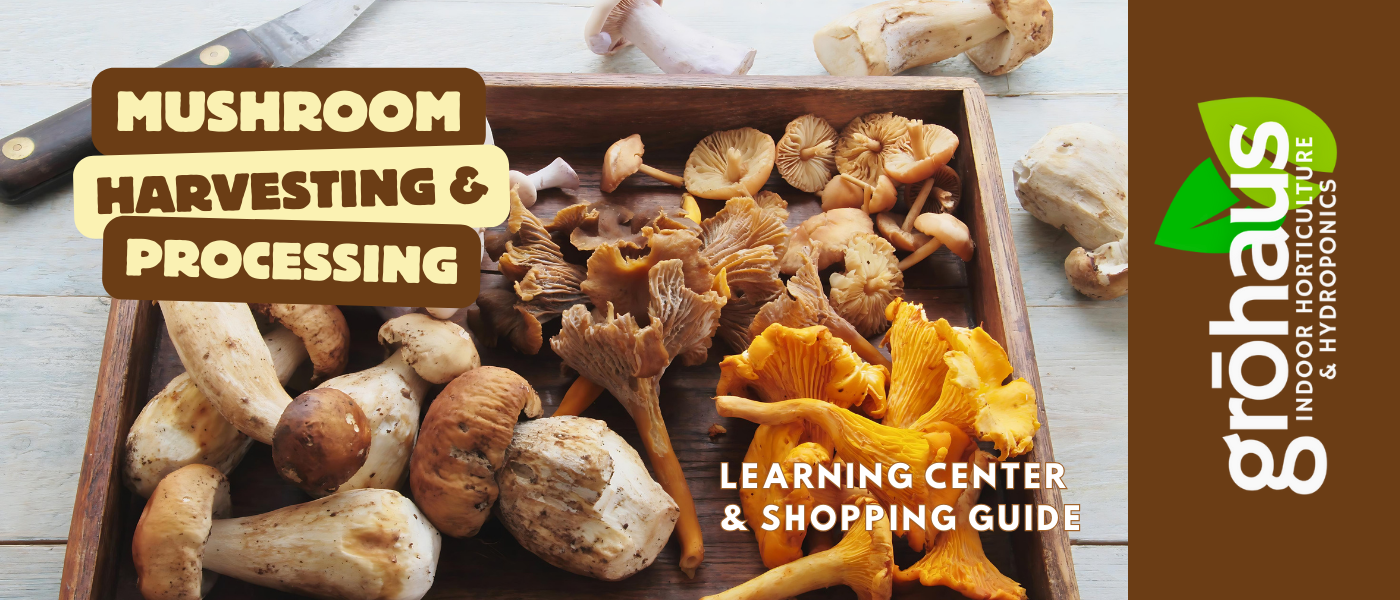
Mushroom Harvest & Processing:
Timing, Second Flushes & Preservation
Complete harvest and processing guide — species-specific timing, twist-and-pull technique, post-harvest block maintenance for second and third flushes, dehydration temperatures for culinary vs. medicinal species, canning safety, freezing with blanching, refrigerator shelf life, and outdoor spent substrate use.
The Harvest Process — Safety First
What is the process for harvesting mushrooms grown at home?
This guide covers harvesting from cultivated, intentionally inoculated substrates only. Never consume mushrooms that grew spontaneously in your yard, on logs, or in your garden without positive identification from a field guide or mycologist. Many toxic species closely resemble edible ones — some fatalities occur annually from misidentification. When in doubt, do not eat it.
Step-by-Step Harvest Process
- 1Monitor daily as fruiting begins. Mushrooms grow rapidly once pinning starts — some species (oyster) can go from pin to harvest-ready in 4–7 days. Check at the same time each day, ideally morning.
- 2Know your species' harvest window (see Section 02 for species-specific timing). General rule: harvest before caps fully open and before spore release begins. Late harvests reduce quality; early harvests reduce yield.
- 3Use twist-and-pull technique for most species (see Section 03). Cutting leaves stubs that harbor contamination. For dense clusters, use a clean kitchen knife — not a sterile scalpel, which is for agar work.
- 4Collect in a breathable container — a clean basket, mesh bag, or open bowl. Never collect in sealed plastic bags; the mushrooms will begin degrading from CO₂ and moisture buildup immediately.
- 5Inspect each mushroom for discoloration, mold, or sliminess during harvest. Discard anything that appears unhealthy to prevent it from contaminating the batch in storage.
- 6Dry-brush to clean; avoid washing until immediately before cooking. Refrigerate in a paper bag as soon as possible after harvest.
- 7Prepare the block for a second flush (see Section 04) — remove stubs, score, rehydrate, and return to fruiting conditions.
Species-Specific Harvest Timing
When is each mushroom species ready to harvest?
| Species | Harvest Indicator | What Happens If You Wait |
|---|---|---|
| Oyster mushrooms (Pearl, Blue, Pink, Yellow) | Caps 50–70% expanded; edges still slightly curled downward; veil between cap and stem still connecting | Caps flatten and become watery within 24–48 hours; flavor and texture degrade rapidly; spore release begins, coating everything in white/purple powder |
| Lion's mane | Icicle-like spines ("teeth") 0.5–1 cm long and uniformly white throughout; outer spines showing first extension | Spines begin yellowing at tips from the outside in — indicates oxidation and flavor degradation; still edible when slightly yellow but taste noticeably diminishes |
| Shiitake | Veil partially intact; cap 70–80% open with edges still curved; veil gives the distinctive curled cap edge indicating prime quality | Veil tears and cap opens fully; gills exposed; still edible but loses the characteristic curled edge; shelf life reduces |
| King oyster | Cap edge still curved downward; stem thick and firm | Cap flattens completely; texture becomes more fibrous; still edible but peak texture is past |
| Button / Crimini | Just before veil break — cap still closed over gills; firm and round | Veil breaks and gills expose; still edible as crimini/portobello at this stage depending on size |
| Portobello | After veil breaks when gills are fully exposed and cap is fully expanded; harvest before gills show blackening | Gills begin to break down and blacken; quality drops and shelf life shortens |
A jeweler's loupe (10–30x, $15–30) lets you inspect veil integrity and gill development without disturbing developing mushrooms. For shiitake and button species where pre-veil-break harvest is ideal, a loupe eliminates guessing. When the veil is still tight and opaque, you have 12–48 hours. When the veil edge begins showing tearing or the cap rolls upward, harvest within the day.

Harvest Technique — Twist-and-Pull vs. Cut
What tools do I need and should I cut or pull mushrooms when harvesting?
Twist-and-Pull Protocol
Grasp the mushroom near its base and apply gentle outward pressure while slowly rotating. The mycelial attachment point releases cleanly with this motion — leaving a smooth surface on the substrate rather than a ragged cut stub. This technique works best for: oyster mushrooms (whole cluster grasped together and pulled outward), lion's mane (grasp the base and pull gently — the attachment point is narrow), king oyster (individual mushrooms twisted from the cluster base).
Why Stubs Are a Problem
Cutting mushrooms and leaving a stub behind introduces a specific contamination risk: the cut stub is dead organic matter that bacteria and mold colonize rapidly. This stub-based contamination can spread to the adjacent substrate surface and reduce the yield or quality of the next flush. Twist-and-pull removes the entire attachment, leaving a clean substrate surface that the mycelium can regrow over before the next pin formation cycle.
When to Use a Knife
- Dense overlapping clusters where individual mushrooms cannot be twisted out without disturbing the adjacent underdeveloped pins
- Shiitake on logs or blocks where the stem attachment is embedded in wood and resists pulling
- Any time the cluster base is inaccessible due to adjacent mushrooms or chamber walls
Harvest Tool Summary
| Tool | Use | Notes |
|---|---|---|
| Clean hands (gloved) | Twist-and-pull for most species | Best method — no tool needed; wipe gloves with 70% IPA before handling |
| Clean kitchen knife | Dense clusters, log shiitake | Sanitize between harvest sessions; never use rusty or contaminated blades |
| Spring scissors | Clean cuts in tight spaces | Reduces hand fatigue during large oyster harvests |
| Soft bristle brush | Removing substrate debris | Dry brush only; use before refrigerating |
| Paper bag or mesh basket | Collection during harvest | Never sealed plastic — CO₂ and moisture buildup accelerates degradation |
| Sterile scalpel | Agar transfers, tissue culture — NOT harvest | Disposable scalpels are for laboratory and culture work |
What to Do With Aborted Pins
Aborted pins (tiny pins that started but never developed — common with oyster and lion's mane) are a routine part of every grow. Fresh, firm pin aborts are edible — harvest them along with the mature flush and use them in cooking. Do not leave them on the block surface — dried aborts become bacteria and mold colonization sites that reduce subsequent flush quality. Remove all aborts during and after each harvest using gloved hands or a clean fork.
Preparing for a Second Flush
How do I prepare my substrate block or tub for a second flush after harvesting?
Post-Harvest Protocol
- 1Remove all stubs, pin aborts, and surface debris using clean gloved hands or a fork. Be thorough — any remaining organic debris will be colonized by bacteria or mold within 24–48 hours, creating contamination pressure that reduces the next flush.
- 2Lightly scratch or score the substrate surface with a clean fork. This creates micro-wounds that stimulate primordia (pin) formation in the next flush cycle. Don't gouge deep — a light scoring of the top 2–3mm is sufficient.
- 3Rehydrate the block. Each flush removes significant moisture from the substrate. Mist the exposed surfaces thoroughly. For blocks that feel significantly lighter than when you started, submerge in a clean bucket of cold water for 4–12 hours — this simultaneously rehydrates and cold-shocks, which can improve pin density in the next flush.
- 4Return to fruiting conditions. Cover loosely (for monotubs or open blocks) or return to the fruiting chamber. Maintain correct temperature range and 85–95% RH. Fresh air exchange remains important — don't seal completely.
- 5Wait 7–14 days. New pins typically appear within this window. If pinning hasn't started after 14 days, try a cold water soak (4–12 hours) to further stimulate. Some blocks benefit from 5–7 days at slightly cooler temperatures to simulate a seasonal trigger.
Flush Yield Expectations by Species
| Species | Typical Flushes | Yield Pattern |
|---|---|---|
| Oyster mushrooms | 3–5 flushes | First and second flushes are typically the largest; yield drops from flush 3 onward |
| Lion's mane | 2–3 flushes | Second flush is often smaller and more prone to yellowing than the first; maintain high humidity |
| Shiitake (block) | 3–5 flushes | More consistent flush-to-flush than oysters; benefits from cold water soak between each flush |
| King oyster | 2–3 flushes | Second flush often produces more individual mushrooms but smaller caps |
| Grow kit (any species) | 2–3 flushes typical | Kits are pre-colonized blocks; each flush depletes nutrients; follow kit instructions for between-flush care |
Refrigerator Storage & Shelf Life
How long do mushrooms last in the refrigerator and how should I store them?
| Species | Refrigerator Shelf Life | Best Storage |
|---|---|---|
| Oyster mushrooms (all varieties) | 3–5 days | Paper bag, single layer if possible; most perishable cultivated species |
| Lion's mane | 5–7 days | Paper bag; small pieces from separated "teeth" store slightly better than whole fruiting bodies |
| Shiitake | 7–14 days | Paper bag; stems can be stored separately and are excellent for broth |
| King oyster | 7–14 days | Paper bag; the most refrigerator-stable common cultivated species |
| Button / crimini | 7–10 days | Paper bag or cardboard container; breathable packaging essential |
| Portobello | 5–7 days | Paper bag; store gill-side up to prevent moisture pooling on gills |
Storage Rules That Actually Matter
- Paper bags, not plastic: Mushrooms respire after harvest, producing CO₂ and moisture. Paper allows gas exchange; plastic traps both and accelerates sliminess within 24–48 hours
- Main compartment, not crisper: Crisper drawers maintain higher humidity than the main compartment, which is the wrong direction for mushrooms — they need slightly drier storage conditions
- Dry brush only before refrigerating: Rinse only immediately before cooking. Standing surface moisture is the fastest path to deterioration
- Single layer when possible: Stacking mushrooms creates pressure points and traps moisture between caps; separate layers with dry paper towels if stacking is necessary
- When to clean before refrigerating: Cultivated mushrooms from clean blocks generally need only a dry brush. Rinse only if substrate is embedded in gills — then spin dry in a salad spinner or blot dry immediately before refrigerating
Quality Signs — Still Good vs. Past It
Slight softness is normal aging. Slight yellowing on oyster mushrooms after a few days is oxidation — still edible but cook within 24 hours. Brown spotting on caps is bacterial blotch — trim affected areas and cook promptly if otherwise firm. Slimy texture, dark coloration throughout, or off odor indicates past edibility — discard.
Dehydration — Temperatures & Times
What temperature should I use to dehydrate mushrooms and how long does it take?
| Species Category | Temperature | Time | Why This Temp |
|---|---|---|---|
| Culinary species (oyster, shiitake, button, king oyster) | 125–135°F (52–57°C) | 4–8 hours (slice thickness dependent) | Sufficient for thorough drying; culinary compounds not heat-sensitive in this range |
| Medicinal species (lion's mane, reishi, turkey tail, chaga, cordyceps) | 105–115°F (40–46°C) | 8–16 hours | Preserves heat-sensitive beta-glucans and aromatic terpenes; most dehydrators default too hot for these species — check your settings |
Why Medicinal Mushroom Dehydration Temperature Matters
Lion's mane, reishi, turkey tail, and related species are grown primarily for their beta-glucan and other bioactive compound content — not just as food. Beta-glucans are polysaccharides with heat-sensitive tertiary structures; extended exposure above 120°F (49°C) degrades these compounds and the aromatic terpenes responsible for their flavor and aroma profiles. Most home food dehydrators set to their default "vegetable" setting (145–165°F) will process the physical mushroom correctly but destroy a significant portion of the bioactive content. Given that these species retail at $60–100/lb dried, the temperature setting is not a minor detail.
Dehydration Process
- 1Slice 3–5mm thick for most species. Lion's mane can be torn into sections rather than sliced. Reishi caps are very dense — slice 2–3mm for adequate drying.
- 2Arrange in a single layer on dehydrator trays with space for air circulation. Overlapping slices extend drying time and produce uneven results.
- 3Set temperature per table above. Run until doneness test is met.
- 4Doneness test: pick up a slice and attempt to bend it. Fully dried mushrooms snap cleanly with a sharp crack. Mushrooms that bend slightly still contain moisture — continue dehydrating and test again every 30–60 minutes.
- 5Allow to cool completely to room temperature before sealing in storage containers. Sealing warm mushrooms creates condensation inside the container that causes mold.
- 6Store in airtight containers away from light and heat. Vacuum-sealed jars or bags extend shelf life significantly. Properly dried and stored mushrooms last 1–2 years in jars and 2–5 years vacuum-sealed.
Freezing Mushrooms
Can I freeze mushrooms raw, or should I blanch them first?
Raw Freezing vs. Blanching — When Each Is Appropriate
| Method | Result | Best For |
|---|---|---|
| Raw freeze | Adequate texture; some enzyme-related flavor and color changes over time | Mushrooms destined for soups, stews, stir-fries, risotto — dishes where soft texture is expected |
| Blanch then freeze | Better texture retention; cleaner flavor; longer freezer shelf life | Sautéed mushroom dishes; anywhere texture matters; large surplus batches intended for long-term storage |
Blanch-and-Freeze Protocol
- 1Bring a large pot of water to a rolling boil. Prepare an ice water bath in a separate bowl.
- 2Add sliced mushrooms to boiling water for 2–3 minutes. Do not overcook — the blanch is brief heat exposure to deactivate enzymes, not a cooking step.
- 3Transfer immediately to the ice water bath to stop cooking. Leave for 2–3 minutes until fully cooled.
- 4Drain thoroughly and pat dry with paper towels, or use a salad spinner. Excess moisture on the mushrooms forms large ice crystals in the freezer that degrade texture.
- 5Spread in a single layer on a baking sheet and freeze until solid (2–4 hours). Transfer to freezer bags or vacuum-sealed bags, removing as much air as possible.
- 6Label with species and date. Use within 12 months for best quality; technically safe indefinitely when frozen below 0°F.
Add frozen mushrooms directly to soups, stews, and sautés from frozen — thawing releases the liquid they've absorbed and produces mushy results. For sautéed applications, add frozen mushrooms to a hot pan and allow the released water to evaporate before browning begins. High heat and patience: the water from frozen mushrooms must cook off before browning can occur.
Preservation Methods — Pickling & Canning Safety
What are all the preservation methods for a large mushroom harvest?
Preservation Method Comparison
| Method | Shelf Life | Equipment | Notes |
|---|---|---|---|
| Refrigeration | 3–14 days (species dependent) | Paper bags, refrigerator | Simplest; best flavor; see Section 05 for shelf life by species |
| Dehydration | 1–2 years jar; 2–5 years vacuum-sealed | Food dehydrator, airtight containers | Best long-term option; fully rehydratable; see Section 06 for temperatures |
| Freezing | 12+ months | Freezer-safe bags or containers, baking sheet | Quick; good quality; blanch for best texture; see Section 07 |
| Pickling | 2–3 months refrigerated | Jar, vinegar, salt, spices | Best flavor method for oyster and shiitake surplus; no special equipment |
| Pressure canning | 1–2 years shelf-stable | Pressure canner (10+ PSI), canning jars | Only shelf-stable option; MUST be pressure canned — see safety note below |
Mushrooms are a low-acid food and must be pressure-canned — boiling water bath canning of mushrooms creates botulism risk. Boiling water reaches only 212°F (100°C), which cannot destroy Clostridium botulinum spores in low-acid foods. Mushrooms must be pressure-canned at 10 PSI minimum to reach 240°F (116°C). If you don't have a pressure canner with the knowledge to use it correctly, dehydration and freezing are equally effective alternatives without this risk. For pressure canning, use current USDA-tested recipes specifically for mushrooms — do not extrapolate from other vegetables.
Quick Pickle Recipe (Refrigerator-Stable)
Aromatics: 2 cloves garlic (smashed) + 3–4 sprigs thyme or rosemary + ½ tsp black pepper
Mushrooms: 8–10 oz oyster or shiitake, larger pieces torn in half
Method: Simmer mushrooms in brine with aromatics for 5 minutes. Pack hot into a sterilized jar; pour hot brine over to cover. Cool to room temperature; refrigerate. Ready in 24 hours. Keeps 2–3 months refrigerated.
Making Mushroom Powder
How do I dry mushrooms for powder and how should I store it?
Powder Production Protocol
- 1Dehydrate completely at the correct temperature for your species (Section 06). Powder requires even drier mushrooms than culinary slices — extend drying time by 1–2 hours past the initial snap test if you're targeting powder.
- 2Confirm full dryness: mushrooms should snap with a clean, sharp crack when broken — no flexibility at all. Any remaining bend indicates residual moisture that will cause the powder to clump and eventually mold.
- 3Allow to cool completely before grinding. Warm mushrooms grind inconsistently and may produce moisture from friction.
- 4Grind in small batches in a dedicated spice grinder (coffee grinder reserved for spices) or high-powered blender. Process 15–20 seconds, then check texture. Continue until uniformly powdered.
- 5Store in an airtight glass jar in a cool, dark location. Light and oxygen are the primary degradation factors for medicinal mushroom compounds. Dark glass or UV-blocking containers are ideal for lion's mane, reishi, and turkey tail powder intended for supplementation.
Powder Shelf Life
| Storage Method | Shelf Life |
|---|---|
| Airtight glass jar, cool dark location | 6–12 months |
| Vacuum-sealed jar or bag, cool dark location | 1–2 years |
| Vacuum-sealed, refrigerated | 2–3 years |
If you're growing lion's mane, reishi, or turkey tail for health purposes, note that some compounds (beta-glucans) are water-soluble while others (triterpenes in reishi) require alcohol extraction. Dried powder in hot tea or broth provides the water-soluble fraction. A dual-extraction tincture (hot water extraction followed by alcohol extraction) provides both fractions. Powder is the simplest delivery format for water-soluble compounds; tinctures are more complete for full-spectrum extraction.
What to Do With Spent Substrate
What do I do with spent substrate blocks after all flushes are complete?
Outdoor Burial — Volunteer Flushes
Spent substrate blocks buried in a shaded garden bed covered with 2–4 inches of wood chips frequently produce additional mushroom flushes over the following growing season. This works best for oyster mushrooms (very aggressive colonizers) and shiitake, but many species will attempt additional fruiting. Bury the spent block 2–4 inches deep in a shaded, moist area — under a tree, beside a north-facing wall, or in a wood chip mulch bed. Keep the area consistently moist. Outdoor flushes are unpredictable but free, and the colonized substrate enriches soil biology regardless of whether additional mushrooms appear.
Other Uses for Spent Substrate
- Compost: spent mushroom substrate is an excellent compost additive — the mycelium accelerates decomposition of other organic material and adds fungal biomass that improves soil structure; add freely to any active compost pile
- Direct soil amendment: break up the spent block and work into garden beds — best in fall for spring growing season; particularly beneficial for heavy clay soils where fungal networks improve drainage and aeration
- Worm bin addition: mushroom mycelium is a preferred food for composting worms (eisenia fetida); add small amounts to an active worm bin for enhanced casting production
- Inoculate new wood chip beds: mix spent substrate into fresh wood chips to inoculate outdoor garden paths and beds with residual mycelium — some will establish and colonize the fresh chips, extending the fungal network
Spent blocks that showed Trichoderma (green mold) contamination should not be buried near your current grow space — Trichoderma spores can persist in garden soil. Compost them in a separate location away from your mushroom grow area, or bag and dispose of them with general organic waste. Clean spent blocks with no contamination history are safe to bury anywhere.
Harvest & Processing — Quick-Reference FAQ
My oyster mushrooms are yellowing — are they still safe to eat?
Slight yellowing on oyster mushrooms is oxidation — a normal aging process, not spoilage. Yellow-tinged oysters are still edible if they're firm, smell fresh, and show no sliminess. Cook them within 24 hours. Yellow with slimy texture indicates bacterial breakdown — discard. Brown spotting (bacterial blotch) on any species is still edible if caught early — trim the spotted areas and cook promptly if the mushroom is otherwise firm. Dark, slimy, or malodorous mushrooms should be discarded.
Why can't I use boiling water bath canning for mushrooms?
Mushrooms are a low-acid food. Clostridium botulinum spores — responsible for botulism — survive in low-acid, anaerobic environments (sealed jars) at temperatures up to 212°F (100°C), which is the maximum achievable by boiling water. Killing these spores requires 240°F (116°C), which can only be reached in a pressure canner at 10+ PSI. Water bath canning of mushrooms creates conditions for botulism growth during storage. If you don't have a pressure canner, dehydrate or freeze instead — both are safer and equivalent in long-term preservation quality.
What happens if I dehydrate lion's mane or reishi at the vegetable setting (145°F)?
The mushroom will be adequately dried and food-safe, but heat-sensitive beta-glucans and aromatic terpenes — the compounds many growers cultivate these species for — will be partially or significantly degraded. If you're growing lion's mane or reishi purely as a culinary ingredient, the higher temperature is fine. If you're growing them for their bioactive compound content (supplements, tinctures, functional teas), use 105–115°F and allow the longer drying time. The extra 4–8 hours of drying time at lower temperature is a meaningful quality difference for medicinal use.
How many flushes can I get from a mushroom block?
Oyster mushrooms: 3–5 flushes with proper post-harvest care; some aggressive strains produce more. Lion's mane: 2–3 flushes; second flush is typically smaller. Shiitake (block): 3–5 flushes. King oyster: 2–3 flushes. Each flush requires removing all stubs and aborted pins, scoring the surface, rehydrating the block, and returning to fruiting conditions for 7–14 days. Blocks that produced only 1 flush usually had stubs left behind that caused contamination, or weren't rehydrated adequately before the second flush attempt.
Can I use my spent mushroom substrate in my garden?
Yes — spent mushroom substrate is one of the best free soil amendments available to home growers. The colonized substrate is rich in fungal biomass and partially decomposed organic matter. Compost it freely, work it directly into garden beds, or bury whole spent blocks in a shaded wood chip bed where many species (especially oyster) will produce additional volunteer flushes over the following growing season. Keep contaminated blocks (green mold) away from your active grow space when disposing of them outdoors.
How do I store mushroom powder and how long does it last?
Store mushroom powder in an airtight glass jar away from light, heat, and moisture. Room temperature in a dark cabinet: 6–12 months before noticeable potency decline. Vacuum-sealed, cool, and dark: 1–2 years. Refrigerated vacuum-sealed: 2–3 years. The key failure mode is moisture reabsorption — powder that has clumped has absorbed ambient humidity; it's still usable but quality has declined. For medicinal species (lion's mane, reishi), dark glass storage or UV-blocking containers help preserve light-sensitive terpene compounds.
Shop Mushroom Harvest & Processing Supplies
Food dehydrators, vacuum sealers, Grove Storage Bags, harvest tools, and everything needed to get the most from every flush.
You've Finished the GrōHaus Mycology Learning Guide
All modules complete — from species overview through spawn production, agar and culture isolation, growing chambers, substrates, and now harvest and processing. Every technique and data point you need to grow culinary and medicinal mushrooms at home with confidence.