Mushroom Growing Chambers:
SGFC, Monotub & Martha Tent Guides
Three distinct fruiting chamber setups clearly separated — SGFC build instructions, monotub FAE hole configurations, Martha tent setup with automated humidity control, correct ventilation guidance for home growers, and contamination containment protocol.
Chamber Types — Which One Is Right for You?
What are the different types of mushroom fruiting chambers and how do they compare?
| Chamber | Cost | Capacity | Best For | Experience Level |
|---|---|---|---|---|
| SGFC | $10–20 | 1–4 blocks/jars | First fruiting chamber; jar and small bag grows | Complete beginner ★ |
| Monotub | $20–40 | 1 bulk batch | Grain-to-bulk grows; oyster on straw; bulk coco coir | Beginner–Intermediate ★★ |
| Modified bin | $15–30 | 2–6 blocks | Budget step between SGFC and Martha tent | Beginner ★ |
| Martha tent | $100–300 | 12–30 blocks | Continuous multi-block production; automated control | Intermediate ★★ |
The Key Distinction: Martha Tent vs. Monotub
These are not the same type of setup and should not be treated as interchangeable. A Martha tent is a multi-block fruiting system — you colonize blocks or bags separately elsewhere, then load multiple fully colonized blocks onto shelves inside the tent to fruit simultaneously. One tent can run 12–30 blocks at once for continuous, rotating production. A monotub is a single-batch system where you colonize and fruit in the same tub — simpler to build and manage, but producing one batch at a time rather than continuous volume. Monotubs are the correct starting point before investing in a Martha tent.
SGFC — The Simplest Fruiting Chamber
What is a Shotgun Fruiting Chamber (SGFC) and how do I build one?
Build List
- Clear plastic storage tote (56–66 qt; clear sides let you monitor without opening)
- Horticultural perlite (coarse grade; 3–4 inch layer in the bottom)
- 1/4-inch (6mm) drill bit
- Spray bottle with clean water
- Optional: small digital hygrometer to verify humidity
Build Instructions
- 1Drill 0.25-inch holes every 2 inches across all six surfaces — all four sides, the top lid, and the bottom. The even hole distribution on all sides is what makes this a "shotgun" design and creates passive omnidirectional airflow.
- 2Add 3–4 inches of dry perlite to the bottom. Rinse perlite before use to remove fine dust. Perlite holds water and releases it slowly through evaporation, maintaining passive humidity without a humidifier.
- 3Wet the perlite by misting heavily until it holds moisture without pooling at the very bottom. Allow to equilibrate for 10–15 minutes before placing any mushroom substrate inside.
- 4Place your substrate, block, or jars on top of the perlite. Do not let them sit directly in pooled water — elevate on a small rack if needed.
- 5Mist the perlite and chamber walls 4–6 times daily — never directly on pins or developing mushrooms. The goal is keeping perlite moist and chamber walls wet enough to evaporate.
The SGFC's passive FAE depends on the density and distribution of holes on all six surfaces. Warm, CO₂-rich air naturally rises and exits through the top and upper side holes while cooler, fresh air enters through lower holes — a passive convection loop. This works without a fan for most single-block grows. If you notice leggy mushrooms (elongated stems, small caps), increase misting frequency and briefly fan the chamber during each misting session.

Monotub Setup — Single-Batch Bulk Grows
How do I set up a monotub for a bulk mushroom grow?
Tote Size Selection
| Tote Size | Substrate Volume | Typical Yield/Flush | Best For |
|---|---|---|---|
| 56 qt | 4–5 dry quarts | 1–2 oz dry | First monotub; small space grows |
| 66 qt | 6–8 dry quarts | 2–4 oz dry | Beginner standard — best balance of yield and manageability |
| 106–116 qt | 10–14 dry quarts | 4–8+ oz dry | Experienced growers; larger harvests; harder to manage humidity |
Monotub Setup — Step by Step
- 1Choose your tote and drill FAE holes before anything else. See Section 04 for the correct hole configuration. Clean the tote with 70% isopropyl alcohol and allow to dry completely.
- 2Prepare bulk substrate to field capacity. For CVG (coco coir, vermiculite, gypsum): mix 1 brick coco coir + 2 qt vermiculite + 1 tbsp gypsum, hydrate with 2 qt boiling water, allow to cool. For straw: pasteurize at 160–185°F for 1–2 hours, drain thoroughly, and cool to room temperature. Test field capacity: squeeze a handful — 0–5 drops of water means correct hydration.
- 3Inoculate with colonized grain spawn at 10–20% by volume. Mix thoroughly — grain spawn should be evenly distributed throughout the bulk substrate, not layered on top. Work in a cleaned area with gloves and mask.
- 4Fill tub to 3–4 inch substrate depth, level the surface, and cover with the lid. During colonization, keep the lid mostly closed — the tub maintains its own internal humidity. Store at 70–75°F in a dark location.
- 5Wait for full colonization (white mycelium covering all visible substrate surface — typically 7–14 days for oyster, 14–21 days for other species). Do not disturb during colonization.
- 6Initiate fruiting: Move to your fruiting temperature range, crack or remove the lid as appropriate for your FAE configuration, and begin 2–3 daily mistings of the tub walls. Pins typically appear within 5–10 days.
What Is Field Capacity?
Field capacity is the point at which substrate holds maximum moisture without pooling — the correct hydration for both colonization and fruiting. Test by squeezing a handful firmly: 0–5 drops = correct. No water = too dry. Stream of water = over-saturated. The feel should be like a wrung-out sponge — damp throughout but not wet. Substrate that is too wet will compact, restrict gas exchange, and promote bacterial contamination. Adding water after colonization has begun is difficult and disruptive — get field capacity right before inoculation.
Monotub FAE Hole Configuration
What is the correct FAE hole configuration for a monotub, and how do I choose between approaches?
Approach Comparison
| Approach | Holes | FAE Method | Maintenance | Best For |
|---|---|---|---|---|
| Tek-style | 1.5–2 inch holes, 2–4 per side at upper wall, packed with polyfill | Passive — always active | Low — check polyfill monthly | Beginners; oyster mushrooms; hands-off approach |
| SAB-style | None or 2–3 small holes covered with micropore tape | Active — manual lid cracks 2–4x daily | High — must be done consistently | Contamination-sensitive grows; smaller spaces |
| Hybrid | 2–4 small holes with polyfill + occasional manual FAE | Passive + supplemental active | Medium | Species that need precise CO₂ management |
Tek-Style Build — Specific Instructions
- Hole size: 1.5–2 inches — large enough for adequate gas exchange; small enough that polyfill stays packed without falling through
- Location: upper third of all four side walls — 2–4 holes per side, positioned above the substrate surface level so air exchange happens above the growing medium
- Polyfill packing: stuff firmly but not compacted — loose polyfill allows air to move freely while catching most airborne particles; over-packed polyfill restricts FAE
- Lid position during fruiting: partially cracked or removed — the top of the tub needs air exchange too; many growers remove the lid entirely and place a layer of polyfill on top of the substrate after pinning begins
If your monotub is producing elongated stems and small caps, CO₂ is accumulating faster than the passive holes can remove it. Solutions: add 1–2 more holes, re-pack polyfill more loosely, crack the lid more aggressively during fruiting, or supplement with 2–3 manual fan sessions daily in addition to passive holes. The substrate level height also matters — taller substrate means the surface is closer to the holes and gets better FAE; substrate more than 4 inches deep may need additional hole placement lower on the sides.
Martha Tent Setup — Multi-Block Continuous Production
How do I set up a Martha tent for fruiting multiple mushroom blocks simultaneously?
Component List
| Component | Spec | Notes |
|---|---|---|
| Wire shelving unit | 4–5 tiers, 36–48" wide | NSF-rated chrome wire shelves; open wire allows humidity to circulate freely between levels |
| Greenhouse humidity tent | Sized to fit over shelving unit | Clear PVC cover with zippered front access; the "Martha" name comes from using garden greenhouse covers designed for seedlings |
| Ultrasonic humidifier | 1–3 gallon capacity | Ultrasonic (cool mist) only — warm mist humidifiers raise temperature and can damage terpene profiles; position on bottom shelf with tube running inside the tent |
| Humidity controller | Two-stage (Inkbird IHC-200 or equivalent) | Humidifier plugged into lower outlet (activates when RH drops below setpoint); fan plugged into upper outlet (activates when RH exceeds setpoint) |
| Small oscillating fan | 6–8 inch | Provides FAE when RH is high; prevents stagnant pockets; positioned to circulate air across multiple shelf levels |
| Digital hygrometer probe | Matches controller | Position at mid-tent height at the level of the blocks — not at ceiling where humidity reads higher |
Martha Tent Workflow
- 1Colonize blocks separately in a separate incubation area at 70–75°F. The Martha tent is not used during colonization — only for fruiting. Colonize in grow bags, filter patch bags, or covered trays until fully white.
- 2Set humidity controller setpoints: lower setpoint 85% (humidifier activates below this), upper setpoint 93–95% (fan activates above this). This creates automated oscillation between 85–95% RH.
- 3Load fully colonized blocks onto shelves with X-cuts or openings facing inward toward the tent interior. Space blocks so air can circulate around all sides.
- 4Monitor for the first 48 hours after loading — verify hygrometer readings match setpoints, check for any blocks showing contamination that may have been missed, and ensure the fan cycles are providing adequate FAE.
- 5Run a rotating production cycle: as blocks finish their final flush and are removed, replace with newly colonized blocks from your incubation area. A well-managed Martha tent can run continuously year-round.
Martha tents are the larger-scale, higher-volume option — not the smaller one. A fully loaded Martha tent with 20 blocks producing 3–4 oz per block per flush yields 60–80 oz per flush cycle across all species. A monotub produces 2–4 oz per flush from one batch. If you're growing for personal use, a monotub plus an SGFC is often sufficient. A Martha tent becomes worthwhile when you want continuous production across multiple species simultaneously.
Humidity Control — Targets, Tools & Automation
What humidity levels do I need inside a fruiting chamber, and how do I maintain them?
Humidity Targets by Growth Phase
| Phase | Target RH | Notes |
|---|---|---|
| Colonization (incubation) | Bag/tub maintains its own | Sealed grow bags or lidded tubs don't need external humidity control; ambient RH not critical |
| Pinning initiation | 85–95% | High humidity signals fruiting conditions have arrived; drops below 80% inhibit pin formation |
| Active fruiting/development | 85–95% maintained | Consistent humidity prevents cracking, splitting, and cap deformation; the surface of the block must not dry out |
| Between flushes (rest period) | 70–80% | Lower humidity during the rest period allows the block to consolidate; not a fruiting phase |
How to Automate Humidity in a Martha Tent
A two-stage humidity controller (Inkbird IHC-200 is the standard home cultivation choice) operates two separate outlets based on a single RH sensor reading. Plug your ultrasonic humidifier into the lower outlet and set it to activate when RH drops below 85%. Plug your small fan into the upper outlet and set it to activate when RH exceeds 93–95%. The controller creates an automated oscillation between 85–95% — when humidity gets too low, the humidifier runs; when it gets too high, the fan runs (which also provides FAE simultaneously). The probe should be positioned at mid-tent height at the level of your fruiting blocks — not near the ceiling where RH reads higher than the actual growing zone.
Plastic covering works during colonization — the bag or tub lid retains internal moisture while the substrate is sealing. During fruiting, covering the substrate surface with plastic blocks gas exchange, causes CO₂ to accumulate at the surface, aborts developing pins, and creates anaerobic conditions that favor bacterial contamination. The substrate surface must be open and exposed to the humid air of the fruiting chamber. Humidity is maintained by the chamber environment, not by direct covering.
Ventilation & Fresh Air Exchange
How do I provide adequate fresh air exchange (FAE) in each chamber type?
Why FAE Matters
Mushroom mycelium continuously produces CO₂ during both colonization and fruiting. In a sealed chamber, CO₂ accumulates and reaches concentrations that suppress normal cap development — mushrooms elongate toward the source of fresher air (openings, vents) rather than developing broad caps. Adequate FAE keeps CO₂ below approximately 1000 ppm in the fruiting zone, allowing normal development. The symptom of poor FAE is always the same: long, thin stems and small or misshapen caps.
FAE by Chamber Type
| Chamber | FAE Method | Frequency/Schedule | Signs of Inadequate FAE |
|---|---|---|---|
| SGFC | Passive through 0.25" holes on all 6 sides; supplemented by misting sessions | Passive always active; supplement by briefly fanning during each misting (4–6x daily) | Leggy, elongated mushrooms; small caps; visible mycelium growth thickening on surfaces |
| Monotub (Tek-style) | Passive through polyfill-packed holes at upper sides | Passive always active; supplement with manual lid cracks 1–2x daily during active fruiting | Same as SGFC; tighten polyfill, add holes, or increase manual supplementation |
| Monotub (SAB) | Manual lid cracks | 2–4x daily; 3–5 minute fanning per session | Requires consistent daily management; skipping sessions causes rapid CO₂ buildup |
| Martha Tent | Automated fan on humidity controller upper outlet | Fan activates when RH exceeds 93–95%; adjust fan timer if CO₂ symptoms appear despite adequate humidity management | Increase fan on-time per cycle; consider a second dedicated exhaust fan on a separate timer |
The Three Purposes of Ventilation
- CO₂ removal: The primary functional purpose — removes metabolic CO₂ that inhibits normal fruiting body development
- Contamination prevention: Moving air prevents stagnant humid pockets where mold spores settle and germinate; good FAE is one of the most effective contamination prevention measures
- Humidity regulation: When paired with a humidity controller, the fan provides humidity correction (removing excess moisture) simultaneously with FAE — two functions from one device
Passive Convection Positioning
For passive vent positioning: place lower vents near the bottom and upper vents near the top of the chamber. Warm, CO₂-rich air naturally rises and exits through upper openings while cooler, denser fresh air enters through lower openings — a natural convection loop that works without a fan. This principle applies to SGFC holes, monotub hole placement, and Martha tent vent positioning.
Lighting for Fruiting Chambers
What lighting do mushrooms need in a fruiting chamber, and how should it be positioned?
What Light Actually Does for Mushrooms
Unlike cannabis or most plants, mushrooms don't photosynthesize — they have no use for light as an energy source. Light serves two functions in mushroom cultivation: it provides a directional cue (mushrooms grow toward light, which results in caps orienting toward the light source) and it acts as a weak environmental signal indicating the mycelium has reached an above-ground, open-air position suitable for fruiting body development. The specific light-to-dark ratio is not critical — what matters is providing consistent, indirect illumination so mushrooms don't grow sideways toward your room's only window.
Practical Lighting Recommendations
- Ambient room light is sufficient for most grows: If your fruiting chamber is in a room that gets normal daylight or has standard ceiling lighting used for 10–16 hours daily, no supplemental lighting is needed
- For chambers in dark closets or basements: A T5 fluorescent or LED shop light (6500K color temperature) provides appropriate indirect illumination; a simple plug-in timer for 12–16 hours on is adequate
- Position for uniform indirect coverage: Light from the side or above; avoid positioning lights so they create a strong directional gradient (mushrooms will lean noticeably toward a single-sided light source)
- Low intensity preferred: Mushrooms don't need and aren't helped by high light intensity — a 40W equivalent LED providing general illumination is more than adequate; grow lights designed for cannabis or plants are unnecessary and will dry out your chamber faster from the heat they generate
Phototropism in mushrooms — growth toward a light source — is normal and not a problem unless it's causing awkward fruiting body angles. If your mushrooms are leaning strongly to one side, rotate the chamber 180° every 1–2 days so each side gets equal exposure, or reposition your light source to be more directly overhead rather than from one side. Oyster mushrooms leaning toward a window will still fruit normally; the directional growth is cosmetic rather than functional.
Contamination Prevention & Safe Removal
How do I prevent contamination in a grow chamber, and how do I safely remove contaminated material?
Prevention Checklist
- Sterilize high-nutrition substrates completely: Grain and supplemented sawdust require 250°F/15 PSI pressure cooking for 2.5+ hours — inadequate sterilization is the most common Trichoderma entry point
- Clean the chamber before loading: Wipe all surfaces with 70% isopropyl alcohol or an Effectant solution and allow to dry before placing any blocks
- Inspect blocks before loading into a Martha tent: A contaminated block loaded into a shared chamber will spread spores to every other block on the next fan cycle — inspect each block individually before placing it in the tent
- Maintain FAE: Stagnant, humid air pockets are where contaminant spores settle and germinate; consistent FAE is one of the most effective passive contamination controls
- Wear clean gloves and minimize physical contact: Skin oils and the natural bacteria on hands are contamination vectors; nitrile gloves during any substrate handling reduce this risk significantly
Safe Contamination Removal — The Containment Protocol
- 1Before touching the contaminated block, have a clean plastic bag ready. Do not touch the block, move it, or examine it closely before the bag is available — Trichoderma releases spores when physically disturbed.
- 2Place the clean bag over the contaminated block while it is still on the shelf or in the chamber — slide the bag down over it rather than lifting the block toward the bag. The block should be inside the sealed bag before it leaves its position.
- 3Seal the bag and carry the contained block out of the grow space immediately. Do not set it down inside the chamber, next to other blocks, or on any surface that will contact future substrate.
- 4Dispose of the sealed bag outdoors. Do not open the bag to examine the contamination or compost the contents indoors.
- 5Clean and sanitize all surfaces the contaminated block contacted with 70% isopropyl or Effectant solution — the shelf surface, any walls it may have touched, and your gloved hands.
Sanitation Products
- 70% isopropyl alcohol: Standard surface sterilizer; use in spray bottle or as wipes; allow to dry completely before placing substrate (wet IPA can inhibit mycelium)
- Effectant disinfectant: Mushroom-safe broad-spectrum disinfectant; dilute per instructions; leaves no harmful residue after drying; recommended for chamber interior surfaces
- Avoid bleach solutions inside grow chambers: Bleach off-gassing in an enclosed environment can inhibit mycelium; use only for cleaning external surfaces and equipment between grows, not inside an active fruiting chamber
Substrate Reuse & Chamber Maintenance
Can I reuse the substrate in my grow chamber for multiple harvests, and how do I maintain the chamber between cycles?
Reuse Potential by Species and Substrate
| Species / Substrate | Flushes | Signs It's Spent | Post-Use Options |
|---|---|---|---|
| Oyster on straw / CVG | 2–3 flushes over 4–6 weeks | Yields dropping significantly; green mold spreading; substrate yellowing | Outdoor burial in woodchip bed; garden compost amendment |
| Oyster / Lion's Mane on sawdust block | 2–3 quality flushes | Block shrinks significantly; contamination appears; third flush very sparse | Same as straw — outdoor burial or compost |
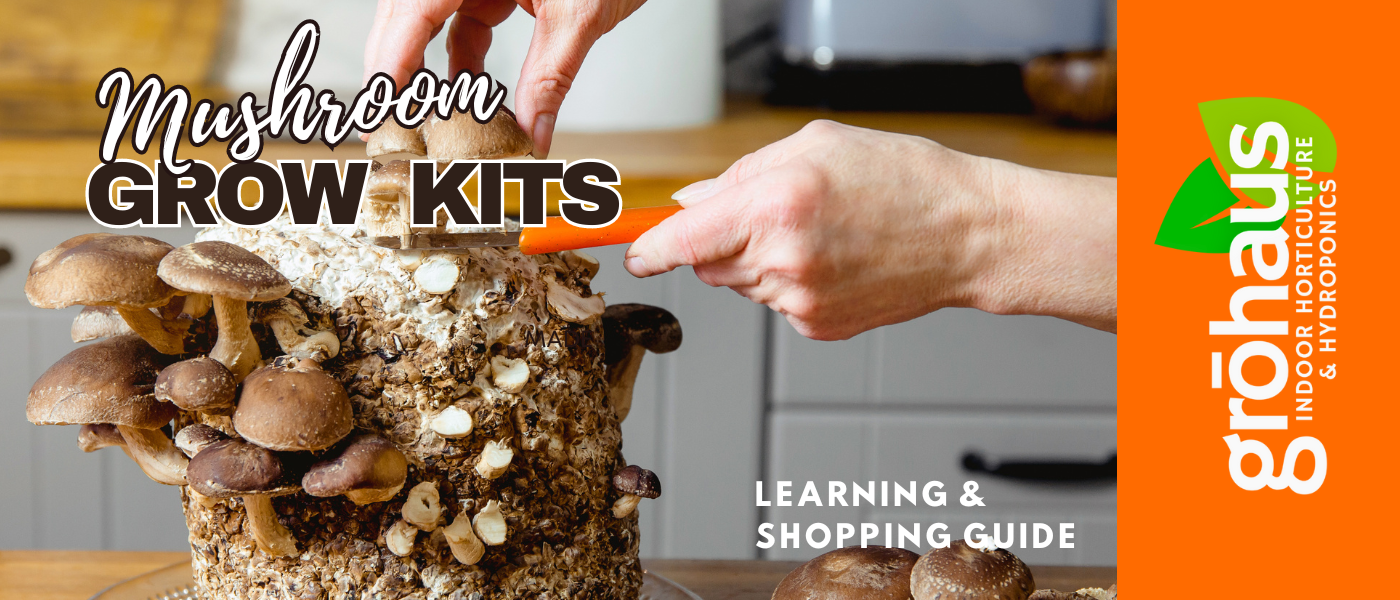
| Shiitake on sawdust block | 3–5 flushes over 2–4 months | Block hard and very shrunken; no pinning response after repeated cold shocks | Outdoor burial or compost; remaining mycelium enriches soil |
| Shiitake on hardwood logs | 2–4 flushes per year for 3–7 years | Log very light and crumbling; no pin response after conditioning | Natural decomposition in shaded garden bed |
Chamber Maintenance Between Cycles
- 1Remove all spent substrate, stubble, and organic debris from the chamber interior. Any organic matter left behind is a contamination seed for the next cycle.
- 2Wipe all chamber surfaces with 70% isopropyl or Effectant. For Martha tents, wipe down all shelf surfaces, the tent interior, and the humidifier housing. For monotubs, scrub the interior with soap and water, rinse, then wipe with IPA.
- 3Allow to dry completely before loading the next batch — wet IPA or residual moisture creates an unfavorable surface for mycelium.
- 4Inspect all equipment: clean humidifier water tank and nozzle (mineral buildup reduces output), check fan blades for residue, replace hygrometer batteries if low, and inspect polyfill in monotub holes for compression or contamination.
Large-scale or enclosed grow chambers can accumulate CO₂ to concentrations that cause dizziness, lightheadedness, or disorientation in humans. If you experience any of these symptoms while working inside or in close proximity to a large grow chamber, exit immediately and seek fresh air. Ensure the room where your chamber is located has adequate ambient ventilation — the FAE that protects your mushrooms also protects the air quality of your grow space.
Shiitake Fruiting Trigger
How do I trigger fruiting in shiitake? Why isn't my shiitake block pinning?
Cold Shock Protocol
- 1Wait for the block to fully colonize and "set" — fully colonized shiitake blocks turn brown and harden. This hardening is the final stage before fruiting readiness. Do not initiate cold shock before the block is fully brown and firm.
- 2Submerge the block in cold water (35–50°F / 2–10°C) for 12–24 hours. Use a cooler with ice packs if your tap water isn't cold enough. The temperature drop mimics seasonal transition and is the primary fruiting trigger for shiitake.
- 3Move to fruiting conditions immediately after cold shock: 55–65°F, 85–95% RH, strong FAE, indirect light 12–16 hours. Pins typically emerge within 5–7 days.
- 4If no pins appear after 10–14 days — repeat the cold shock. Multiple cold shock cycles are normal for subsequent flushes on the same block.
Shiitake moved directly from incubation to a warm fruiting chamber without a cold shock will often sit colonized and unresponsive indefinitely. The temperature drop is not optional for this species. If your home ambient temperature is too warm for cold shocking (above 65°F year-round), a brief refrigerator soak is the standard workaround — submerge the block in a bucket of cold water in the refrigerator for 12–24 hours.
Growing Chambers — Quick-Reference FAQ
What is the difference between a Martha tent and a monotub?
They are entirely different setups for different scales of production. A Martha tent is a multi-block fruiting system — wire shelving inside a greenhouse cover with an automated humidifier and fan, running 12–30 pre-colonized blocks simultaneously. A monotub is a single-batch system where you colonize and fruit one bulk substrate batch in the same large plastic tote. Monotubs are simpler, cheaper ($20–40), and the right starting point before investing in a Martha tent ($100–300). Build a monotub first; upgrade to Martha tent when you want continuous multi-block production.
What is the simplest fruiting chamber I can build?
An SGFC (Shotgun Fruiting Chamber) — a clear plastic storage tote with 0.25-inch holes drilled every 2 inches on all six sides and a 3–4 inch layer of horticultural perlite on the bottom. Cost: $10–20. The holes provide passive fresh air exchange; the perlite maintains humidity through evaporation when kept moist. Mist the perlite and chamber walls (never directly on mushrooms) 4–6 times daily. This is the recommended first fruiting chamber for beginners growing from jars, bags, or a single colonized block.
Why are my mushrooms growing sideways toward the light?
Phototropism — mushrooms use light as a directional cue and grow toward it. This is normal behavior. For cosmetically straight mushrooms, rotate your chamber 180° every day or two, or reposition your light source to be more directly overhead rather than from a single side. The sideways growth doesn't affect flavor, yield, or quality. If you're growing in a window-facing position, the mushrooms will always lean toward the window — move the chamber to a position where light is more even, or rotate it regularly.
What is field capacity and how do I test it?
Field capacity is the maximum moisture content a substrate can hold without free-standing water — the correct hydration for inoculation. Grab a handful of prepared substrate and squeeze firmly: at field capacity, you get 0–5 drops of water. No drops = too dry; a stream = too wet. The texture should feel like a wrung-out sponge — damp throughout but not waterlogged. Achieve field capacity before inoculation; adding water to partially colonized substrate is difficult and risks introducing bacteria to an unprotected environment.
Do I need to provide a 12-hour light cycle for my mushrooms?
No — mushrooms are not photoperiod-sensitive. The 12/12 light cycle is a cannabis cultivation concept that doesn't apply to mushroom fruiting. Mushrooms use light as a directional cue and a general environmental signal, not as a photoperiod trigger. Consistent ambient indirect light for 12–16 hours daily from a standard room light or T5 shop light is adequate for all common cultivated species. The exact hour ratio doesn't matter; consistency and indirect illumination do.
How do I safely remove a contaminated block from my grow chamber?
Before touching the block, slide a clean plastic bag over it while it's still in position — this contains the spores before any disturbance releases them. Seal the bag, then carry the contained block directly out of your grow space. Dispose outdoors without opening. Wipe down all surfaces the block contacted with 70% isopropyl alcohol. Never pull a Trichoderma-contaminated block out of a chamber without containment — green mold releases billions of spores on disturbance that can contaminate every other block in the space and persist for months.
Shop Humidity Controllers, Chambers & Supplies
Humidity controllers, ultrasonic humidifiers, Martha tent covers, hygrometers, and everything needed to build an SGFC, monotub, or automated Martha tent setup.