Mushroom Grow Kits:
Setup, Species Comparison & Troubleshooting
Complete grow kit guide with corrected per-species timelines and temperature targets, correct fruiting humidity (85–95%), misting protocol, diagnostic checklist for kits that won't pin, and what to do with your spent block after the final flush.
How Mushroom Grow Kits Work
How do mushroom growing kits work and what is included?
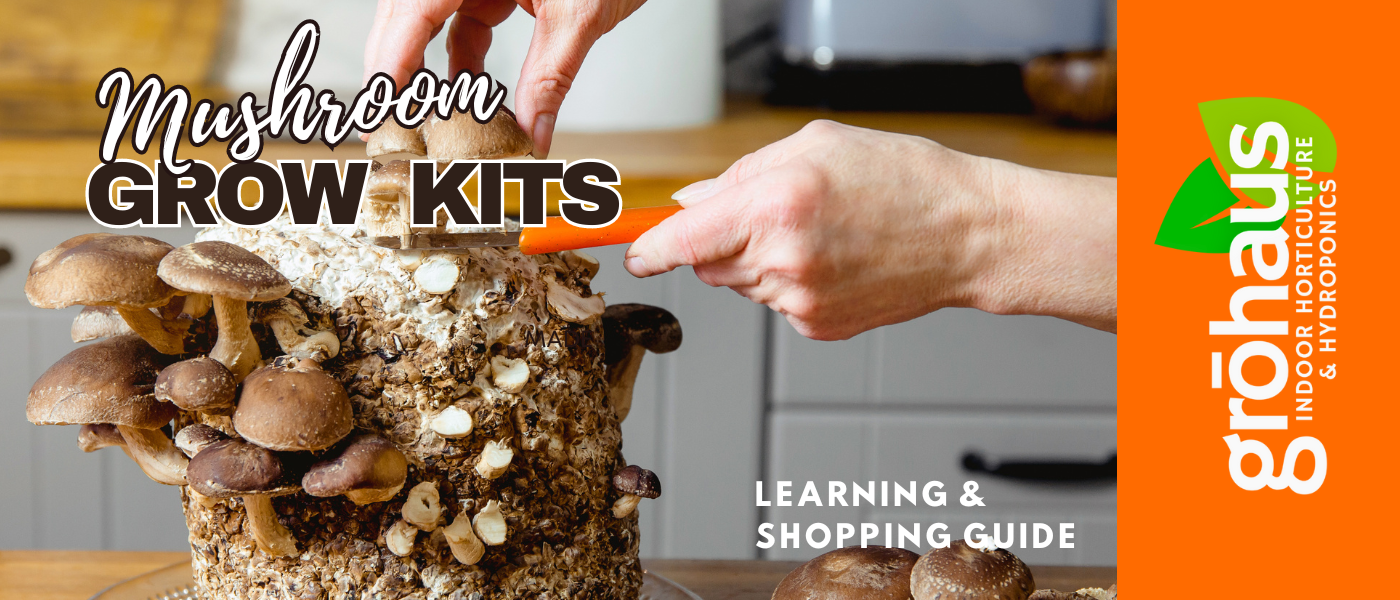
What's in a Typical Kit
- Colonized substrate block: The block (typically hardwood sawdust, straw, or a grain-sawdust mix) has been fully grown through with mushroom mycelium before shipping — it's white throughout when healthy
- Grow bag with filter patch: The bag maintains internal humidity and the filter patch allows gas exchange without letting contaminants in during incubation and early fruiting
- Instructions: Species-specific care guidance including when and how to initiate fruiting, misting schedule, and harvest timing
- Sometimes included: Humidity tent, small hygrometer, spray bottle, or humidity pack depending on the kit brand and price point
Two Types of Kits — Know the Difference
| Kit Type | Ships As | Time to First Harvest | Skill Level |
|---|---|---|---|
| Ready-to-fruit | Fully colonized block — just open and fruit | 7–14 days after setup | Complete beginner |
| Grow-your-own | Inoculated but not colonized — requires incubation period | 3–6 weeks after setup | Beginner with patience |
Most commercial kits sold in the US are ready-to-fruit. If the block inside appears mostly white and dense, it's already colonized. If it looks like loose substrate material with visible spawn mixed in, it needs an incubation period of 2–4 weeks at 70–75°F before fruiting.
Species Available as Grow Kits
What types of mushrooms can I grow with a kit, and how do they compare?
Per-Species Grow Kit Comparison
| Species | Kit Ships | Days to 1st Harvest | Flushes | Fruiting Temp | Cold Shock? | Difficulty |
|---|---|---|---|---|---|---|
| Pearl Oyster P. ostreatus | Colonized | 7–14 days | 2–3 | 55–75°F | Not required | Easy ★ |
| Blue Oyster | Colonized | 7–14 days | 2–3 | 50–65°F | Not required | Easy ★ |
| Pink Oyster P. djamor | Colonized | 5–10 days | 2–3 | 70–85°F | Not required | Easy ★ |
| Lion's Mane H. erinaceus | Colonized | 7–14 days | 1–2 | 65–70°F | Not required | Easy–Mod ★★ |
| Shiitake L. edodes | Colonized or partial | 14–21 days post-soak | 3–5 | 55–65°F | Yes — required | Moderate ★★ |
| King Oyster P. eryngii | Colonized | 10–14 days | 2–3 | 55–65°F | Helpful | Easy–Mod ★★ |
| Reishi G. lucidum | Colonized | 21–30 days | 1–2 | 70–80°F | Not required | Moderate ★★ |
All timelines assume fully colonized kits. Cold-weather oyster species (blue, pearl, king) will not pin reliably above 75°F — check your room temperature before selecting a species. Pink and yellow oyster are the correct choice for warm grow spaces (70°F+).
The single most important kit selection factor is your ambient room temperature. A blue oyster kit in a 78°F room will never pin no matter how good your humidity and FAE are — it's simply too warm. Check your grow space temperature with a thermometer before buying, then select a species whose fruiting range matches your conditions.

Realistic Kit Timelines by Species
How long does a mushroom grow kit take to produce mushrooms?
| Species | Days to First Pins | Days to First Harvest | Flush Interval | Total Flushes |
|---|---|---|---|---|
| Pearl/Blue Oyster | 3–7 days | 7–14 days | 10–14 days | 2–3 flushes over 4–6 weeks |
| Pink/Yellow Oyster | 3–5 days | 5–10 days | 7–12 days | 2–3 flushes over 3–5 weeks |
| Lion's Mane | 5–10 days | 7–14 days | 14–21 days | 1–2 quality flushes |
| King Oyster | 7–10 days | 10–14 days | 14–21 days | 2–3 flushes over 5–7 weeks |
| Shiitake | 5–10 days post-soak | 14–21 days post-soak | 3–5 weeks + rest | 3–5 flushes over 2–4 months |
| Reishi | 14–21 days | 21–30 days | Long rest required | 1–2 large fruiting bodies |
Why the "Several Months of Flushes" Claim Is Misleading
Some kit descriptions promise harvests for "several months" — this is only accurate for shiitake under ideal conditions or in commercial-scale substrate. Most home grow kits yield 2–3 flushes before the substrate is spent. Yield drops significantly with each flush as the block's available nutrition depletes. This is normal and expected — the block has done its job. After the final flush, the spent block is valuable as a garden amendment or outdoor burial candidate (see Section 09).
Temperature & Humidity — Corrected Targets
What are the correct temperature and humidity targets for mushroom kit fruiting?
The Colonization → Fruiting Temperature Relationship
A common misconception is that colonization and fruiting require different temperature ranges with colonization being "slightly cooler." The correct relationship is the opposite: colonization (incubation) is most efficient at 70–75°F for all common species — mycelium metabolizes fastest and colonizes most efficiently at this range. Fruiting is often triggered by a temperature drop of 5–10°F below colonization temperature, which mimics the seasonal shift to autumn conditions that signals the fungus to fruit. If you keep a kit at colonization temperatures throughout, it may colonize well and then sit without pinning.
Humidity Targets — Corrected
| Stage | Target RH | What Happens Outside This Range |
|---|---|---|
| Incubation (colonization) | Bag maintains its own; ambient not critical | Sealed bag prevents moisture loss; no external humidity control needed |
| Fruiting — pinning | 85–95% RH | Below 80%: pin abortion, cracked caps; above 97%: stagnant air, bacterial blotch risk |
| Fruiting — development | 85–95% RH maintained | Never reduce humidity to "encourage fruiting" — low humidity aborts development |
Some older cultivation guides suggest reducing humidity to 70–80% to "encourage fruiting body formation." This is incorrect for gourmet mushrooms and will cause pin abortion and block drying. If your fully colonized kit is not pinning despite adequate humidity, the trigger is one of: temperature too high (drop it 5–10°F), inadequate fresh air exchange (fan more frequently), or for shiitake — the required cold water soak hasn't been done. Humidity is not the variable to reduce.
Tools for Monitoring
- Digital hygrometer/thermometer combo: Required — visual inspection alone cannot accurately assess humidity; most kit failures from "wrong conditions" are actually from not measuring
- Placement: Place the hygrometer at the level of the fruiting block, not at ceiling height where humidity reads higher
- Target zone: 85–90% is the ideal working range — achievable without pooling water and low enough to allow adequate FAE
Watering & Misting — The Correct Technique
How should I water and mist my mushroom grow kit?
Misting Protocol
- 1Mist the chamber walls and air, not the mushrooms: Spray the interior walls of your fruiting tent or chamber 2–3 times daily. The fine mist evaporates and raises ambient humidity without direct contact with the block or developing mushrooms.
- 2Check the block surface: The block surface should look white and feel damp — like a wrung-out sponge. Cracking, yellowing, or a dry texture indicates insufficient moisture. If the block is drying, a brief direct soak (submerge in water for 2–4 hours) restores internal moisture better than surface misting.
- 3Never mist developing pins or caps directly: Once pins are visible, keep misting indirect. Water sitting in the gills or on cap surfaces of developing mushrooms creates the warm, wet conditions that Pseudomonas bacteria need to establish, causing the brown spotting known as bacterial blotch.
- 4Check for pooling: If misting the block surface causes water to pool on top and not absorb within a few minutes, the block has reached moisture capacity — improve FAE rather than adding more water.
Assessing Block Moisture
| Block Appearance | What It Means | Action |
|---|---|---|
| Bright white, dense, slightly damp surface | Healthy, well-hydrated | Continue current misting schedule |
| Yellowing or light brown patches | Drying out or stress | Soak block for 2–4 hours, then resume fruiting conditions |
| Water pooling on surface | At moisture capacity | Improve FAE; reduce misting frequency |
| Cracking on surface | Significant dehydration | Full soak in cold water 4–8 hours |
| Green patches developing | Trichoderma contamination | See contamination section — separate from grow area |
My Kit Is Fully White But Not Pinning
My mushroom block is fully colonized (solid white) but nothing is pinning — what do I do?
- 1Check FAE first: Are you opening or fanning your fruiting chamber 2–3 times daily? A sealed chamber accumulates CO₂ that actively suppresses pinning. Open the chamber, fan briefly, and check again in 24–48 hours. This resolves the majority of "won't pin" cases.
- 2Check temperature: Is your grow space within the correct fruiting range for your species? Blue oyster and shiitake will not pin above 75°F. Pink oyster will not pin below 65°F. King oyster needs 55–65°F. Take an actual thermometer reading — don't estimate.
- 3For shiitake specifically — do the cold shock: A fully colonized shiitake block that hasn't received a cold shock will often wait indefinitely. Submerge the block in cold water (55–60°F) for 12–24 hours, then return to fruiting conditions at 55–65°F. Pins typically appear in 5–7 days.
- 4Check humidity: Is the block surface still moist? A dehydrated block cannot pin regardless of other conditions. Look for cracking or yellowing — if present, soak the block for 4–8 hours in cold water before returning to fruiting conditions.
- 5Wait and observe: If all conditions are correct and the block is healthy, some species (especially king oyster and shiitake) simply take longer. Give it 5–7 additional days at correct conditions before concluding there's a problem. Impatience is a very common false diagnosis.
Shiitake Cold Shock Protocol
2. Submerge the entire block in cold water — 55–60°F — for 12–24 hours
3. Remove, allow to drain for 15 minutes, then score the bag or remove from bag per kit instructions
4. Return to fruiting conditions: 55–65°F, 85–95% RH, FAE 2–3x daily
5. Expect pins in 5–7 days. If none by day 10, repeat cold shock.
Long Stems, Small Caps — The FAE Problem
Why are my mushrooms growing with long, thin stems and tiny underdeveloped caps?
The Mechanism
Mushroom mycelium continuously produces CO₂ as a metabolic byproduct. In a sealed or poorly ventilated fruiting chamber, CO₂ accumulates rapidly — and mushrooms are highly CO₂-sensitive during fruiting. When CO₂ concentrations rise, mushrooms grow toward the source of fresher air (toward any opening or light) rather than developing the broad, flat caps that indicate healthy fruiting. The result is dense clusters of elongated mushrooms that look like they're reaching for something — because they are.
Fix: Immediate FAE Increase
- Open the chamber and fan briefly 2–3 times daily: 30–60 seconds of active fanning is sufficient to reduce CO₂ to acceptable levels in most small fruiting chambers
- Add passive ventilation holes if none exist: A shotgun fruiting chamber (1/4" holes at 2" spacing on all sides) provides adequate passive FAE for most single-block grows without requiring active fanning
- Reposition the kit: If the kit is in a closed cabinet or sealed space with no airflow, relocate it to a more open area even if you continue providing humidity manually
- Don't compensate with more misting: Increasing humidity when the real problem is CO₂ only makes things worse — stagnant, humid air is the worst possible fruiting environment
If your mushrooms have reached harvestable size with long stems, harvest them — they're still edible and flavorful despite the shape. Then correct your FAE before the next flush. Future flushes on the same block will produce better cap development once CO₂ is managed. The block itself is not damaged by one or two leggy flushes.
Identifying Contamination — What's Normal, What's Not
What does healthy mycelium look like versus contamination — and how do I tell the difference?
| Appearance | Diagnosis | Action |
|---|---|---|
| Bright white, fluffy surface coating | Aerial mycelium — normal and healthy | Nothing — initiate fruiting conditions |
| Dense white throughout block, firm | Full colonization — ready to fruit | Initiate fruiting conditions |
| Vivid green patches (lime or forest green) | Trichoderma — serious contamination | Remove immediately, discard outdoors without opening indoors |
| Yellow-brown wet areas with sour or sweet off-odor | Bacterial contamination | Discard if widespread; isolated small spots — monitor closely |
| Black or gray patches | Aspergillus or other mold | Discard block; improve sterilization protocol |
| Blue-green coloration | Penicillium or Trichoderma early | Discard; note where block was stored and sanitize area |
| Brown pins that don't develop | Aborted pins — not contamination | Improve humidity and FAE; aborted pins are a stress response |
Contamination Context Matters
Not all contamination requires the same response — the growth stage when contamination appears determines whether the block is lost or recoverable:
- Green mold on a fully colonized, post-harvest block: Normal end-of-life — the substrate is depleted and Trichoderma is completing natural decomposition. The block has done its job; compost it
- Green mold on an uncolonized or partially colonized block before first flush: Failed kit — the contamination arrived before the mushroom mycelium could establish dominance. Discard without opening indoors
- Small isolated green spot on an early-stage colonized block: Potentially recoverable if caught within 24–48 hours — cut a wide margin around the spot with a sterile blade and monitor. If spreading continues, discard
Never open a Trichoderma-contaminated bag indoors. Green mold releases billions of spores on disturbance — opening the bag inside your grow space will contaminate every other block in the area and seed your walls and surfaces with spores. Carry the sealed bag outside, then double-bag and discard. Sanitize any surfaces the bag contacted with 70% isopropyl alcohol.
For still air box (SAB) construction and use, see Module 07 — Growing Supplies & Tools →
After the Final Flush — Reuse & Spent Block Uses
Can I reuse a grow kit for multiple harvests, and what do I do with a spent block?
Between Flushes — Normal Maintenance
- 1Harvest all mushrooms and remove all stub material: Remaining stem stubs rot and invite bacterial contamination. Clean the harvest site completely.
- 2Rest the block at lower humidity for 3–5 days: This rest period allows the mycelium to consolidate and recover before the next fruiting push.
- 3Rehydrate: Soak the block in cold water for 2–8 hours (shorter for young blocks, longer for blocks that have already produced 2+ flushes), then return to full fruiting conditions.
- 4Expect declining yields: Each successive flush produces less than the previous as the substrate nutrients are consumed. This is normal and expected — not a sign of a problem.
What to Do With a Spent Block
- Outdoor burial in a woodchip or garden bed: Break the spent block into pieces and bury in a woodchip mulch bed or under hardwood trees. The remaining mycelium may colonize the outdoor substrate and produce volunteer flushes over one or several seasons — one of the most rewarding extended uses of a kit
- Compost: Spent mushroom substrate is excellent compost material — the already-processed organic matter with active fungi breaks down rapidly and enriches soil biology
- Garden amendment: Break the block up and work into garden beds — the colonized substrate improves soil structure, water retention, and microbial diversity
- Do not attempt to re-sterilize for indoor reuse: Spent substrate cannot be meaningfully restored to a sterile, nutrient-rich state through heat treatment or chemical sterilization at home. The block has been consumed — start a new kit or substrate for the next indoor grow
Burying spent oyster mushroom blocks in a woodchip bed or under a hardwood tree produces one of the most satisfying outcomes in home cultivation — surprise outdoor flushes weeks or months later, often larger and more fully developed than indoor flushes because of natural FAE. Pearl, blue, and pink oyster blocks work well for this. Simply bury pieces 4–6 inches deep in moist wood chips and keep the area watered during dry periods.
Kit Storage, Safety & Additional Supplies
How do I store an unused grow kit, and what additional supplies do I need?
Unused Kit Storage
- Refrigerator (35–45°F): Slows mycelial metabolism without damaging it; most colonized kits store well for 4–8 weeks; some shiitake kits store longer
- Check for contamination before storing: A kit with early-stage green or bacterial contamination will only get worse in storage; use or discard immediately
- Keep sealed: Do not open the bag until ready to initiate fruiting — the sealed filter bag maintains the internal environment and prevents ambient contaminants from entering
- Away from strong odors and chemicals: Mycelium is sensitive to volatile organic compounds — don't store kits near household cleaners, solvents, or produce that off-gases ethylene (bananas, apples)
- Check manufacturer expiration dates: Some kits have best-by dates on the packaging — kits used past these dates may still produce but with lower first-flush yields
Recommended Additional Supplies
| Supply | Priority | Why It Matters |
|---|---|---|
| Digital hygrometer + thermometer | Essential | Most kit failures are from wrong conditions that could have been caught with a $10 hygrometer |
| Spray bottle (fine mist) | Essential | Precise, indirect misting to raise humidity without wetting mushrooms directly |
| Fruiting chamber or humidity tent | Strongly recommended | Maintains humidity without constant misting; SGFC or modified bin works for single kits |
| Small fan | Recommended | FAE management — the most commonly under-addressed variable in kit grows |
| Nitrile gloves | Recommended | Reduces contamination risk during handling and harvest |
| Isopropyl alcohol (70%) | Recommended | Surface sterilization for work area and tools |
| Food dehydrator | Optional | Preserves excess harvest; properly dried mushrooms store 2–5 years vacuum-sealed |
Safety Notes
- Only consume mushrooms you have positively identified: Commercial grow kits produce known species, but never consume an outdoor mushroom unless you are 100% certain of its identity
- Keep kits and harvested mushrooms away from children and pets: Even edible mushroom species can cause illness in pets, especially dogs, who may react to small amounts of certain compounds
- Dispose of spent substrate per local guidelines: Most mushroom substrate can be composted; a small number of municipalities have specific organic waste rules — check before composting unusual substrates
Mushroom Grow Kit — Quick-Reference FAQ
What is the white fuzz on my mushroom kit and is it contamination?
White, fluffy coating on the surface of a mushroom block is aerial mycelium — healthy, normal, and a sign that your conditions are correct. Mycelium produces aerial growth in response to high humidity and CO₂, which are exactly the right fruiting conditions. Actual contamination to watch for: vivid green patches (Trichoderma), yellow or brown wet areas with an off odor (bacteria), or black/gray fuzzy patches (Aspergillus). Fluffy white = healthy. Do not discard a healthy kit because of surface white growth.
Do I need to soak my shiitake kit in water before it will produce mushrooms?
Yes — shiitake almost always requires a cold water soak to trigger reliable pinning. Submerge the fully colonized block in cold water (55–60°F) for 12–24 hours, then move to fruiting conditions at 55–65°F with 85–95% humidity and FAE 2–3 times daily. Pins typically appear within 5–7 days. Shiitake that goes straight from incubation to a warm fruiting chamber without a cold shock will often sit without pinning indefinitely — the cold shock replicates the autumn rain signal the fungus expects before fruiting.
How many harvests can I get from one grow kit?
Most commercial mushroom grow kits produce 2–3 flushes over 4–8 weeks before the substrate is depleted. Yield declines with each flush as the block's nutrition is consumed — this is normal, not a sign of a problem. Shiitake kits with larger blocks can produce 3–5 flushes over a longer period with proper rest and rehydration between flushes. After the final flush, use the spent block for outdoor burial in a woodchip bed, composting, or garden amendment — the remaining mycelium has value outside the indoor grow.
What humidity should I maintain for my mushroom grow kit?
85–95% RH at the level of the fruiting block throughout pinning and development. Never reduce humidity to "encourage fruiting" — this inverts the correct guidance and will cause pin abortion and block drying. If your colonized kit is not pinning despite adequate humidity, the triggers to check are FAE (open the chamber more frequently), temperature (is it within your species' fruiting range?), and for shiitake, the cold water soak. Humidity is not the variable to reduce when troubleshooting a kit that won't pin.
Can I use my spent mushroom kit block in my garden?
Yes — and this is one of the best extended uses of a kit block. Break the spent block into pieces and bury 4–6 inches deep in a woodchip mulch bed or under hardwood trees — the remaining mycelium may colonize the outdoor substrate and produce volunteer flushes over subsequent seasons. Alternatively, work the broken block into garden beds as amendment (excellent for soil structure and microbial diversity) or add to a compost pile where the partially processed substrate breaks down rapidly. Spent mushroom substrate is genuinely valuable to a garden.
What temperature should I grow my mushroom kit at?
It depends entirely on your species — there is no single correct temperature for "mushrooms." Blue and pearl oyster fruit best at 55–75°F; pink and yellow oyster need 70–85°F; lion's mane prefers 65–70°F; shiitake and king oyster fruit best at 55–65°F. Check your grow space temperature with a thermometer and match it to the correct species from the table in Section 02. Running a cold-loving species at room temperature (70–75°F) is the most common reason kit buyers report that their kit never produced mushrooms.
Shop Mushroom Grow Kits & Cultivation Supplies
Ready-to-fruit kits for oyster, shiitake, lion's mane and more — plus hygrometers, fruiting chambers, and everything you need for a successful first grow.