Cannabis Indoor Grow Room
Setup Guide
Everything you need to plan and build a successful indoor cannabis grow room — from budget tiers and setup sequence to grow lights, ventilation, smell control, pots, nutrients, cloning, and harvest supplies with specific numbers throughout.
Grow Room Planning
How do I plan my first indoor cannabis grow room?
The biggest factor in yield is grow space — specifically, how much canopy you can put under adequate light. Defining your footprint before buying any equipment prevents the most common beginner mistake: buying a tent that's too small for the light, or a light that can't cover the tent's floor area at flowering intensity.
Concrete Starter Build — 4×4 Tent Setup
| Component | Spec | Why |
|---|---|---|
| Grow Tent | 4×4 ft (48×48 in) | Most common size — widely supported by light and fan specs |
| Grow Light | 600W quality LED | Covers 4×4 at flowering PPFD with manageable heat |
| Inline Fan | 6-inch, 400+ CFM | Handles the volume of a 4×4×6.5 ft tent efficiently |
| Carbon Filter | 6-inch matched to fan | Paired to fan — mismatched sizing reduces effectiveness |
| Ceiling Height | 6 ft minimum | Allows tent + light hang height + plant stretch in flower |
| Electrical | 15A dedicated circuit | Handles most single-tent setups up to 1,000W draw |
Location Selection Checklist
- Adequate ceiling height: Minimum 6 ft from floor to ceiling — tents range from 5 to 7 ft tall and you need clearance above the tent for light adjustments
- Dedicated power: One 15-amp circuit is sufficient for most single-tent setups; never share an overloaded circuit with other high-draw appliances
- Exhaust path: You need somewhere to route hot, filtered air — a window, adjacent room, attic, or crawlspace; no exhaust path means no grow
- Water access: Not required adjacent to the tent, but carrying water to an inconvenient location gets old fast — proximity matters for daily maintenance
- Privacy and lightproofing: Ambient light from hallways or windows can create issues in flowering; choose a space you can fully darken
The most common tent-sizing mistake is choosing size based only on plant count and forgetting that the grow light's coverage area is the real constraint. A 240W LED covers roughly 3×3 ft at flowering intensity — not 4×4 as most manufacturer specs suggest. Choose your light first, confirm its realistic PPFD coverage map, then match the tent to that footprint.
How much does it cost to set up an indoor cannabis grow room?
| Tier | Budget | Tent | Light | Fan/Filter | Plants |
|---|---|---|---|---|---|
| Budget | $300–$500 | 2×4 ft | 200–300W LED | 4-inch combo | 1–2 |
| Mid-Range | $700–$1,200 | 4×4 ft | 600W LED | 6-inch combo | 4–9 |
| Premium | $1,500–$3,000+ | 5×5 or 4×8 ft | 1000W+ LED | 8-inch combo | 6–16 |
What Each Tier Includes (and Doesn't)
Budget ($300–$500): Covers tent, entry-level LED, 4-inch fan and carbon filter, a basic thermometer/hygrometer, and a timer. You'll still need to buy pots, growing media, nutrients, pH meter, and seeds or clones separately. The biggest compromise at this tier is light quality and intensity — entry-level LEDs have lower PPFD output, so yields will be modest.
Mid-Range ($700–$1,200): The sweet spot for a first serious grow. A quality 600W LED from a reputable brand delivers enough PPFD to fill a 4×4 in flower. Add digital pH and EC meters, fabric pots, and a starter nutrient kit and you have a complete functioning setup. This tier produces results that reward the effort you put in.
Premium ($1,500–$3,000+): Environmental controller that automates fan speed, humidity response, and temperature alerts; high-output LED with true spectral control; larger tent footprint; and quality accessories throughout. The right choice if you're serious about maximizing yield and minimizing troubleshooting time.
Setup cost is one-time. Factor in recurring costs: nutrients ($30–$80/cycle), growing media ($15–$40/cycle), electricity ($60–$120/month for a 4×4), and occasional replacement parts. A mid-range grow typically runs $150–$250 per cycle in consumables beyond electricity.
What order should I set up my grow room?
- 1Clean and sanitize: Wipe all surfaces with diluted bleach or isopropyl alcohol. Remove dust and debris. Mold and pathogen spores from a dirty space can cause problems weeks later when conditions become ideal for them to activate.
- 2Install reflective material and seal light leaks: If not using a pre-lined tent, apply Mylar or white poly sheeting to walls. Inspect every seam, zipper, and cable port — seal any gap where light could escape during the dark cycle. This matters most once you flip to flower.
- 3Set up ventilation (inline fan + carbon filter + ducting): Mount the inline fan, connect the carbon filter, run ducting to your exhaust point. Test for negative pressure — tent walls should flex slightly inward when the fan is running. This confirms air is being drawn through (not just recirculated) and that odor control is functioning.
- 4Hang grow lights and set timer: Mount at the manufacturer's recommended starting height. Connect to a dedicated 24-hour digital timer — not a mechanical timer, which can drift. Do not put the light and the fan on the same timer circuit.
- 5Place environmental monitors at canopy height: Thermometer and hygrometer readings at the top of the plant canopy are the only readings that matter — floor and ceiling temps are significantly different. Add a water thermometer if you're running any hydroponic component.
- 6Set up containers and growing media: Fill fabric pots or containers with pre-moistened medium and position them before planting. Moving filled containers after transplanting causes unnecessary root disturbance.
- 7Run a 24-hour test cycle before introducing plants: Power everything on, set your timer to the target light schedule, and let the room run for a full day. Confirm temps hold within range with lights on, RH is adjustable, light fires on the correct schedule, and negative pressure is maintained throughout. Fix any issues now — not after plants are in.
Do I need separate spaces for vegetative and flowering stages?
Single-Tent Cycle (Recommended for First Grows)
A single 4×4 tent runs one complete crop at a time: seedling → veg → flower → harvest → clean → repeat. The total cycle is typically 10–16 weeks depending on strain, training method, and how long you hold plants in veg before flipping. This setup is simpler to manage, easier to troubleshoot, and requires only one set of environmental controls.
Two-Tent Perpetual Harvest (Intermediate Upgrade)
A perpetual setup uses one tent for vegetative growth (running 18/6) and a second for flowering (running 12/12). Plants move from veg to flower on a rotating schedule, allowing you to harvest every 6–8 weeks rather than waiting a full cycle. The tradeoff: two tents to maintain, two environments to control, and more planning required to manage plant timing across both spaces.
- Perpetual advantage: More frequent harvests, continuous supply of fresh plant material
- Perpetual disadvantage: Double the equipment cost, double the complexity, and double the things that can go wrong simultaneously
- When to consider it: After at least one successful single-tent harvest, when you understand your strain's veg time and have consistent environmental control
Get one complete cycle from seed (or clone) to jar in a single tent before adding complexity. The skills and intuition you build in that first cycle — reading plant response, managing environment, dialing in nutrition — are prerequisites for running a perpetual setup successfully.

Grow Room Setup
How do I set up an indoor cannabis grow room step by step?
Setting up a grow room is a sequencing problem as much as an equipment problem. The right components installed in the wrong order leads to rework and frustration. The checklist below follows the correct dependency order — each step creates conditions the next step requires.
Complete Setup Sequence
- 1Clean and prep the space: Wipe all surfaces with diluted bleach (1:10 ratio) or 70% isopropyl alcohol. Vacuum corners. Mold spores and pest eggs in a new grow space are invisible until conditions favor them.
- 2Install tent or line walls: If not using a grow tent, apply Mylar or white poly to all walls and ceiling. Seal gaps, electrical outlets, and any penetrations where light could leak during the dark cycle.
- 3Mount ventilation system: Hang inline fan, connect carbon filter with ducting, route exhaust to exit point. Sizing rule: calculate the tent volume (L × W × H in feet) and divide by 1–3 to get your minimum CFM. A 4×4×6.5 ft tent = 104 cubic feet; minimum fan: 35–100 CFM — use a 400 CFM 6-inch fan to have headroom for filter resistance and future scalability.
- 4Confirm negative pressure: Run the fan and check for slight inward flex on tent walls or fabric. This confirms air is being actively drawn through the carbon filter before exhausting. If walls bow outward, you have positive pressure — odor is escaping unfiltered.
- 5Hang grow lights at starting height: Install adjustable ratchet hangers before running power. Set timer for target light schedule before connecting the light — confirms the timer works correctly at zero risk.
- 6Place environmental monitors at canopy height: The thermometer and hygrometer readings at canopy level are your targets — not floor or ceiling readings, which can differ by 10°F+ in a sealed tent.
- 7Add growing containers and media: Fill pots, position in final locations. Pre-moisten media before planting to ensure even hydration from the start.
- 8Run a 24-hour test cycle: Confirm lights fire on schedule, canopy temp holds in range with lights on, RH is manageable, negative pressure is maintained, and no light leaks are visible in a darkened room.
How do I control smell in an indoor cannabis grow room?
The carbon filter works by forcing exhaust air through a bed of activated carbon granules that adsorb (bind to) terpene and aromatic molecules before they can escape. For this to work, the entire tent airflow must pass through the filter — not around it. Any unsealed port, gap, or exhaust path that bypasses the filter will let odor out.
Carbon Filter Sizing and Setup
- Match diameter to fan: A 6-inch fan requires a 6-inch carbon filter — mismatched sizes create bypass gaps and reduce contact time with the carbon bed
- Match CFM capacity: Carbon filter CFM rating should equal or exceed fan CFM — undersized filter can't keep up and odor breaks through
- Pre-filter sleeve: The white fabric sleeve on the outside of the filter extends media life — clean or replace it every 4–6 weeks during heavy use
- Replace media every 12–18 months: Carbon effectiveness degrades before you can smell the difference. Replace on schedule, not when you notice odor returning — by then you've already been leaking smell for weeks
- Seal all unused ports: Every unused duct port, cable opening, and zipper gap in your tent is a potential odor escape path during flower
Odor intensity increases dramatically in the last 2–3 weeks before harvest as terpene production peaks. If your carbon filter is older than 12 months, replace it before entering late flower — not after you notice breakthrough odor. A new filter costs far less than the consequences of a smell complaint.
How much electricity does a cannabis grow room use per month?
Electricity Cost Estimator
| Component | Typical Draw | Hours/Day | kWh/Month | Est. Cost/Month* |
|---|---|---|---|---|
| 600W LED (veg 18/6) | 600W | 18 | 324 | ~$52 |
| 600W LED (flower 12/12) | 600W | 12 | 216 | ~$35 |
| 6-inch inline fan | 30–50W | 24 | 22–36 | ~$4–$6 |
| Oscillating fan | 15–25W | 18 | 8–14 | ~$1–$2 |
| Dehumidifier | 100–300W | 6–12 | 18–108 | ~$3–$17 |
*Estimated at $0.16/kWh (US average April 2025). Your actual rate may vary significantly — check your utility bill for the per-kWh rate you pay.
How to Calculate Your Setup's Monthly Cost
For any component: Watts ÷ 1,000 × Hours per day × 30 × your kWh rate = monthly cost. Example: 600W LED × 18 hours × 30 days = 324 kWh. At $0.16/kWh, that's $51.84/month just for the light. Add your fans and any climate control to get the full picture.
In high-rate states (California, New York, Hawaii) electricity costs can run $0.25–$0.35/kWh — nearly double the national average. A 600W LED in those states can cost $80–$115/month in veg alone. Factor your local rate into the total cost of ownership before choosing light wattage.
Grow Tent
What is a grow tent and why should I use one?

Key Advantages Over a Bare Room
- Reflective interior: Mylar lining bounces light back to the canopy — recovers 20–30% of light that would otherwise be absorbed by walls, effectively increasing your light's output without adding cost
- Built-in ports: Pre-cut duct ports, cable holes, and viewing windows eliminate drilling or cutting in a rented or finished space
- Light containment: The lightproof exterior prevents dark-cycle interruption and prevents light from spilling into the living space during night hours
- Environmental containment: Humidity, CO2, and odor stay inside the tent where your carbon filter can address them — not spreading through the house
- Easy cleaning: Between cycles, the tent can be wiped down, inspected, and sanitized more thoroughly than a built room
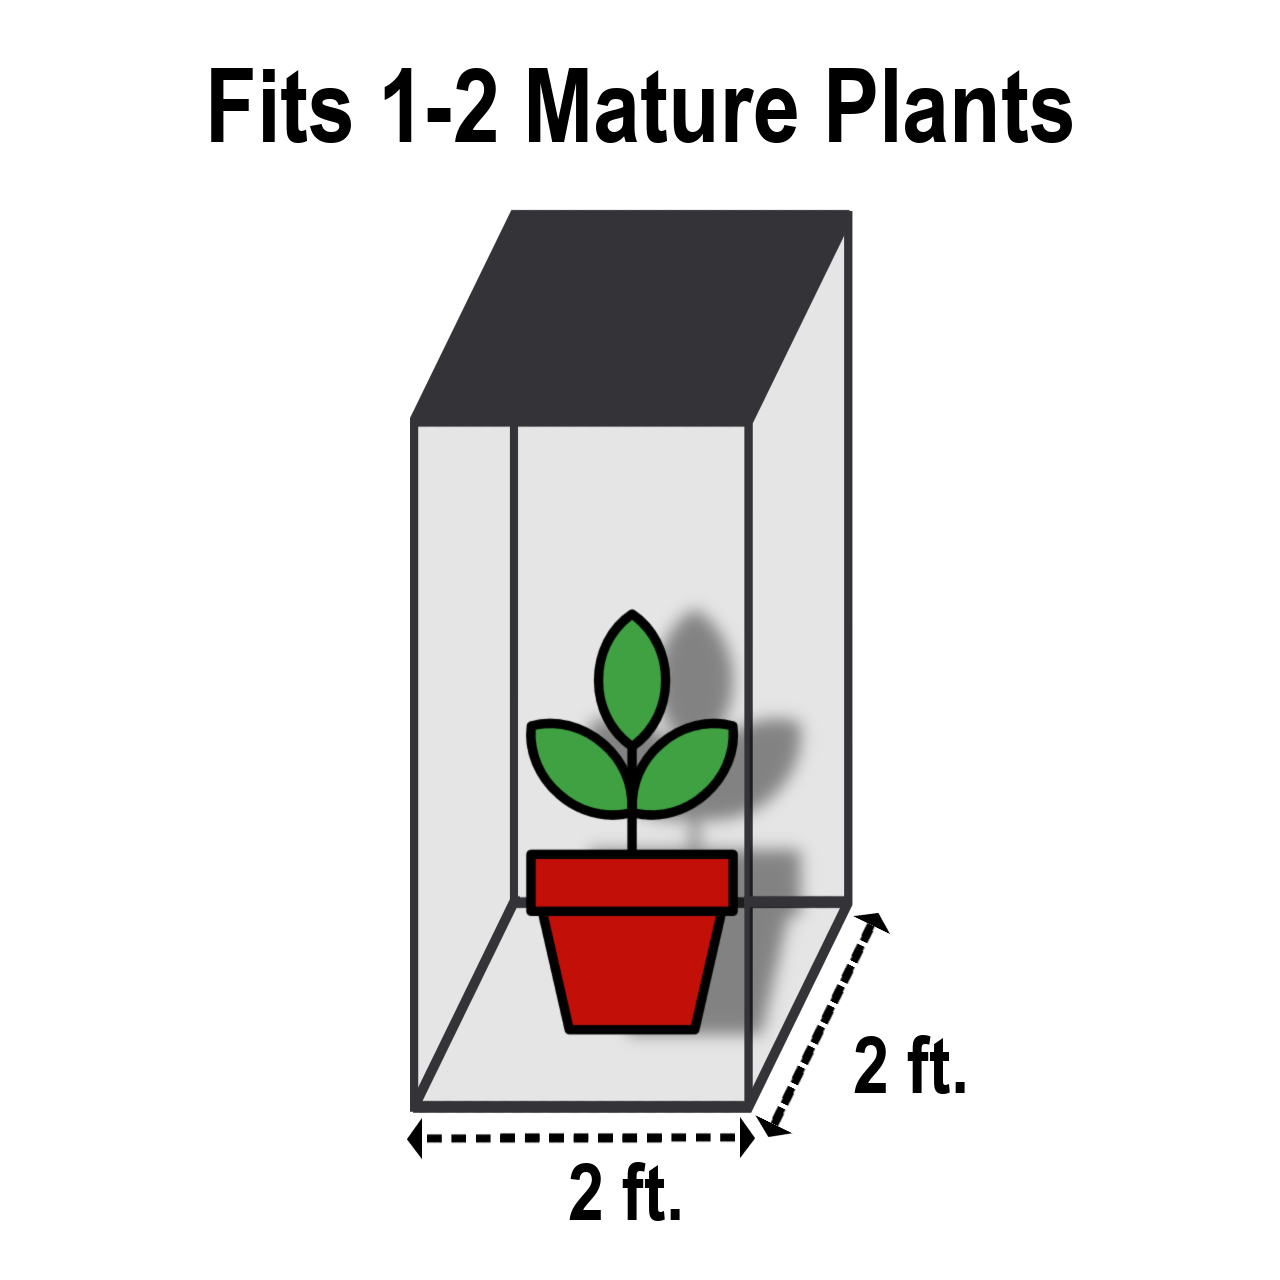
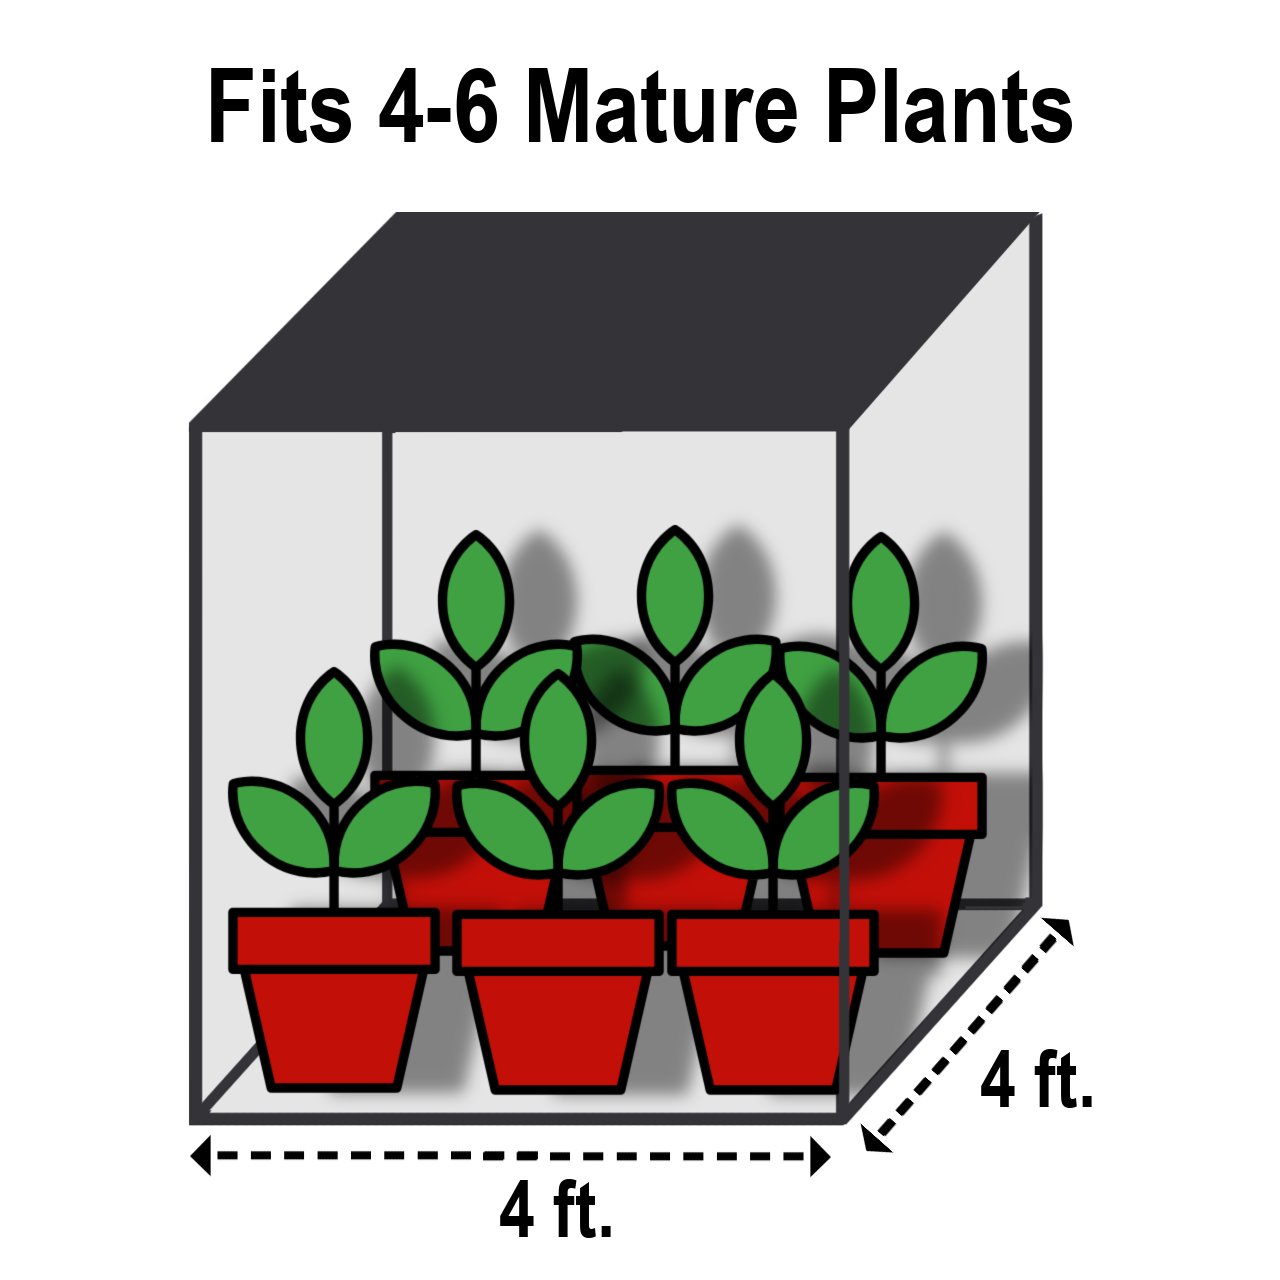
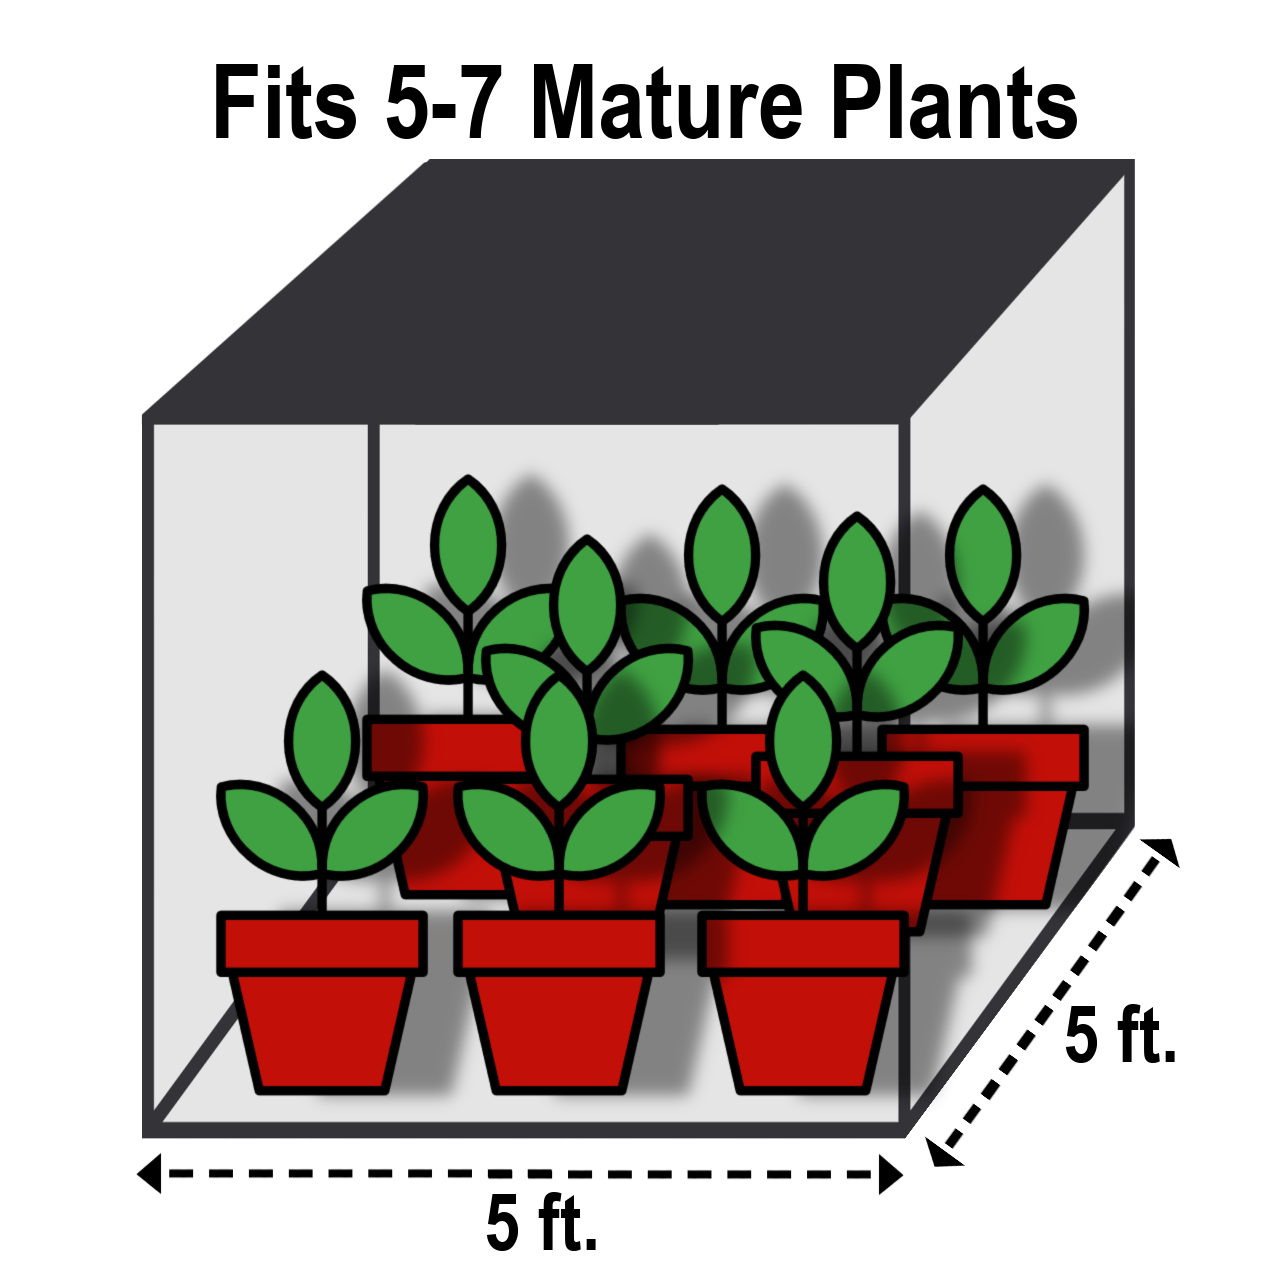
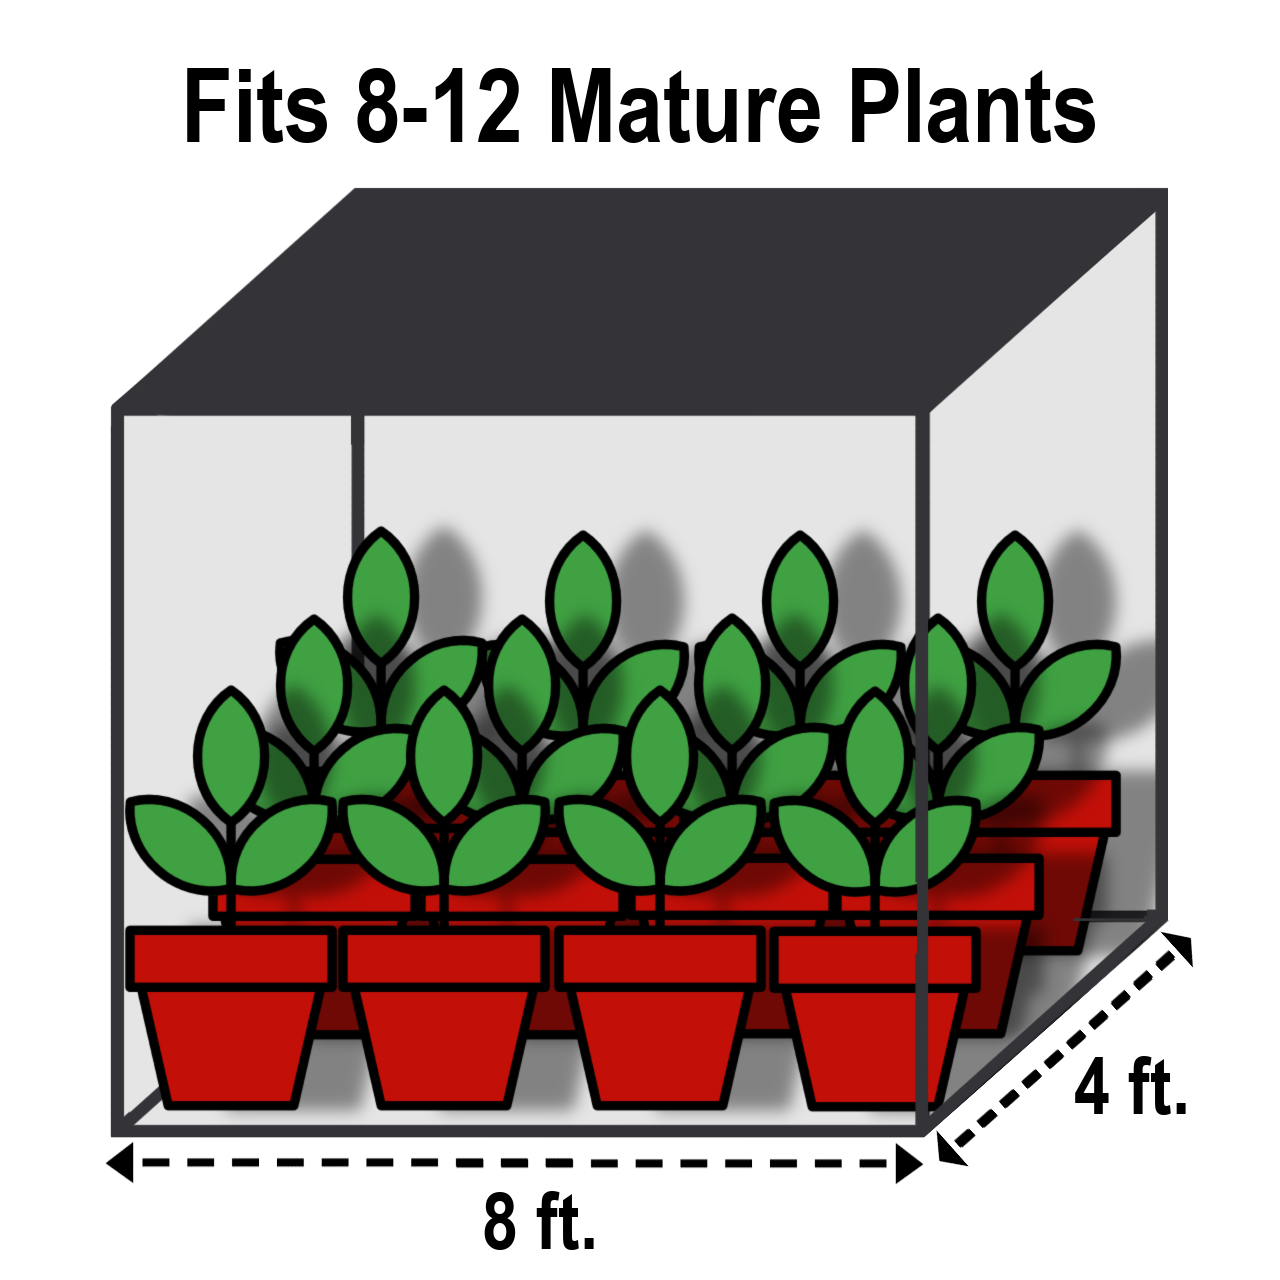
How do I choose the right grow tent size for cannabis?
Tent Size Guide by Light Coverage
What a "Complete Tent Kit" Includes vs. What You Still Need
| Typically Included in a Kit | Still Need to Buy Separately |
|---|---|
| Tent, frame, and Mylar interior | Growing medium (soil, coco, hydroton) |
| Grow light (not all kits) | Pots or containers |
| Inline fan and carbon filter combo | Nutrients — veg and bloom formulas |
| Ducting and hangers | pH meter and EC/PPM meter |
| Timer (not all kits) | pH up and down adjusters |
| Thermometer/hygrometer (not all kits) | Seeds or clones |
Grow Lights
What grow lights should I use for indoor cannabis?

Grow Light Type Comparison
| Type | Efficiency | Heat | Lifespan | Best Use |
|---|---|---|---|---|
| LED | Highest | Low | 50,000+ hrs | All stages — best overall for home grows |
| CMH | High | Medium | ~20,000 hrs | Veg and flower; excellent full spectrum |
| HPS | Medium | High | ~10,000 hrs | Flowering in large, well-ventilated spaces |
| T5 / Fluorescent | Low | Very Low | ~20,000 hrs | Clones, seedlings, and propagation only |
What PPFD does cannabis need, and why is wattage a misleading spec?
PPFD Targets by Growth Stage
| Stage | PPFD Target | Notes |
|---|---|---|
| Seedling / Clone | 200–400 µmol/m²/s | Gentle — high intensity causes light stress before roots establish |
| Vegetative | 400–600 µmol/m²/s | Increasing PPFD drives faster canopy development |
| Flowering | 600–900+ µmol/m²/s | High-output LEDs can push 900–1,200 µmol with CO2 supplementation |
Why Wattage Is Misleading
Wattage measures electricity consumption, not light output. A quality 240W LED from a reputable brand may deliver more PPFD at canopy than a cheap 400W LED — because efficiency (µmol per watt, or PPE) varies enormously across brands and technologies. CMH and HPS also produce very different PPFD per watt than LEDs do.
The coverage area problem is worse: Most manufacturers state coverage area based on vegetation (lower PPFD requirement) rather than flowering. A light advertised as covering a 4×4 ft area typically delivers flowering-level PPFD over only a 3×3 ft area. This is one of the most common sources of frustration for new growers who buy "correctly sized" lights and still get light-limited yields in flower.
Look for manufacturer PPFD maps — third-party tested at a fixed hanging height showing actual µmol/m²/s readings across the coverage area. Average the readings across your tent's square footage. If the manufacturer doesn't publish a PPFD map, treat the coverage area claim with significant skepticism. Reputable LED brands (Gavita, Spider Farmer, Mars Hydro, Grower's Choice) publish detailed photon maps.
See Module 06 — Grow Lights Guide for a deep dive into PPFD, DLI, spectrum, and light selection across all growth stages.
Pots & Soil
What pots and soil should I use for indoor cannabis?

Fabric Pots vs. Plastic Pots
| Feature | Fabric Pot | Plastic Pot |
|---|---|---|
| Root air-pruning | ✓ Yes — roots self-prune at the sides | ✗ No — roots circle and become bound |
| Oxygen to roots | High — air passes through fabric walls | Low — soil only breathes through top and drain holes |
| Drainage | Excellent — can't overwater easily | Good — drainage depends on hole count |
| Reusability | Machine washable, many cycles | Rinse and reuse indefinitely |
| Water retention | Lower — dries faster, needs more frequent watering | Higher — holds moisture longer |
Pot Sizing: Why 3–5 Gallons Is the Sweet Spot
Bigger is not always better with pot size. Excess soil volume around the roots holds moisture too long between waterings, creating anaerobic conditions that invite root pathogens. The goal is a pot size where the plant's root system can reasonably fill most of the available volume within its lifecycle.
- Solo cup: Seedling to 2–3 weeks — tiny root mass, large pot would stay wet too long
- 1 gallon: Early veg transplant — good transition size before final container
- 3 gallon: Good final size for autoflowering strains or heavily trained compact plants
- 5 gallon: Standard for most photoperiod indoor plants — enough volume for a well-developed root system without excess
- 7–10 gallon: Large photoperiod plants with extensive training (SCROG, manifold); overkill for most beginner grows
Pre-Amended Cannabis Potting Mixes
Pre-amended mixes contain slow-release nutrients blended into the medium at manufacture. They're designed to provide adequate nutrition for the first 3–5 weeks of growth without supplemental feeding, giving beginners a buffer while learning feeding schedules. Look for mixes specifically formulated for cannabis — general-purpose potting soils often have too high a pH or inappropriate nutrient ratios.
Transplanting a seedling directly into a 5-gallon pot is tempting ("fewer transplant steps") but creates a large wet zone around a small root ball. Root oxygen availability drops, moisture lingers, and the risk of early root issues goes up significantly. Use progressive pot sizing: solo cup → 1 gallon → 3–5 gallon final. Each transplant also stimulates root growth.
Nutrients
What nutrients does cannabis need to grow, and why?

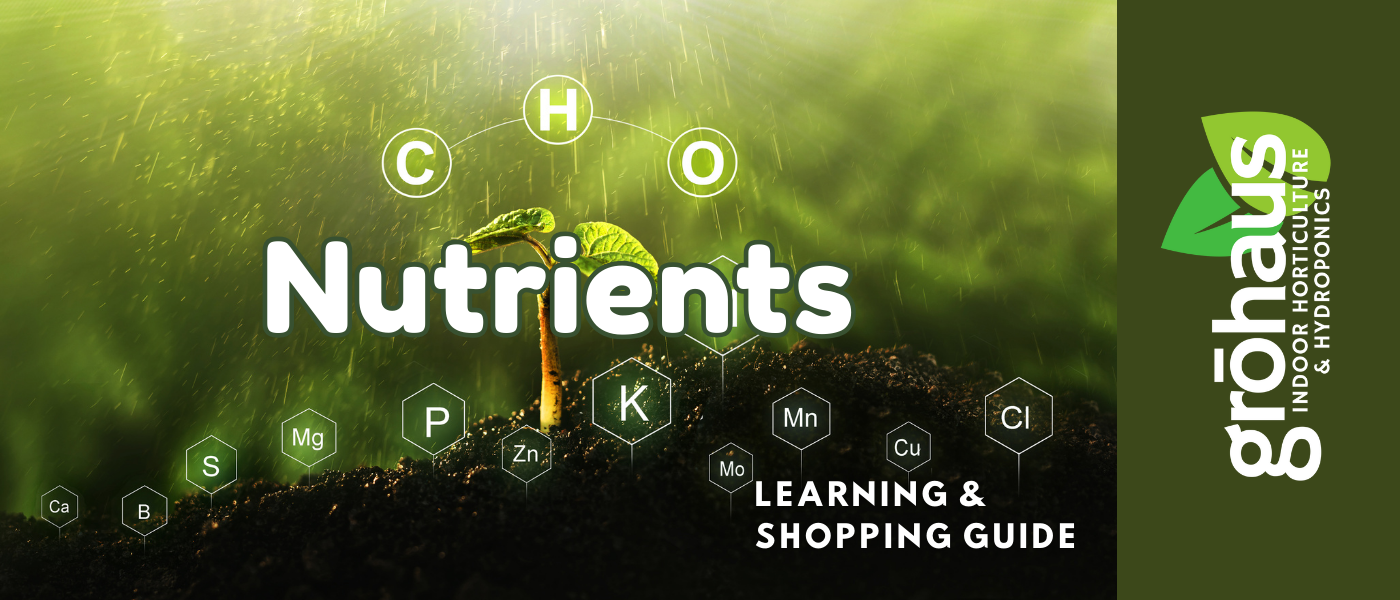
Primary Macronutrients (N-P-K)
| Nutrient | Symbol | Primary Role | When Demand Is Highest |
|---|---|---|---|
| Nitrogen | N | Chlorophyll production, protein synthesis, vegetative tissue growth | Vegetative stage — demand drops sharply in flower; high N in flower suppresses terpene development and delays maturation |
| Phosphorus | P | ATP energy transfer, cell division, bud and seed formation | Flowering — supports energy demands of reproductive growth; note: phosphorus does NOT directly stimulate roots (that is driven by auxin signaling and root-zone oxygen) |
| Potassium | K | Stomatal regulation, water uptake, enzyme activation, stress resistance | Throughout — essential at all stages; demand increases in flower alongside phosphorus |
Secondary Macronutrients
- Calcium (Ca): Cell wall structure and integrity — deficiency causes brown spots on new growth; immobile in the plant so new deficiency symptoms appear on new growth first
- Magnesium (Mg): Central atom in every chlorophyll molecule — deficiency causes interveinal yellowing (yellow between green leaf veins) starting on older leaves
- Sulfur (S): Amino acid synthesis and enzyme function — deficiency causes pale new growth; often seen in young plants on soft water or RO-fed systems
Micronutrients
Iron (Fe), manganese (Mn), zinc (Zn), copper (Cu), boron (B), and molybdenum (Mo) are required in trace amounts but are critical for enzyme function, chlorophyll synthesis, and plant metabolism. Most quality cannabis nutrient lines include these at correct ratios — micronutrient deficiencies in otherwise well-managed grows are most often caused by pH being out of range (locking out otherwise available nutrients) rather than actual absence from the medium.
High nitrogen during flowering is one of the most common beginner mistakes. Nitrogen supports vegetative tissue — leaves and stems. During flower, your plant's energy should go into bud development, not new leaf production. Heavy nitrogen in flower delays maturation, produces loose airy buds, and can suppress terpene expression. Switch to a bloom formula (lower N, higher P and K) at or shortly after the light flip.
For detailed feeding schedules, EC/PPM targets by stage, and product-specific guidance, see Module 09 — Nutrients Guide.
What do NPK ratios mean on cannabis fertilizer labels?
The three numbers on any fertilizer label — for example 6-2-4 or 2-8-10 — represent the percentage by weight of nitrogen (N), phosphorus as P₂O₅ (P), and potassium as K₂O (K), in that order. You don't need to calculate exact percentages for home growing — understanding the shape of the ratio is what matters.
| Stage | Desired Ratio Shape | Example NPK | Rationale |
|---|---|---|---|
| Seedling | Very mild across all three | 1-1-1 or half-strength veg | Fragile roots, low demand — start at 25–50% of label rate |
| Vegetative | High N, moderate P and K | 3-1-2 | Nitrogen drives rapid leaf and stem development |
| Transition (flip week) | Dropping N, rising P and K | 1-3-2 | Signal the shift from vegetative to reproductive growth |
| Flowering | Low N, high P and K | 1-4-5 | Bud development requires energy transfer (P) and water management (K) |
| Late Flower / Flush | Minimal to none | 0-0-0 or very low | Reduce nutrient delivery in final weeks before harvest |
Most nutrient manufacturers produce two-bottle (veg + bloom) or three-bottle (grow + micro + bloom) systems with pre-calibrated ratios for each stage. Follow the brand's feeding schedule as a baseline and adjust based on your plant's response — yellowing means more, dark green with curling tips means less.
Garden Care Supplies & Tools
What garden care tools do I need for cannabis cultivation?

Essential Tools — Every Grow
- Pruning scissors: Sharp, pointed-tip scissors for precise defoliation, training cuts, and harvest trimming — keep a dedicated pair for each use, sanitized between sessions
- pH meter: Digital meter with ±0.1 accuracy or better — calibrate monthly with reference solution; pH accuracy is the single most important measurement in your entire grow
- EC/PPM meter: Measures dissolved nutrient concentration — required for hydroponic and coco grows, strongly recommended for soil; lets you diagnose overfeeding and underfeeding objectively
- pH up and down solutions: Phosphoric acid (pH down) and potassium hydroxide (pH up) — buy both before you start, not after your first pH problem
- Hand sprayer or pump sprayer: For foliar feeding, preventive pest sprays, and humidity adjustment during propagation
- Nitrile gloves: Protect plants from contamination and protect your hands from nutrients, pH adjusters, and resin
Useful Additions
- Jeweler's loupe (30–60x) or pocket microscope: The only accurate way to read trichome maturity at harvest — the naked eye cannot distinguish clear from cloudy from amber at the scale of trichome heads
- Trellis netting: SCROG setups increase light exposure across the canopy — significant yield improvement for the minor cost
- Soft plant ties: For LST and SCROG without cutting into stems
- Seed storage vault envelopes: Airtight, humidity-controlled seed storage preserves viability for years
Seeding, Cloning & Rooting
What is cannabis cloning and how does it work?

A mother plant is a female cannabis plant kept in vegetative growth (18/6 light schedule) that is used exclusively as a source of cuttings. By selecting a mother based on desirable traits — yield, potency, structure, aroma, disease resistance — you can reproduce those exact genetics indefinitely across as many cycles as you need.
Why Clone Instead of Seed
- Genetic consistency: Every clone is genetically identical to the mother — no variation in growth pattern, sex, or potency from plant to plant
- Faster cycle start: A rooted clone enters vegetative growth immediately — saves 1–2 weeks compared to growing from seed through the seedling stage
- Known sex guarantee: Clones taken from a confirmed female mother are always female — eliminates the risk of male plants appearing in the grow
- Preserved genetics: A mother plant can supply cuttings for years, preserving a particularly successful phenotype indefinitely
How do I take a cannabis clone successfully?
Cutting Technique — Step by Step
- 1Select a healthy branch: Take cuttings from vigorous lower or mid-canopy branches with at least 2–3 nodes. Avoid the very top of the plant (apical tip) — these root more slowly. Choose branches that are actively growing, not pale or stressed.
- 2Make a clean 45° cut: Use a sterile razor blade or sharp scissors. Cut just below a node at a 45-degree angle — the angled cut increases surface area for root emergence and prevents the cut end from sealing flat against the bottom of the medium.
- 3Remove lower leaves immediately: Strip all leaves from the lower two-thirds of the cutting. Any leaf submerged in or touching medium will rot and invite pathogens to the stem.
- 4Dip in rooting gel or powder: Apply rooting hormone to the cut end immediately — do not let the cut end dry out or seal before the hormone is applied. Gel provides better coverage and adhesion than powder for most growers.
- 5Insert into pre-moistened medium: Rockwool plugs (pre-soaked to pH 5.5), root plugs, or an aeroponic cloner. Push the stem in deep enough that the bottom node is submerged — this node often produces the first roots.
- 6Maintain dome humidity at 75–85% RH: Mist the inside of the dome (not the cuttings directly) 2–3 times per day. Keep temperature at 72–78°F. Use low-intensity light only — high PPFD causes stress before roots establish.
Dome vs. Aeroponic Cloner
| Method | Speed | Cost | Best For | Key Tradeoff |
|---|---|---|---|---|
| Dome + Plugs | 7–14 days | $ | Beginners, low volume | Slower but more forgiving; lower initial investment |
| Aeroponic Cloner | 5–10 days | $$ | Regular cloners, 10+ cuttings | Faster roots; requires clean water and pump maintenance |
Most cuttings root in 7–14 days under ideal conditions (72–78°F, 75–85% RH, gentle light). No visible roots by day 14 means something is wrong — check humidity first, then rooting hormone application, then medium moisture (too wet drowns developing roots). A slightly wilted-but-alive cutting at day 7 is normal; a brown, mushy stem is not.
Harvest & Curing Supplies
What supplies do I need for harvesting and curing cannabis?

The Most Important Thing Most Beginners Get Wrong
Drying too fast is the most common harvest mistake, and it's irreversible. Terpenes — the compounds responsible for your cannabis's flavor and aroma profile — are volatile compounds that degrade rapidly above 70°F or below 55% RH. A plant grown for 10–12 weeks with meticulous care can have its entire aromatic profile destroyed in 3–4 days of rushed drying in a warm room.
Target: 60°F and 60% RH for 10–14 days. This slow dry rate preserves terpenes, allows chlorophyll to break down gradually (smoother smoke), and produces the best basis for curing. If branches snap cleanly at smaller stems and buds feel dry on the outside but slightly spongy inside, they're ready to jar.
Drying and Curing Process
- 1Harvest at peak trichome maturity: Use a 30–60x loupe or digital microscope. Mostly cloudy with 0–5% amber = peak THC. Cloudy with 10–20% amber = heavier, more sedating effect. Clear trichomes = too early.
- 2Wet or dry trim: Wet trim (before drying) removes fan leaves immediately for faster, more even dry. Dry trim (after drying) is slower but preserves terpene-rich sugar leaves longer. Either approach works — choose based on your preference and available time.
- 3Hang or rack dry at 60°F / 60% RH: Maintain these conditions consistently for 10–14 days. A small oscillating fan prevents hot spots but should not blow directly on buds. Avoid light exposure — UV degrades cannabinoids.
- 4Jar and monitor curing RH: Pack loosely into glass mason jars with a mini hygrometer per jar. Target 58–62% RH inside the jar. CVault containers with Boveda humidity packs automate RH maintenance — highly recommended.
- 5Burp jars daily for the first 2 weeks: Open each jar for 10–15 minutes daily to release moisture and replenish oxygen. If RH spikes above 65% when opened, leave lids off longer. If below 55%, the dry was slightly too fast — a 62% Boveda pack will help recondition.
- 6Cure for at least 4 weeks: Two weeks is functional; four weeks is where quality noticeably improves. Many connoisseurs cure 6–8 weeks. Store in a cool, dark location — heat and light are the two fastest ways to degrade cannabinoids in cured bud.
Harvest and Curing Supplies Checklist
- Jeweler's loupe (30–60x) or digital microscope for trichome inspection
- Clean, sharp trimming scissors (at least two pairs — one gets sticky fast)
- Drying rack or hang wire in a dark, climate-controlled space
- Separate thermometer and hygrometer for the drying room
- Glass mason jars (wide-mouth quart jars are the standard)
- Mini hygrometers — one per jar for accurate monitoring
- Optional: CVault stainless containers or airtight humidity-controlled vessels
- Optional: Boveda 62% humidity packs to automate curing RH
Processing Supplies
What processing supplies are used after cannabis harvest?

Home Processing Options
| Method | Input | Output | Equipment | Skill Level |
|---|---|---|---|---|
| Dry Sift (Kief) | Trim, dried bud | Loose kief | Trim tray with mesh screen | Beginner |
| Rosin Press | Dried bud or sift | Solventless concentrate | Rosin press, parchment paper | Beginner–Intermediate |
| Bubble Hash | Trim, dried bud, ice water | Full-spectrum hash | Bubble bags, buckets, ice | Intermediate |
| Decarboxylation + Infusion | Dried bud, trim | Infused oils, butter, tinctures | Oven or decarboxylator, infusion machine | Beginner |
Processing Supplies Checklist (Home Grower)
- Trim tray with fine-mesh kief collection screen — passive kief collection while trimming
- Sharp trimming scissors or electric trimmer for larger harvests
- Food-safe nitrile gloves — keep hands clean and prevent resin contamination
- Isopropyl alcohol or resin remover wipes — scissors get sticky fast
- Airtight glass jars or humidity-controlled storage containers for processed material
- Optional: Rosin press for solventless concentrate production
- Optional: Bubble hash bags and buckets for ice water extraction
- Optional: Decarboxylator and infusion machine for edibles
Grow Room Setup — Quick-Reference FAQ
What size grow tent should I start with for cannabis?
A 4×4 ft tent is the most popular and well-supported beginner size. It accommodates a 600W–1000W LED at proper hanging height, handles 4–9 plants, and works efficiently with a standard 6-inch inline fan and carbon filter combo. A 2×4 is a solid choice for 2–4 plants if space is limited. Avoid starting larger than 5×5 — environmental control becomes significantly harder as tent volume increases.
How much does a basic cannabis grow room setup cost?
A budget 1–2 plant setup with a 2×4 tent, entry-level LED, and 4-inch fan runs $300–$500. A solid mid-range 4×4 grow with a quality 600W LED, 6-inch inline fan and carbon filter, digital meters, fabric pots, and nutrients costs $700–$1,200. Premium setups with environmental controllers and high-output lighting run $1,500–$3,000+. Budget separately for recurring costs: nutrients, media, and electricity ($60–$120/month for a 4×4).
How do I control smell from an indoor cannabis grow?
A carbon filter paired with a properly sized inline fan is the standard and most reliable solution. The fan draws all tent air through activated carbon before exhausting it outside the grow space — this neutralizes odor at the source rather than masking it. Match your filter diameter and CFM rating to your fan. Replace carbon media on a 12–18 month schedule regardless of whether you notice effectiveness degrading — it will degrade before you smell the difference.
What is PPFD and why does it matter more than wattage?
PPFD (Photosynthetic Photon Flux Density), measured in µmol/m²/s, measures how much usable light actually reaches the plant canopy per second. Wattage measures how much electricity a light consumes — two very different things. A quality 240W LED can outperform a cheap 400W LED in PPFD delivery because efficiency (photons per watt) varies widely across technologies and brands. Target PPFD: 200–400 for seedlings, 400–600 for veg, 600–900+ for flower.
What is the best pot size for indoor cannabis?
3–5 gallon fabric pots are the sweet spot for most indoor photoperiod plants. Fabric pots air-prune roots at the sides, preventing root-bound conditions and improving oxygen delivery to the root zone. Autoflowering strains often do well in 3-gallon fabric pots. Avoid transplanting seedlings directly into final 5-gallon pots — the excess wet soil around a small root ball creates anaerobic conditions and root health problems. Use progressive sizing: solo cup → 1 gallon → 3–5 gallon final.
How do I harvest and cure cannabis correctly?
Harvest when most trichomes are cloudy (use a 30–60x loupe — naked eye is insufficient). Dry at 60°F and 60% RH for 10–14 days — rushing the dry destroys terpenes irreversibly. Jar in glass mason jars with a mini hygrometer per jar and target 58–62% RH inside. Burp jars daily for the first two weeks. Cure for a minimum of 4 weeks — flavor and smoothness develop significantly beyond the two-week mark.
Everything You Need to Set Up and Grow
Tents, lights, ventilation, nutrients, meters — shop by category or ask Grōbot to help you build a complete shopping list for your budget and space.