Cannabis Indoor
Hydroponic Grow Checklist
Everything you need to plan and run a successful indoor hydroponic cannabis grow — systems compared, reservoir management, VPD explained, EC/PPM targets by stage, grow media breakdowns, and harvest timing with trichome detail.

Grow Room Setup
What are the basic grow room requirements for a hydroponic setup?
Your grow space can be a closet, spare room, or a grow tent — the core requirements are the same. What changes with hydro is the density of powered components and the presence of open water that actively raises ambient humidity.
Core Requirements
- Space: Minimum 2×2 ft — enough to fit your hydro system footprint plus the canopy above it
- Power: At least one dedicated outlet; hydro setups routinely run an air pump, water pump, chiller, circulation fans, and grow light simultaneously
- Ventilation: Active airflow in and out — passive intake is acceptable for small setups, but an exhaust fan is essential
- Lightproofing: Zero light leaks during dark cycles — critical for photoperiod strains in flower; even a brief interruption can disrupt hormonal flowering signals
- Waterproof flooring: Sealed concrete, vinyl, or a spill tray under the hydro system — spills happen, plan for them
Hydro-Specific Considerations
Plan your outlet and power strip layout before you build — surge-protected strips are strongly recommended, and all cables should be routed above the reservoir floor height. Reservoirs need floor-level access for daily top-offs, weekly cleaning, and emergency draining; account for clearance in your space plan. Exposed water surfaces actively raise ambient humidity, so your exhaust system needs more capacity than a comparable soil grow.
Route all cables above reservoir and floor level. A single spill into a tangled cable area can end your grow and create a genuine electrical hazard. Use drip loops on all power connections near water.
Grow Room Setup Checklist
- Surge-protected power strip(s) — at least one per grow zone
- Thermometer + hygrometer combo (place one at canopy height)
- Oscillating fan for constant air circulation across the canopy
- Inline duct fan + carbon filter for exhaust and odor control
- Reflective Mylar or white poly sheeting if not using a lined tent
- Waterproof floor tray or drip mat under all hydro components

Grow Tent (Optional but Recommended)
What size grow tent should I choose, and what hydro-specific features matter?
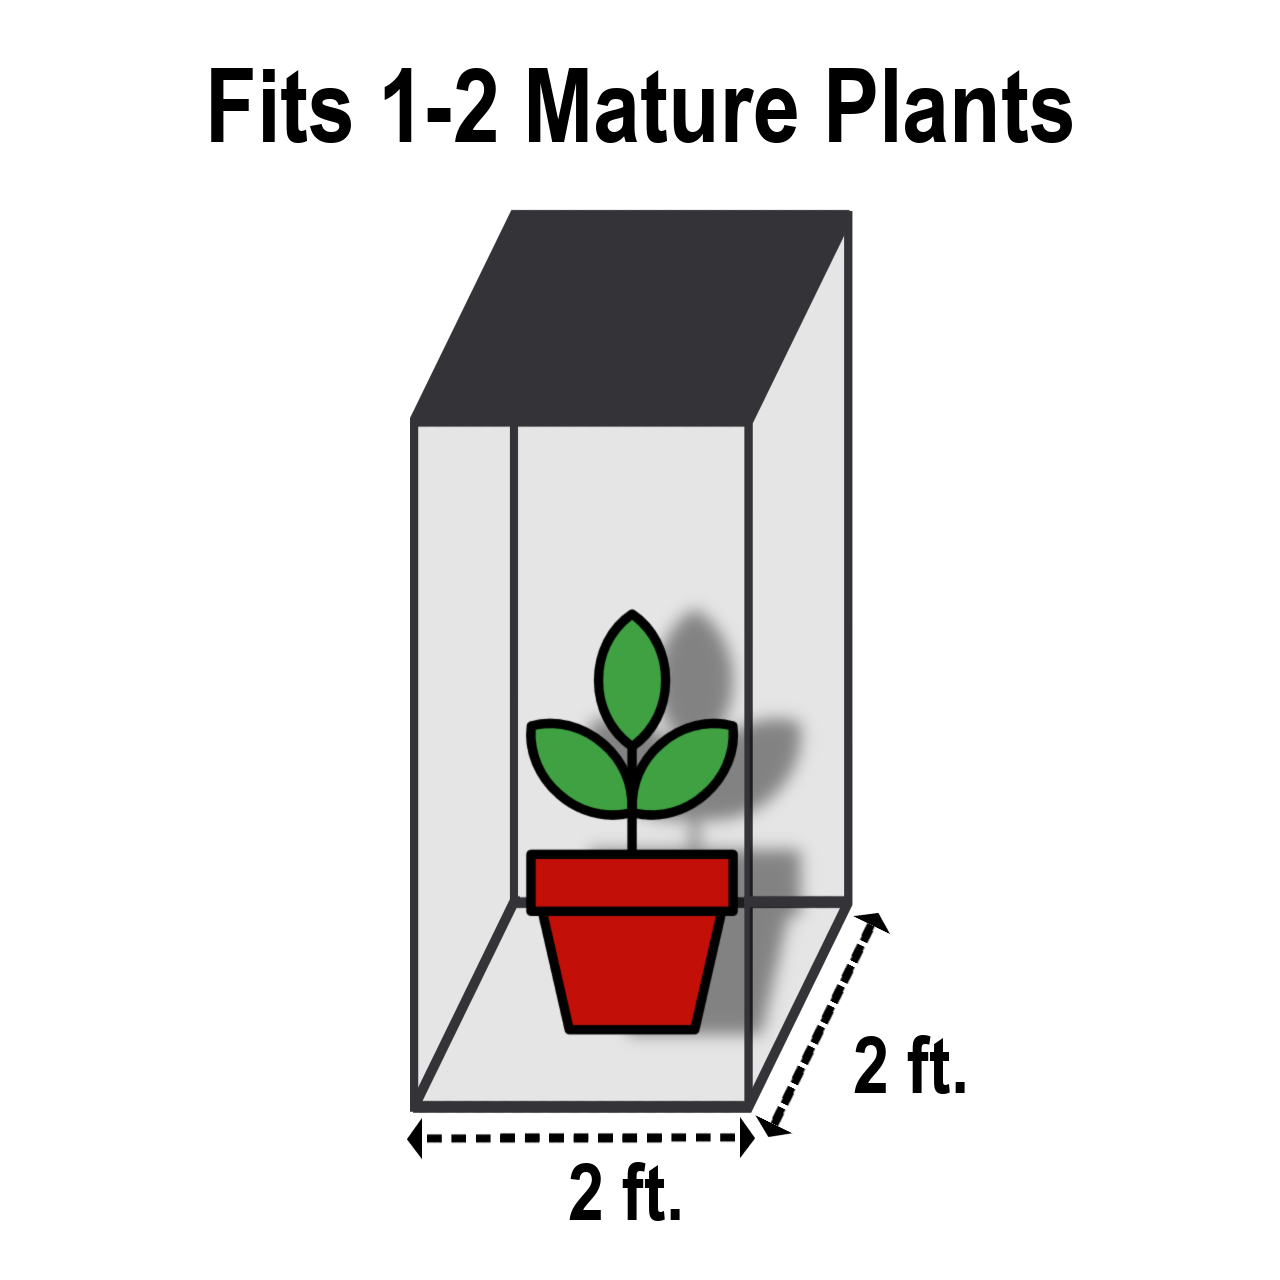
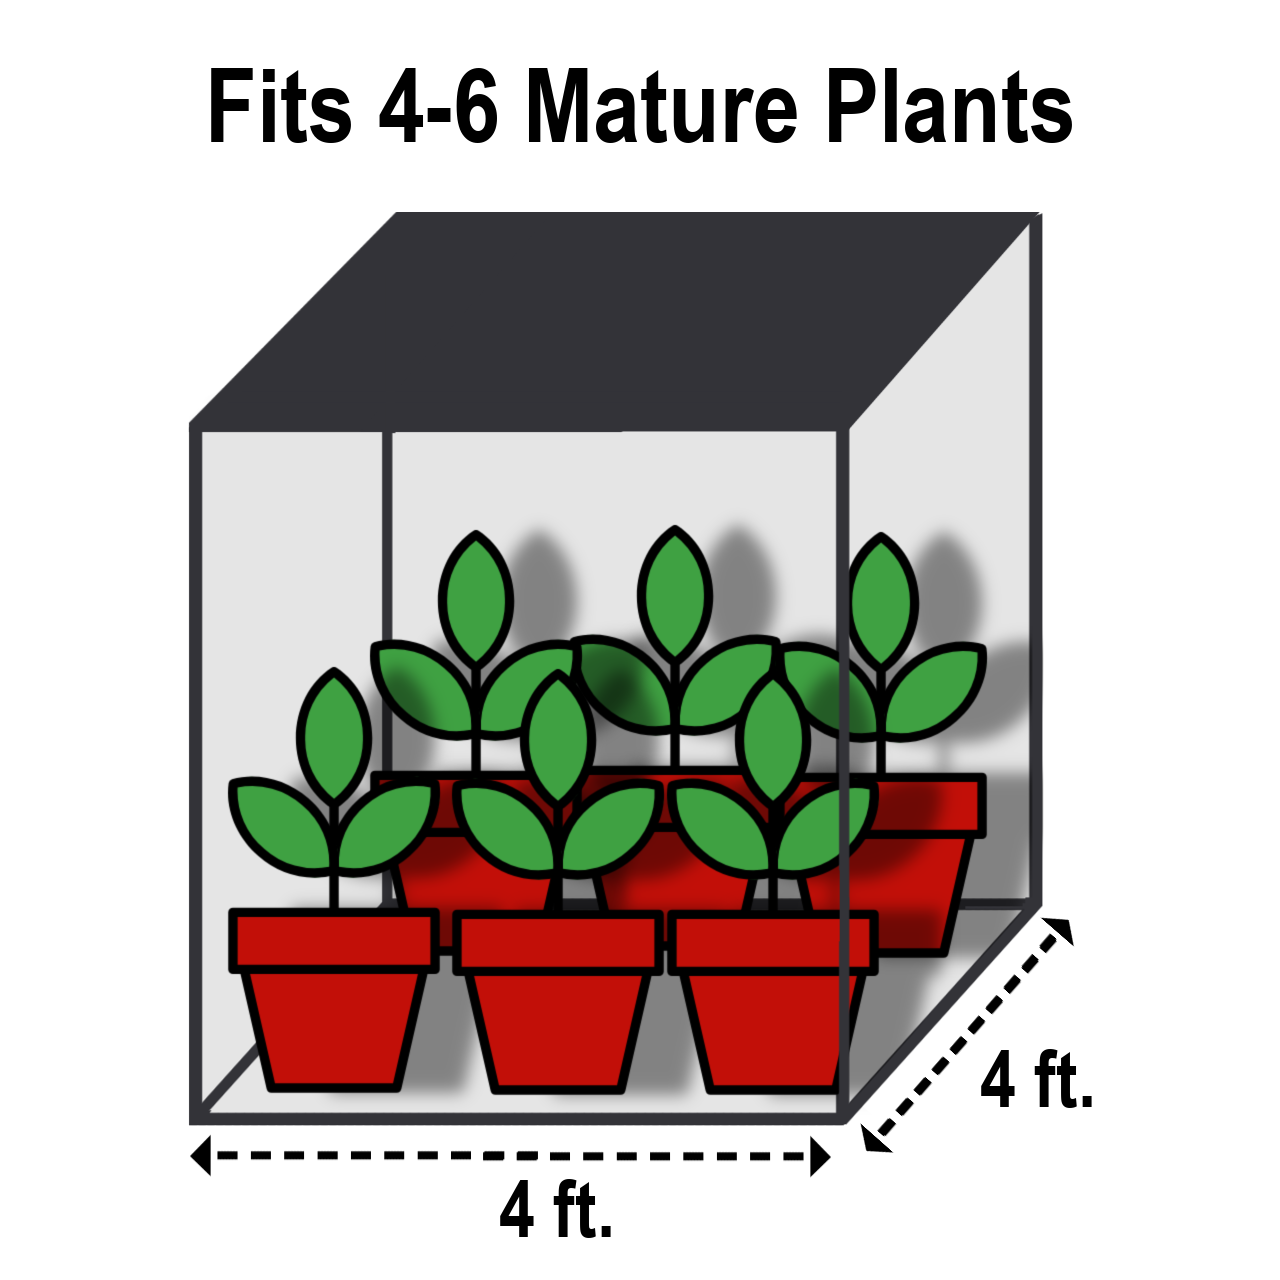
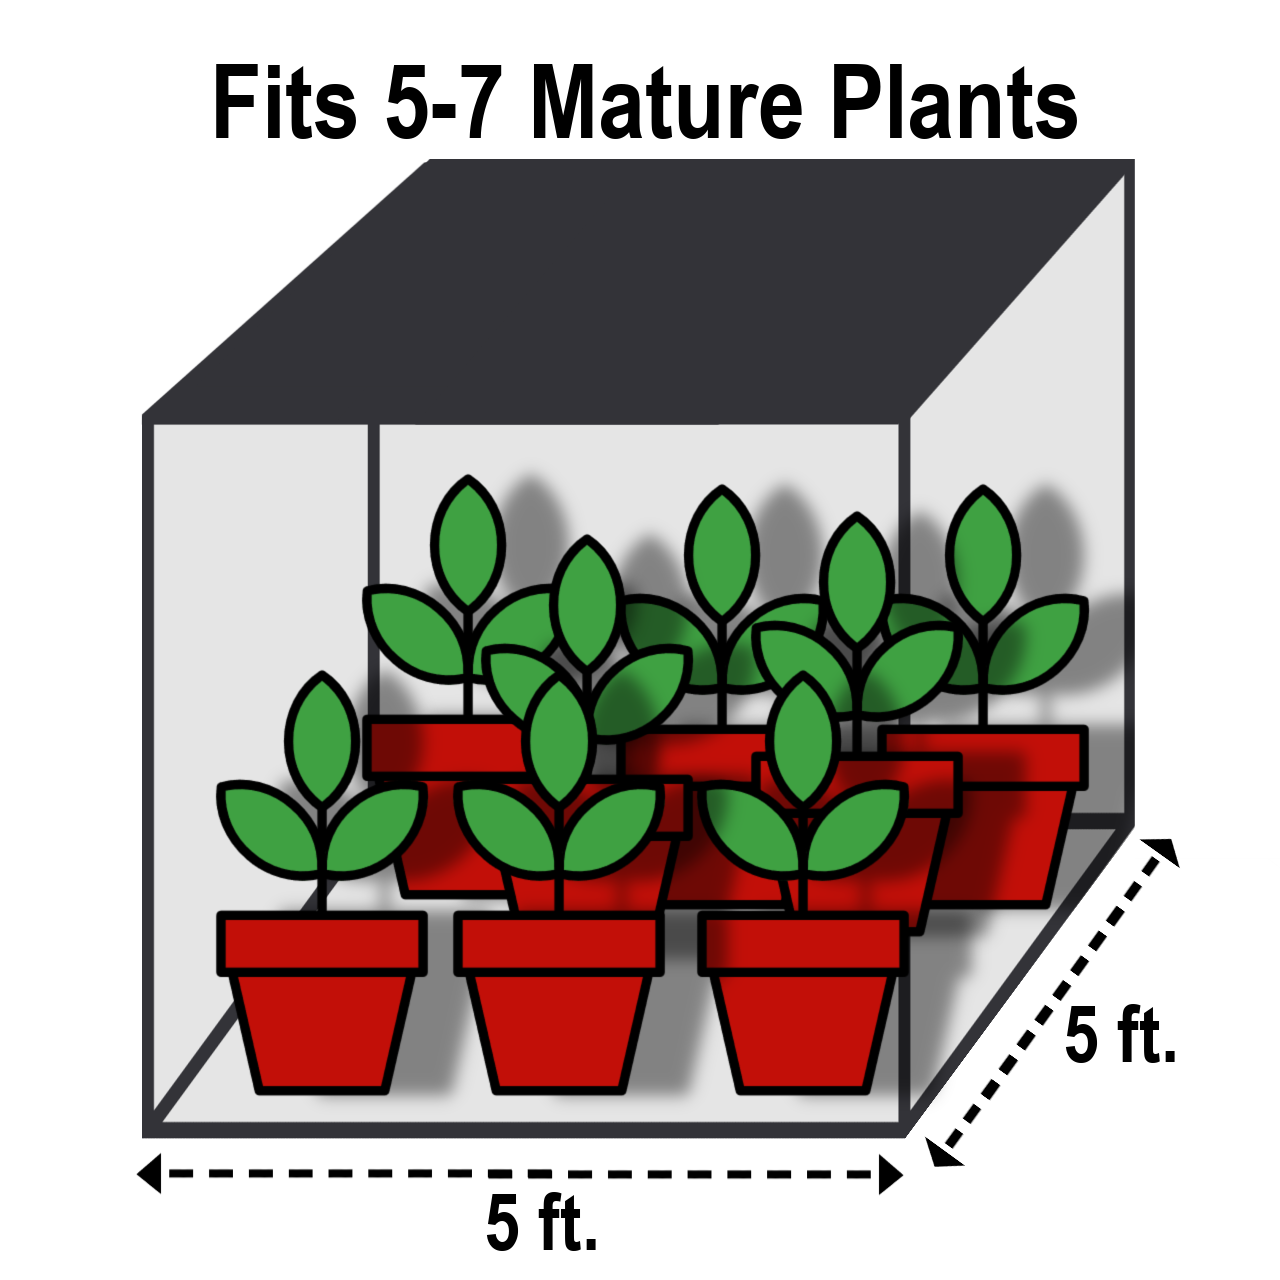
Grow tents aren't required, but they dramatically simplify a hydro grow by containing humidity, reflecting light, and keeping your environment sealed. The key difference in hydro tent selection is making sure the system footprint, reservoir access, and tubing ports all fit inside your chosen size.
Tent Size Options
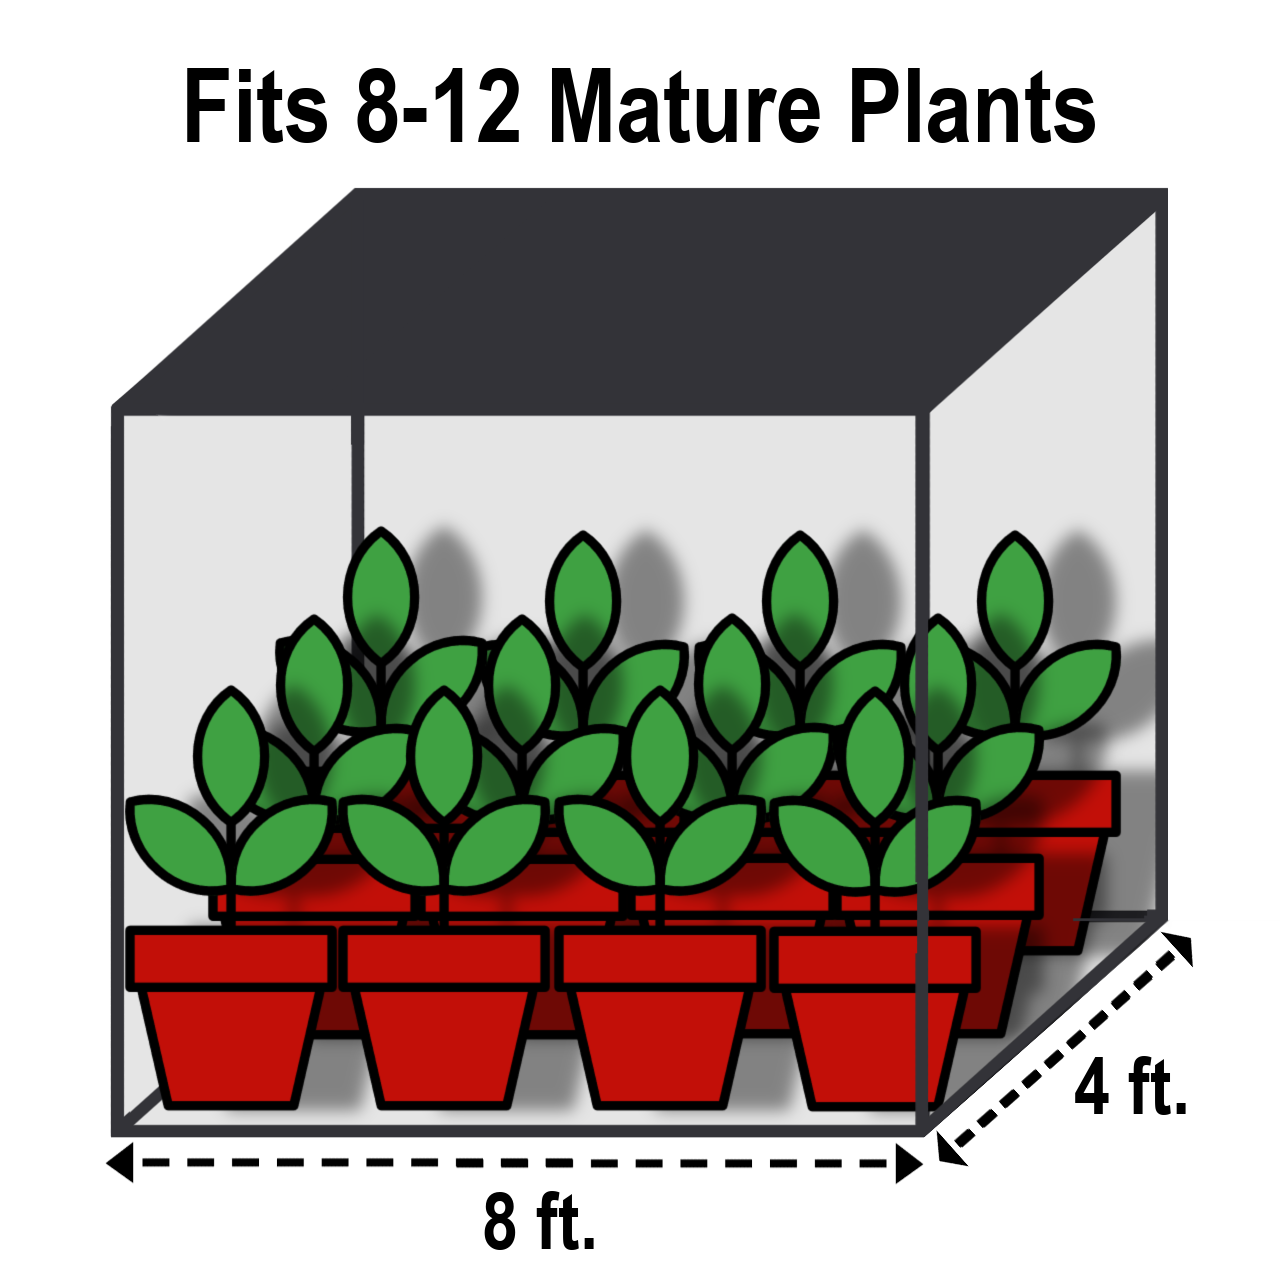
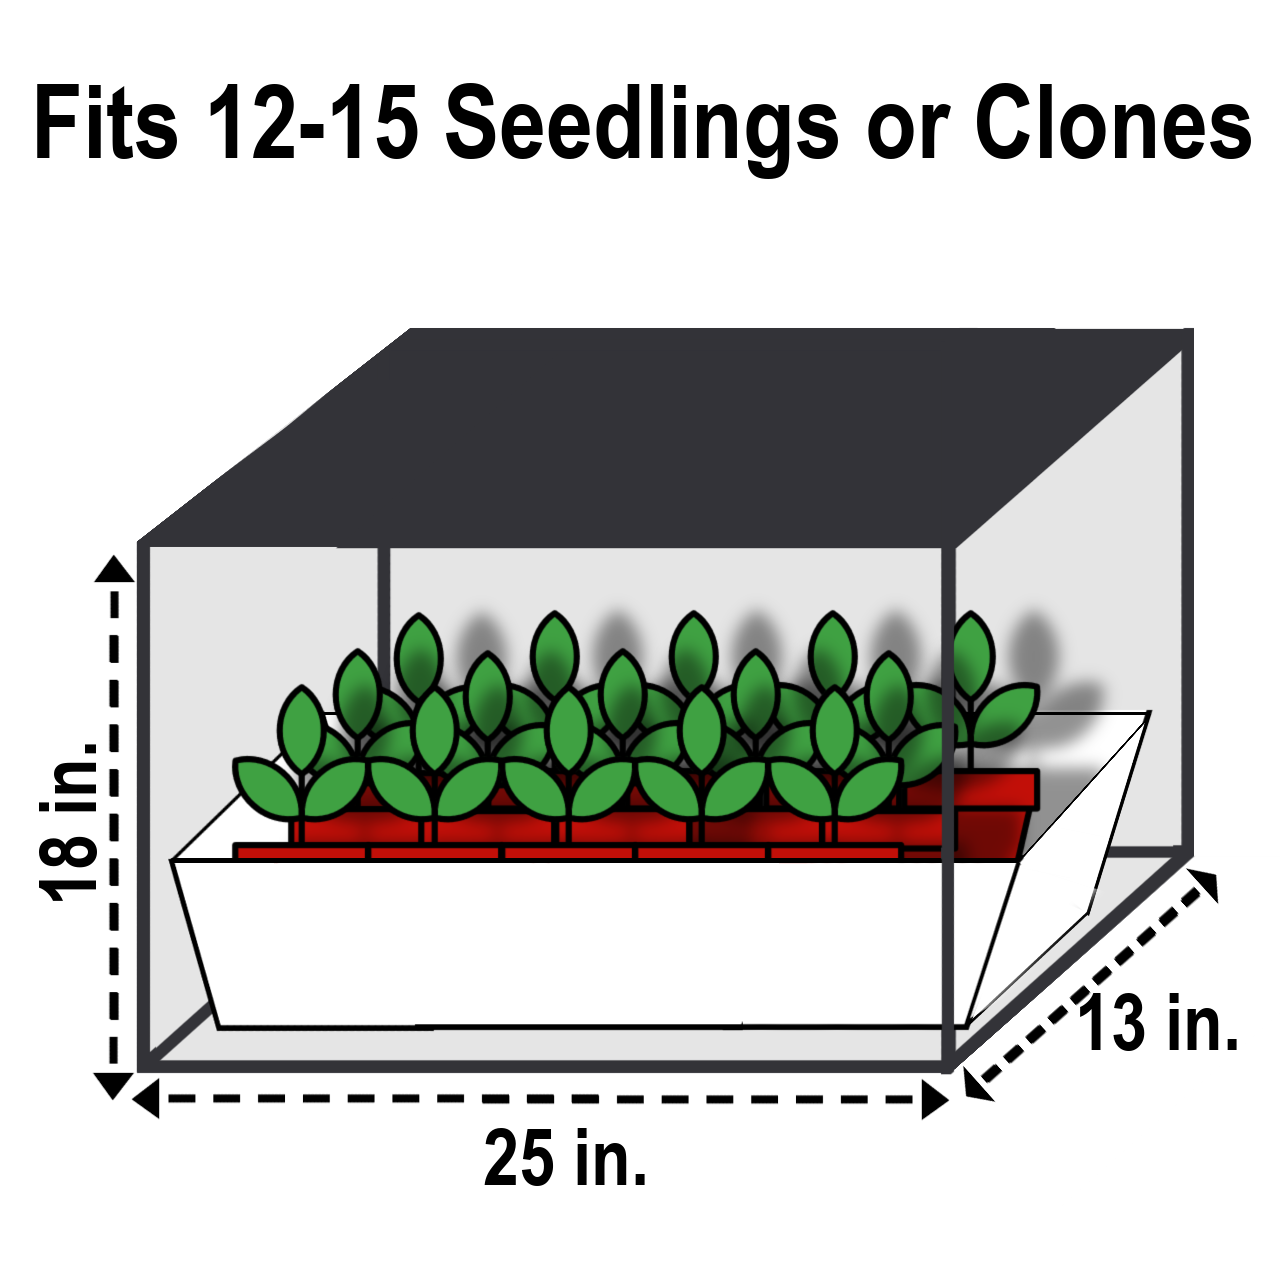
Hydro-Specific Tent Considerations
- System footprint first: Measure your reservoir and system before choosing a tent — the system sits on the floor, plants grow above it
- Reservoir access: You need to open the tent daily for top-offs and weekly for full changes; side doors or low access panels are a major convenience
- Humidity management: Exposed water surfaces naturally raise RH — ensure your tent has large enough exhaust ports for a strong fan and dehumidifier if needed
- Tubing ports: Multiple cable and duct ports simplify routing air pump tubing, water lines, and power cords
- Lightproof zippers: Essential for photoperiod strains — inspect seams and corners before the first light flip
Grow Lights
What grow lights work best for indoor hydroponic cannabis?
Light Type Comparison
| Type | Efficiency | Heat Output | Best For |
|---|---|---|---|
| LED | High | Low | All stages — beginner to advanced |
| CMH | Medium-High | Medium | Veg & flower, excellent spectrum |
| HPS | Medium | High | Flowering in large, well-ventilated spaces |
| Fluorescent/T5 | Low | Very Low | Clones and seedlings only |
Hydro-Specific Lighting Notes
Hydroponic plants typically grow faster and develop larger canopies than soil-grown plants at the same stage, so they may need more light intensity to match that accelerated growth. Keep a closer watch on canopy height and adjust your hanging ropes more frequently — what was the right distance last week may be too far today. HPS lights generate enough heat that managing both air temperature and reservoir temperature becomes significantly harder; LED is strongly preferred in any smaller hydro tent.
In DWC and RDWC, plants are fixed in position and can't be moved to chase the light. Set your hanging height and intensity carefully from the start. A PAR/PPFD meter takes the guesswork out of optimal canopy distance.
Grow Lights Setup Checklist
- Full-spectrum LED or CMH grow light (sized to your tent's square footage)
- Adjustable ratchet rope hangers
- 24-hour digital timer for automated on/off cycles
- Optional: PAR/PPFD meter for dialing in light intensity
Light Schedule & Timers
What are the correct light schedules for each growth stage in hydroponics?
| Stage | Light On | Dark | Notes |
|---|---|---|---|
| Seedling / Clone | 18–24 hrs | 0–6 hrs | Gentle light, high humidity dome |
| Vegetative | 18 hrs | 6 hrs | Hydro plants may size up faster than expected |
| Flowering | 12 hrs | 12 hrs (strict) | Any light leak during dark period can disrupt flowering |
A single light leak during the 12-hour dark period can reset hormonal flowering signals in photoperiod strains and cause re-vegging. Inspect all zipper seams, cable ports, and tent corners before flipping. Use a blackout-rated digital timer — cheap mechanical timers can drift.
Timer Setup Checklist
- 24-hour digital plug-in timer (set same on/off time every day)
- Plugged between the outlet and grow light — not shared with fans or pumps
- All light leaks sealed before first 12/12 flip
- Optional: Dual-timer setup for multi-light grows
Do autoflowering strains have a different light schedule in hydroponics?
Autoflowering strains flower based on age rather than photoperiod, which means no light flip is needed and no scheduling mistake can accidentally trigger or re-veg them. This makes autos particularly forgiving for first-time hydro growers who are still learning timer management and light cycle discipline.
Key Autoflower Considerations for Hydro
- No light flip needed: Run 18/6 or 20/4 start to finish — the plant flowers on its own timeline
- Limited veg window: Autos can't be held in veg indefinitely — training time is compressed and mistakes are harder to recover from
- Fast lifecycle: Most autos finish in 8–11 weeks total from seed — ideal for quick hydro turns
- No re-vegging risk: Light leaks won't disrupt flowering — a genuine advantage in a hydro tent you're opening daily for reservoir maintenance
If this is your first hydro grow, autoflowering strains in a DWC setup is an excellent combination. You get the speed and yield advantages of hydro without worrying about light cycle management or re-vegging from reservoir access light exposure.
Environment & Climate Control
What are the ideal temperature and humidity targets at each growth stage for hydro cannabis?
| Stage | Air Temp | Humidity (RH) | Reservoir Temp |
|---|---|---|---|
| Seedling | 70–75°F (21–24°C) | 65–70% RH | 68–72°F (20–22°C) |
| Vegetative | 72–82°F (22–28°C) | 50–70% RH | 65–70°F (18–21°C) |
| Flowering | 65–80°F (18–26°C) | 40–50% RH | 65–70°F (18–21°C) |
Hydro-Specific Climate Notes
Exposed water surfaces in DWC and RDWC setups continuously evaporate into your tent, pushing RH higher than a comparable soil grow. Plan for a stronger exhaust fan and have a dehumidifier ready for the flowering stage when hitting 40–50% RH can otherwise be difficult. Water temperature must be managed independently from air temperature — they often diverge significantly, especially under strong LED lighting. Keep reservoir water between 65–70°F (18–21°C). Above 72°F, dissolved oxygen drops sharply and anaerobic bacteria — the direct cause of root rot — proliferate rapidly.
Climate Setup Checklist
- Thermometer + hygrometer combo (one at canopy height)
- Separate water thermometer or reservoir temp monitor
- Oscillating fan for airflow and VPD management
- Exhaust fan sized for your tent (minimum 1× air exchange per minute)
- Humidifier for seedling/early veg stage if RH drops below 50%
- Dehumidifier for flowering if RH consistently exceeds 50%
- Optional: Water chiller for reservoir temps in warm climates
What is VPD and does it matter for indoor hydroponic cannabis growing?
VPD (Vapor Pressure Deficit) measures the difference between how much moisture the air can hold at a given temperature and how much it currently holds. Because temperature directly affects how aggressively the plant transpires, the same RH at different temperatures produces very different results. VPD unifies both into a single actionable number at the leaf surface.
VPD Targets by Stage
| Stage | Target VPD | Effect |
|---|---|---|
| Seedling / Clone | 0.4–0.8 kPa | Low transpiration, protects fragile root zone |
| Vegetative | 0.8–1.2 kPa | Balanced transpiration, strong growth |
| Flowering | 1.2–1.6 kPa | Elevated transpiration drives nutrient uptake; watch for mold at >1.6 |
In practice, VPD is why growers progressively raise temperature and lower humidity as plants move from seedling into flower — rather than simply dropping humidity. High VPD means the air is "thirsty" and the plant transpires more aggressively, pulling water and dissolved nutrients up through the roots. This is ideal in flower. Low VPD in flower = slow transpiration, poor nutrient uptake, and serious mold risk from stagnant humid air around dense buds.
Free VPD charts are widely available online — input your current temperature and RH to find your VPD reading. Many smart controllers and humidity monitors display VPD directly. For a first hydro grow, just use the targets above as a guide and cross-reference with your thermometer/hygrometer readings to develop intuition.
Choosing a Hydroponic System
What types of hydroponic systems are available for cannabis, and which is best for beginners?
| System | Best For | Difficulty | Cost | Growth Speed |
|---|---|---|---|---|
| DWC | Beginners, 1–4 plants | Easy | $ | Fast |
| Top-Feed / Drip | Small tents, DIY builders | Easy–Med | $ | Moderate |
| RDWC | Multi-plant, intermediate | Intermediate | $$ | Very Fast |
| Ebb & Flow | Mid-size grows, trays | Medium | $ | Fast |
| NFT | Space-efficient setups | Medium | $$ | Fast |
System Breakdowns
DWC (Deep Water Culture): Roots hang directly in a bucket of oxygenated, nutrient-rich water. One bucket per plant, one air pump, one air stone. Simple, fast, and the most forgiving of the recirculating systems. Sensitive to water temperature — keep below 70°F. Best for beginners running 1–4 plants.
Top-Feed / Drip: Nutrient solution delivered from above and drains back to a central reservoir. Easy to build or automate with a timer and pump. Works well in coco or clay pebbles. Lower risk of root zone issues than DWC. Fewer clogging issues than drip tape if using coarse media.
RDWC (Recirculating DWC): Multiple DWC buckets connected to a central reservoir via tubing and a water pump. Central reservoir makes monitoring easy but requires more plumbing and more frequent cleaning. Extremely fast growth. Best for intermediate to advanced growers with 4+ plants.
Ebb & Flow (Flood & Drain): A grow tray is periodically flooded with nutrient solution and then drained back to the reservoir. Excellent oxygenation between flood cycles. Needs precise setup to prevent overflow. Works well with timers and is great for mid-size grows on raised tables.
NFT (Nutrient Film Technique): A thin, continuous film of nutrient solution flows over the roots in a sloped channel — roots are exposed to both solution and air simultaneously. Highly oxygenated. Space-efficient. Less forgiving of pump failures than DWC since there's no reservoir buffer at the root level. A strong intermediate option for growers who want maximum oxygenation in a compact footprint.
Basic DWC Checklist (Beginner Starting Point)
- 3–5 gallon food-safe, light-blocking bucket per plant
- Net pot lid and hydroton (clay pebbles) for plant support
- Air pump + tubing + air stone (1 per plant site)
- pH meter and EC/PPM meter
- pH up/down adjusters
- Light-blocking lid or reservoir cover to prevent algae
- Backup bucket for reservoir changes and emergency draining
Grow Media
What grow media should I use for hydroponic cannabis?
| Media | Drains Fast | Holds Water | Air Space | pH Stable | Reusable |
|---|---|---|---|---|---|
| Clay Pebbles | ✓✓ | ✗ | ✓✓ | ✓ | ✓ |
| Rockwool | ✗ | ✓✓ | ✓ | ✗ | ✓* |
| Coco Coir | ✓ | ✓✓ | ✓ | ✓ | ✓ |
| Perlite | ✓✓ | ✗ | ✓✓ | ✓ | ✓ |
| Vermiculite | ✗ | ✓✓✓ | ✗ | ✓ | ✓* |
* Rockwool and vermiculite can be sterilized and reused by hobbyists, though commercial growers rarely do so.
Media Deep Dives
Clay Pebbles (Hydroton): The default hydro media. Excellent drainage and airflow, inert and pH-stable, fully reusable if cleaned properly between cycles. Best for DWC, flood & drain, and top-feed setups. Rinse well before use to remove clay dust.
Rockwool: The standard for germinating seeds and rooting clones. Excellent water retention and easy to handle in small cubes. Requires pre-soaking in pH 5.5 water before use — rockwool's natural pH runs alkaline and will pull your solution out of range until it's conditioned. Can be sterilized and reused by home growers.
Never use raw coco coir straight from the bag without pre-buffering. Raw coco aggressively chelates (binds) calcium and magnesium from your nutrient solution — stripping them from the water even when your EC looks correct. Pre-buffer by soaking coco with a diluted cal-mag solution (following label rate) until runoff EC stabilizes. Skipping this step is one of the most common causes of calcium deficiency in coco grows.
Perlite: Extremely lightweight, superb drainage, and maximum air space near roots. Used almost exclusively as an amendment — blend 30% perlite into coco for a highly forgiving, well-draining top-feed substrate.
Vermiculite: High water retention and good for seedling propagation mixes. Not ideal as a standalone hydro media due to poor drainage, but useful when blended with coco or perlite for seed-starting applications.
Beginner Recommendations
- DWC / RDWC / Ebb & Flow: Use clay pebbles as your primary media
- Starting seeds or clones: Use rockwool cubes — pre-soak in pH 5.5 water for 30–60 minutes first
- Top-feed / drain-to-waste: Coco with 30% perlite is forgiving and gives a soil-like feel
- Always rinse media before first use to remove dust and debris
Watering & Reservoir Management
How do I set up and maintain my hydroponic reservoir?
In hydroponics there is no "watering" in the soil sense. Your plants live in or above a reservoir of nutrient-rich, pH-balanced water 24/7. That water must be oxygenated, kept within temperature range, and monitored daily for chemistry drift. Get this right and hydro's speed advantage is enormous. Let it slip and problems emerge within 24–48 hours.
Reservoir Best Practices
- 1Top off daily — Plants drink constantly. Add clean, pH-adjusted water to maintain the fill level. As water drops, nutrient concentration (EC) rises — topping off with plain water keeps it stable between full changes.
- 2Full reservoir change every 7–14 days — Drain completely, scrub all surfaces in contact with water, and remix fresh nutrient solution. This prevents salt buildup, biofilm, and pathogen accumulation that no amount of top-offs will correct.
- 3Keep water at 65–70°F (18–21°C) — This is the single most important reservoir parameter. Above 72°F, dissolved oxygen plummets and anaerobic bacteria proliferate. A water chiller is the most reliable solution in warm climates.
- 4Check pH and EC daily — Both drift as plants feed and metabolize ions. pH can move 0.5 points or more overnight in a healthy DWC system. Always adjust.
- 5Use a clean water source — Filtered or reverse osmosis (RO) water gives you the most control. Tap water quality varies significantly by municipality and can affect pH stability and baseline EC.
Reservoir Setup Checklist
- Food-safe, light-blocking reservoir (5–20 gallons depending on system)
- Air pump + tubing + air stones (1 per plant site minimum)
- Submersible water pump (for draining or mixing nutrient solution)
- pH meter and EC/PPM meter (both required)
- pH up and pH down adjusters
- Water thermometer or reservoir temp monitor
- Clean water source (filtered or RO preferred)
- System cleaner (H₂O₂, enzymes, or hydro-safe sanitizer)
Why are my roots brown and slimy? How do I fix root rot?
Healthy hydro roots are white or cream-colored with a clean, slightly musky smell. Brown slime with a foul odor is Pythium root rot. It spreads aggressively and can kill a plant in days if untreated. In DWC, it's almost always caused by one or more of three factors: water too warm (above 72°F), insufficient dissolved oxygen, or light entering the reservoir.
Causes of Root Rot
- Warm water: Above 72°F dissolved oxygen drops sharply; anaerobic bacteria flourish
- Insufficient aeration: Too weak an air pump, air stones blocked or degraded, inadequate air stone coverage
- Light leaks into the reservoir: Light fuels algae; algae depletes oxygen and harbors bacteria
- Dirty reservoir: Skipping full water changes allows biofilm and pathogens to accumulate
Treatment and Prevention
Option A — Beneficial bacteria (preferred for prevention): Products like Hydroguard or Great White contain Bacillus subtilis and mycorrhizal fungi that colonize root zones and outcompete Pythium. Add at every reservoir change. Works best as a preventive measure in a well-maintained system.
Option B — Hydrogen peroxide (treatment): Add 1–3 mL of 3% food-grade hydrogen peroxide per gallon of reservoir water to suppress algae and kill anaerobic pathogens. H₂O₂ breaks down rapidly so reapply after each top-off. Do not use H₂O₂ together with beneficial bacteria products — it will kill them. Pick one approach and stick with it.
If you're fighting recurring root rot, get your reservoir under 68°F before trying anything else. No amount of additives reliably overcomes chronically warm water. At optimal temps (65–68°F), water holds 8–9 mg/L of dissolved oxygen — the level where Pythium can't establish.
How do I prevent algae in my hydroponic reservoir?
Algae in the reservoir competes with your plants for oxygen and nutrients, harbors bacteria, and can physically clog air stones and tubing. The solution is simple: algae requires light and water. Remove the light and algae cannot survive, regardless of what else is in your reservoir.
- Light-blocking lids or covers on all reservoirs and buckets — check that light can't enter through cable holes or cracks
- Opaque tubing for all water and air lines that pass through lighted areas
- Covered ports — wrap exposed fittings or openings with light-blocking tape
- Full reservoir change every 7–14 days — prevents any established algae from taking hold
- H₂O₂ treatment at 1–3 mL/gal can knock back existing algae, but light exclusion must accompany it or algae will return
Organic and kelp-based nutrients introduce particles that fuel algae and biofilm in recirculating systems. Particle-free synthetic nutrient lines are the standard for DWC and RDWC. Organic inputs work well in drain-to-waste coco or rockwool setups where the medium acts as a filter.
What's the difference between RO water, filtered water, and tap water for hydroponics?
| Water Type | Starting EC | Control Level | Key Consideration |
|---|---|---|---|
| RO (Reverse Osmosis) | ~0.0 | Maximum | Requires baseline cal-mag supplementation; RO strips minerals |
| Filtered | 0.1–0.3 | High | Removes chlorine/chloramine; good balance for most growers |
| Tap (conditioned) | 0.2–0.8+ | Medium | Must neutralize chloramine; hard water areas may have high baseline EC |
Tap Water Notes
Most municipal water now uses chloramine rather than chlorine as a disinfectant. Unlike chlorine, chloramine does not off-gas by sitting overnight — it requires vitamin C (ascorbic acid) treatment or a carbon filter to neutralize. Using untreated chloramine-dosed tap water can inhibit the beneficial bacteria products you're counting on for root zone health. Check your local water report to confirm which disinfectant your utility uses.
If your tap water has high baseline EC (0.4+), your nutrient headroom is reduced. For example, if your seedling target is 0.6 EC total and your water already starts at 0.4, you only have 0.2 EC worth of nutrient to add. Growers in hard water areas often switch to RO or at minimum use a whole-house filter.
RO water starts at essentially zero EC and zero alkalinity, which gives you perfect control — but requires you to add a baseline of calcium and magnesium before nutrients since you're starting from truly clean water.
Nutrients
For complete nutrient guidance including EC/PPM targets by stage, feeding schedules, and deficiency diagnosis, see Module 09 — Nutrients Guide →
Seeding, Cloning & Propagation
How do I germinate seeds and root clones for a hydroponic grow?
Germination & Propagation Tips
- Seeds germinate best at 72–78°F (22–26°C) in warm, moist (not soaked) conditions
- Pre-soak rockwool cubes in pH 5.5 water for 30–60 minutes before planting seeds
- Use a humidity dome or plastic cover to retain 80–90% RH during germination
- Clones need high humidity and low light intensity while rooting — high light causes wilting before roots establish
- Dip clone cuttings in rooting gel or powder before planting into plugs
- Do not overwater — plugs need oxygen near developing roots too
- Expect visible root emergence in 7–14 days for most strains
Propagation Methods
Seeds: Germinate directly in a rockwool cube or starter plug. Once the taproot is visible and the seedling has its first true leaves, transfer the whole plug into your hydro net pot.
Clones: Take 4–6 inch cuttings from a healthy mother plant. Make a clean 45° cut, dip in cloning gel, and insert into a dampened rockwool plug or propagation media in an aeroponic cloner. Maintain 75–80% RH and 73–78°F until roots emerge.
Propagation Setup Checklist
- Propagation tray with humidity dome
- Rockwool cubes or root plugs (pre-soaked to pH 5.5)
- Heat mat (optional but speeds germination in cool environments)
- Rooting gel or powder
- Spray bottle for maintaining humidity
- Low-intensity grow light or T5 fluorescent
Garden Tools & Maintenance
What garden tools and maintenance supplies do I need for a hydro grow?
General Garden Tools
- Trimming scissors — keep sanitized for pruning, training, and harvest
- Trellis netting or soft plant ties for canopy management and SCROG setups
- Spray bottles or pump sprayers for foliar feeding or pest prevention sprays
- Clean gloves for handling plants and reservoir components
- Measuring syringes and graduated cylinders for nutrients and pH adjusters
Hydro-Specific Tools
- Reservoir scrub brush — for cleaning inside tanks and buckets
- Tubing brushes or pipe cleaners — clean all air and water lines on every reservoir change
- Extra air stones and airline tubing — swap in clean ones while soaking used ones
- Submersible pump — for draining and refilling reservoir (much faster than scooping)
- Food-grade hydrogen peroxide or hydro-safe sanitizer for system cleaning
- Isopropyl alcohol wipes for sanitizing scissors and measuring tools
Hydro Cleaning Schedule
- Clean and sanitize the entire hydro system every full reservoir change (every 7–14 days)
- Flush and scrub all surfaces in contact with water — prevent biofilm buildup
- Wipe down tent surfaces and poles every 1–2 weeks to prevent pest and mold harboring
- Replace worn air stones — they become less efficient after 4–6 weeks of continuous use
Plant Training: Topping, Pruning & More
What plant training techniques work best in a hydroponic grow?
Key Training Techniques & Timing
| Technique | Best Timing | Effect |
|---|---|---|
| Topping | 4–6 nodes (early veg) | Creates two main colas from one; encourages bushy growth |
| FIMing | 4–6 nodes (early veg) | Similar to topping but less precise; may create 3–4 new tops |
| LST (Low Stress Training) | Early veg → through stretch | Bends stems to open canopy; no recovery time needed |
| Defoliation | Light pruning in veg; heavier before flip | Improves light and airflow to lower bud sites |
| SCROG | Late veg (weave through net) | Spreads canopy horizontally; maximizes light coverage |
| Super Cropping | Late veg through first 7–10 days of flower | Crimps stems to control height/stretch during transition |
Hydro Training Notes
Hydro plants grow faster and bushier than soil plants at the same age — start training earlier than you would in soil and monitor the canopy closely. SCROG works exceptionally well in DWC and RDWC because the plants are fixed in position, making the canopy geometry predictable; just ensure your net setup still allows clear access to the reservoir for daily maintenance. Hydro plants recover from training stress faster due to continuous oxygen and nutrient delivery, so topping, FIMing, and defoliation can generally be done a bit more assertively — but always watch strain-specific response.
Super crop during late veg or within the first 7–10 days of flower (the stretch phase) when plants are directing energy toward structure. Performing it mid-to-late flower stresses the plant when it needs all available energy for bud production and recovery becomes difficult.
Recommended Training Tools
- Clean, sharp pruning scissors (sanitized between plants)
- Soft plant ties, coated wire, or LST anchors
- Garden stakes or clips for bending support
- Trellis netting for SCROG setups (ensure reservoir remains accessible below)
- Gloves when defoliating or working with sticky resin-covered leaves
Pest & Disease Prevention
How do I prevent pests and diseases in a hydroponic cannabis grow?
Common Threats to Watch For
| Pest / Disease | Signs | Notes |
|---|---|---|
| Spider Mites | Fine webbing, speckled/stippled leaves | Thrive in hot, dry conditions; spreads rapidly |
| Aphids & Thrips | Distorted new growth, silvery streaks | Sap-sucking pests; introduce beneficial insects early |
| Powdery Mildew | White powdery coating on leaves | High humidity + poor airflow; common in flower |
| Fungus Gnats | Small flies around media, larvae in substrate | Not relevant in open-water DWC; applies to coco/rockwool top-feed setups only |
| Root Rot (Pythium) | Brown slimy roots, wilting despite wet conditions | See Section 8 for full treatment protocol |
| Bud Mold (Botrytis) | Gray/brown rotting inside dense buds | High humidity + poor airflow in flower; catastrophic if uncaught |
Prevention First
- Keep RH at 40–50% in flower — the single most effective bud mold and powdery mildew prevention
- Maintain strong, consistent airflow across the canopy with oscillating fans
- Place yellow sticky traps in the grow space to monitor for flying pests — check weekly
- Quarantine new clones or mother plants for 1–2 weeks before introducing to your grow
- Sanitize all tools (scissors, stakes, nets) with isopropyl alcohol between uses
- Clean and inspect the entire system at every reservoir change
Never apply neem oil during flowering. Neem residues persist in bud tissue and when combusted produce breakdown products considered harmful. Use neem oil as a preventive spray in vegetative stage only. For flowering-safe alternatives, consider potassium silicate, Spinosad-based sprays, or diluted hydrogen peroxide for targeted pest management.
IPM Starter Kit (Hydro-Safe)
- Yellow sticky traps for monitoring flying pests
- Neem oil (vegetative stage only — never in flower)
- Spinosad-based spray (flowering-safe for thrips and larvae)
- Potassium silicate (strengthens cell walls, reduces pest damage)
- Beneficial microbes (Bacillus subtilis) for foliar disease prevention
- Clean gloves, sanitized scissors, and tent surface wipes
Harvest & Curing
When and how do I harvest and cure hydroponic cannabis?
Trichome Harvest Windows
The naked eye is not sufficient for accurate trichome reading — get a jeweler's loupe (30–60x) or a digital microscope with a macro lens. You're looking at the trichome heads on the buds themselves (not the sugar leaves, which amber earlier).
| Trichome Appearance | Cannabinoid Profile | Effect |
|---|---|---|
| Still clear / translucent | THC not yet fully developed | Too early — wait |
| Mostly cloudy, 0–5% amber | Peak THC, minimal CBN | Energetic, cerebral, uplifting |
| Cloudy with 10–20% amber | THC beginning to degrade to CBN | Heavier, more relaxing, better for sleep |
| 20%+ amber | Significant THC degradation | Overripe for most purposes |
Pre-Harvest Flush: Contested Practice
The practice of flushing — running plain water through the system for 1–2 weeks before harvest to "clear" residual nutrients — is widely recommended but scientifically contested. A 2019 peer-reviewed study found flushing did not significantly improve smoke quality in controlled blind taste tests. Many commercial hydro growers skip it entirely. However, flushing remains a common precaution for growers using high-dose synthetic nutrient programs where salt accumulation is likely. If you flush, reduce reservoir EC to near zero (under 0.4 EC) for the final 5–10 days before harvest.
A 2019 study (Zheng et al., HortScience) found flushing did not significantly improve smoke quality in blind taste tests. Many commercial growers skip it. However, flushing remains widely recommended as a precaution on heavy synthetic programs where salt accumulation is likely. If you flush, reduce EC to near zero for the final 5–10 days.
Drying & Curing
- 1Hang or rack dry in a dark room at 60°F / 60% RH — aim for a slow, even dry over 7–14 days. Faster drying = harsher smoke.
- 2Trim either before drying (wet trim) for faster dry time or after drying (dry trim) to preserve terpenes and cure more slowly.
- 3Jar and monitor — pack buds loosely into glass mason jars. Place a mini hygrometer in each jar. Target 58–62% RH inside the jar.
- 4Burp daily for the first 1–2 weeks — open jars for 10–15 minutes each day to release moisture and replenish oxygen.
- 5Cure for 3–4 weeks minimum — flavor and smoothness develop substantially beyond the first 2 weeks. Many connoisseurs cure 6–8 weeks.
Harvest Setup Checklist
- Jeweler's loupe (30–60x) or digital microscope for trichome inspection
- Trimming scissors (clean and sharp)
- Drying rack or hang wire in a dark, climate-controlled space
- Mini hygrometers for drying room and inside jars
- Glass mason jars for curing and storage
- Clean gloves for handling trimmed bud
- Optional: Humidity packs (62% Boveda) to maintain cure RH automatically
Processing Supplies
What processing supplies do I need after harvesting hydroponic cannabis?
Processing Options
- Final trim: Clean up buds for appearance, storage, and smoking quality
- Kief collection: Use a trim tray with fine-mesh screen to catch trichomes as you trim
- Rosin pressing: Solventless concentrate extraction using heat and pressure — no solvents required
- Infusing: Decarb and infuse trimmed flower into oils, butter, or tinctures for edibles
- Long-term storage: Airtight glass jars, CVaults, or vacuum-sealed pouches in a cool, dark location
Processing Setup Checklist
- Trim tray with fine-mesh kief collection screen
- Sharp trimming scissors (electric trimmer optional for large harvests)
- Food-safe gloves for handling processed bud
- Alcohol wipes or resin remover for cleaning scissors
- Airtight glass jars or humidity-controlled storage containers
- Optional: Rosin press or pollen press for concentrate production
Hydroponic Grow — Quick-Reference FAQ
What is the ideal reservoir temperature for hydroponic cannabis?
Keep your reservoir water between 65–70°F (18–21°C). Above 72°F, dissolved oxygen drops sharply and anaerobic bacteria — the direct cause of Pythium root rot — proliferate rapidly. A water chiller is the most reliable long-term solution in warm grow spaces.
How often should I change my hydroponic reservoir?
Do a full drain-and-remix every 7–14 days. Between full changes, top off daily with pH-adjusted clean water to replace what plants consume. Skipping full changes allows salt buildup, biofilm, and pathogen accumulation that top-offs alone cannot correct.
What EC/PPM should my hydroponic cannabis reservoir be?
Target 0.4–0.8 EC for seedlings, 0.8–1.8 EC through vegetative growth, 1.6–2.4 EC during flower, and 0–0.4 EC for pre-harvest flush. Always measure with a calibrated EC meter and adjust pH to 5.5–6.5 after confirming EC.
What is VPD and do I need to track it for hydro cannabis?
VPD (Vapor Pressure Deficit) is a more precise climate metric than RH alone because it accounts for the interaction between temperature and humidity at the leaf surface. Target 0.4–0.8 kPa in seedling, 0.8–1.2 kPa in veg, and 1.2–1.6 kPa in flower. Serious hydro growers use VPD targets rather than RH alone.
Why is my pH drifting so fast in my DWC reservoir?
pH drift is normal and expected in DWC. As plant roots absorb nutrient ions at different rates, the water chemistry changes and pH shifts. Fast drift usually means active, healthy roots consuming nutrients rapidly. Use RO or filtered water (which has low buffering capacity) and expect to adjust pH daily. Allowing pH to cycle naturally between 5.5 and 6.5 — rather than chasing a single number — ensures all micronutrients pass through their optimal uptake windows.
When should I harvest hydroponic cannabis?
Use a 30–60x jeweler's loupe or digital microscope to examine trichomes on the buds (not sugar leaves). Mostly cloudy with 0–5% amber = peak THC, energetic effect. Cloudy with 10–20% amber = heavier and more relaxing. Over 20% amber = overripe. Clear trichomes mean the plant needs more time.
Everything You Need for a Successful Hydro Grow
Systems, nutrients, meters, grow media, lights — shop by category or ask Grōbot to build your complete hydro shopping list.