Grow Tents & Starter Kits:
Complete Indoor Setup Guide
Everything you need to choose, size, and set up an indoor cannabis grow tent — including CFM fan sizing formulas, fabric quality explained, corrected environment targets by stage, kit contents, and the best beginner setups with specific wattage guidance.
Grow Tent Basics & Benefits
What are the benefits of using a grow tent for cannabis cultivation?
For most home growers, a grow tent is the superior alternative to converting a bare closet or room. It provides a pre-built, repeatable environment with integrated mounting points for lights, fans, and ducting — without any permanent modification to your space.
Key Benefits with Mechanisms
- Light efficiency — Mylar reflectivity: The reflective Mylar interior bounces approximately 95–97% of incident light back toward the canopy, compared to ~85–90% for flat white paint. In practice this improves light uniformity across corners and edges — plants at the tent perimeter receive meaningfully more light than they would in an unlined room, effectively increasing usable output without adding wattage.
- Odor containment: The sealed tent ensures all exhaust air passes through the inline fan and carbon filter before leaving the space. Without a tent's containment, odor diffuses through walls and HVAC before the filter can address it.
- Climate control: Temperature, humidity, and airflow are all managed within a fixed, known volume. Dialing in a 4×4 tent environment is far more predictable than trying to manage a whole room or basement zone.
- Pest and contamination barrier: The zippered, sealed enclosure physically blocks flying insects, airborne mold spores, and contaminants from reaching your plants. One of the most effective forms of IPM for home growers costs nothing extra.
- Stem strengthening through air movement: Oscillating fans inside the tent cause constant micro-flexing of stems, triggering thigmomorphogenesis — the plant's response to mechanical stress that produces additional lignin and structural tissue. Stronger stems support heavier bud development and are more resistant to snap during late-flower weight gain.
- Portability and renter-friendliness: A grow tent requires zero permanent installation — no drilling, no structural modification. It can be broken down and moved between locations in under an hour.
Are grow tents completely smell-proof?
Cannabis odor intensity increases dramatically in the final 2–3 weeks of flower as terpene production peaks. A tent without an active carbon filtration system will not contain this. What makes the combination effective is the tent's airtightness forcing all exhausted air through the activated carbon bed before it exits.
What Effective Odor Control Requires
- Inline fan sized for 1–3 minute air exchange: The entire tent air volume should turn over completely every 1–3 minutes. At this rate, terpene-loaded air doesn't accumulate before being processed. (Five minutes is too slow — heat and humidity build significantly between exchanges.)
- Carbon filter matched to fan diameter and CFM: A 6-inch fan requires a 6-inch carbon filter. Mismatched sizes allow bypass. The filter's CFM rating should meet or exceed the fan's rating.
- All unused ports sealed: Every unsealed cable port, zipper gap, or duct opening is a direct odor escape that bypasses the filter entirely
- Replace carbon media every 12–18 months: Activated carbon effectiveness degrades before you can detect the change — don't wait until breakthrough odor confirms the failure
- Pre-filter sleeve maintenance: The outer fabric sleeve on carbon filters extends media life; clean or replace it every 4–6 weeks during heavy flowering cycles
If your carbon filter is older than 12 months, replace it before entering the final 3 weeks of flower — not after you notice odor breaking through. A new filter costs far less than the consequences of odor escaping during the most aromatic phase of the grow.
Does using a grow tent make growing cannabis easier?
Why Tents Reduce Grow Complexity
- Contained, measurable environment: Dialing in temp and RH in a 4×4×6.5 ft space (104 cubic feet) is dramatically easier than managing an entire basement or spare room where ambient conditions shift constantly
- Built-in mounting infrastructure: Pre-installed crossbars, hanging loops, and duct ports eliminate the need to improvise light mounting and ducting — a significant source of beginner frustration and safety risk
- Repeatable setup: Between cycles the tent can be wiped down, inspected, and rebuilt in the same configuration — consistency reduces variables and makes each grow cycle more predictable than the last
- Light schedule enforcement: The lightproof exterior ensures your timer controls the entire light cycle — no ambient light from hallways or windows interfering with the dark period
- Pest and contamination containment: If a pest or disease outbreak occurs, it stays within the tent boundary — far easier to treat than an infestation that has spread to a room or multiple spaces

Choosing the Right Grow Tent Size
What size grow tent do I need for cannabis?
The most common sizing mistake is choosing a tent based on a fixed "square feet per plant" number without accounting for training method. An untrained or minimally pruned plant can easily fill 4–6 square feet at maturity. A heavily trained SCROG canopy might be held to 2–3 square feet. The same plant in different training scenarios requires very different amounts of space.
Space Requirements by Training Method
| Training Method | Space Per Plant | Notes |
|---|---|---|
| SCROG / Manifold | 2–4 sq ft | Flat canopy maximizes light use per sq ft |
| LST (Low Stress Training) | 3–5 sq ft | Bends stems outward — moderate canopy control |
| Minimal / Untrained | 4–6+ sq ft | Natural bush shape; takes up the most space |
| Autoflowers (any method) | 2–4 sq ft | Compact lifecycle; limited training time window |
Tent Size Reference Guide
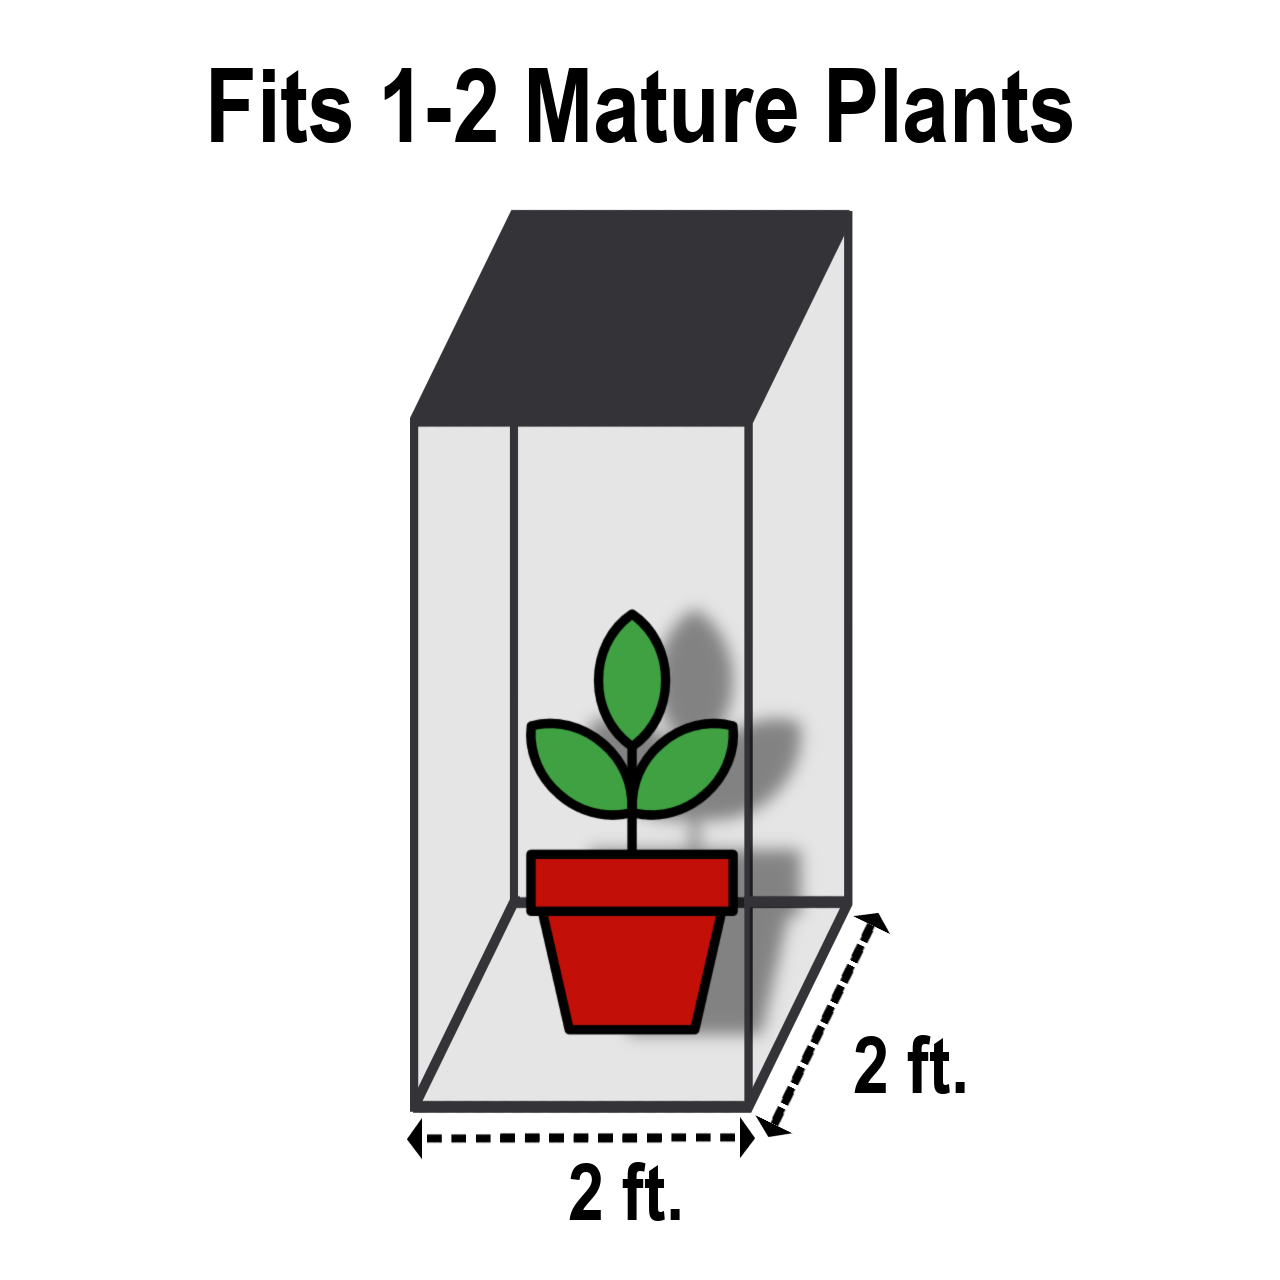
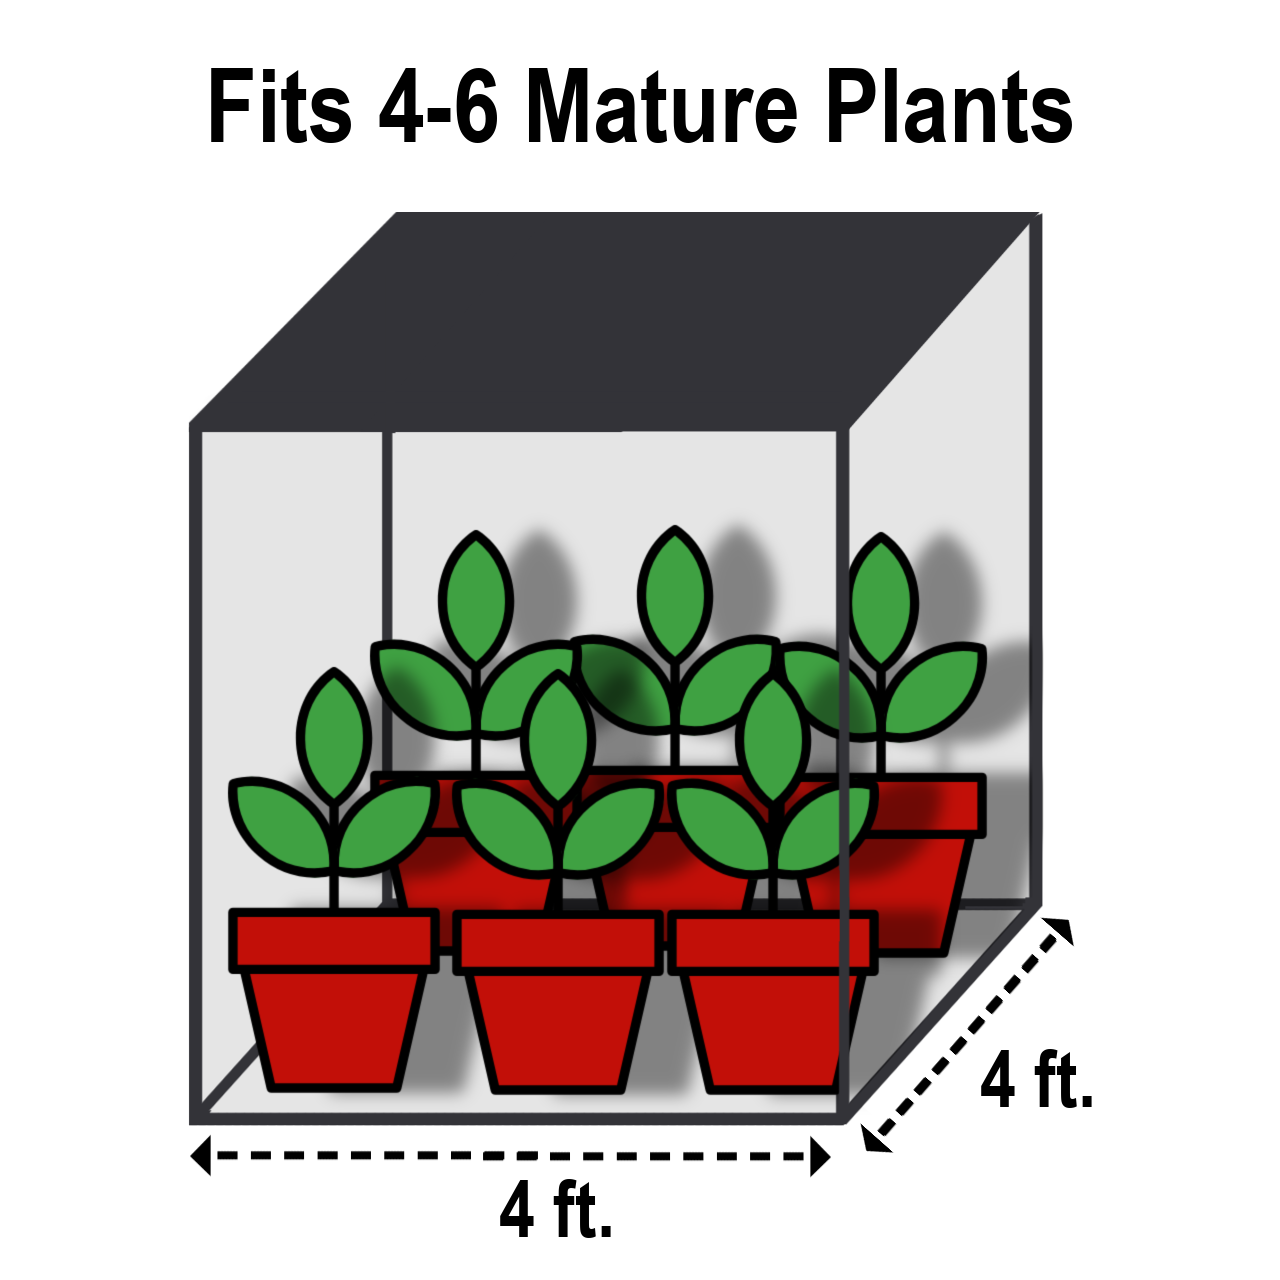
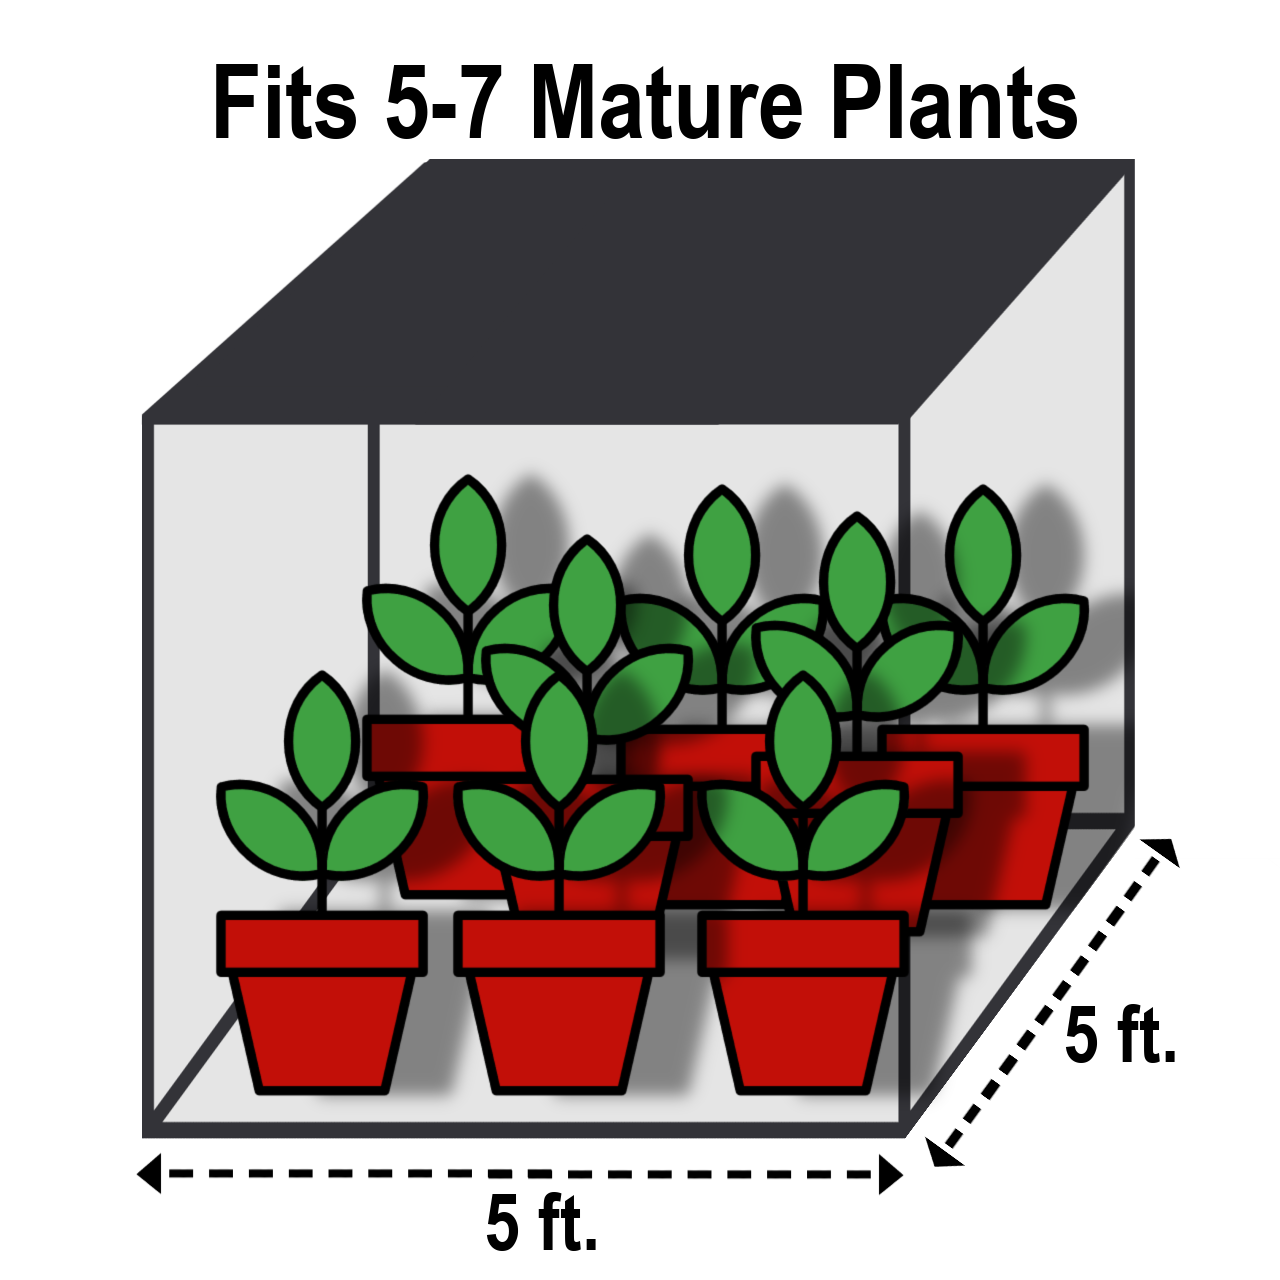
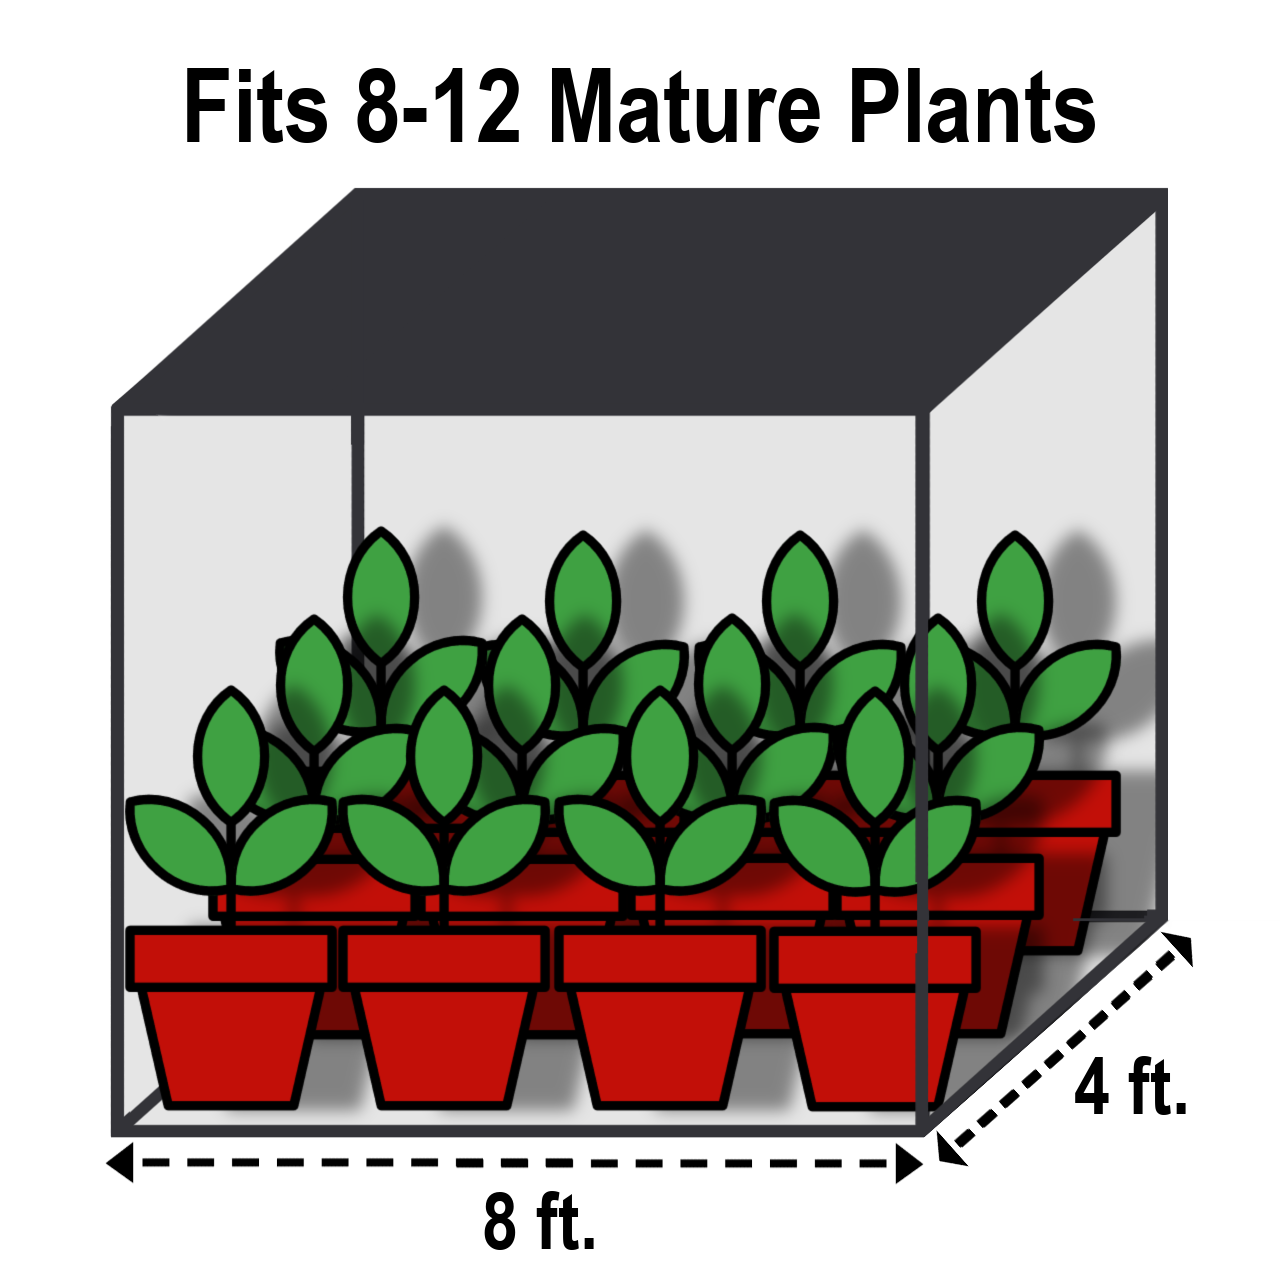
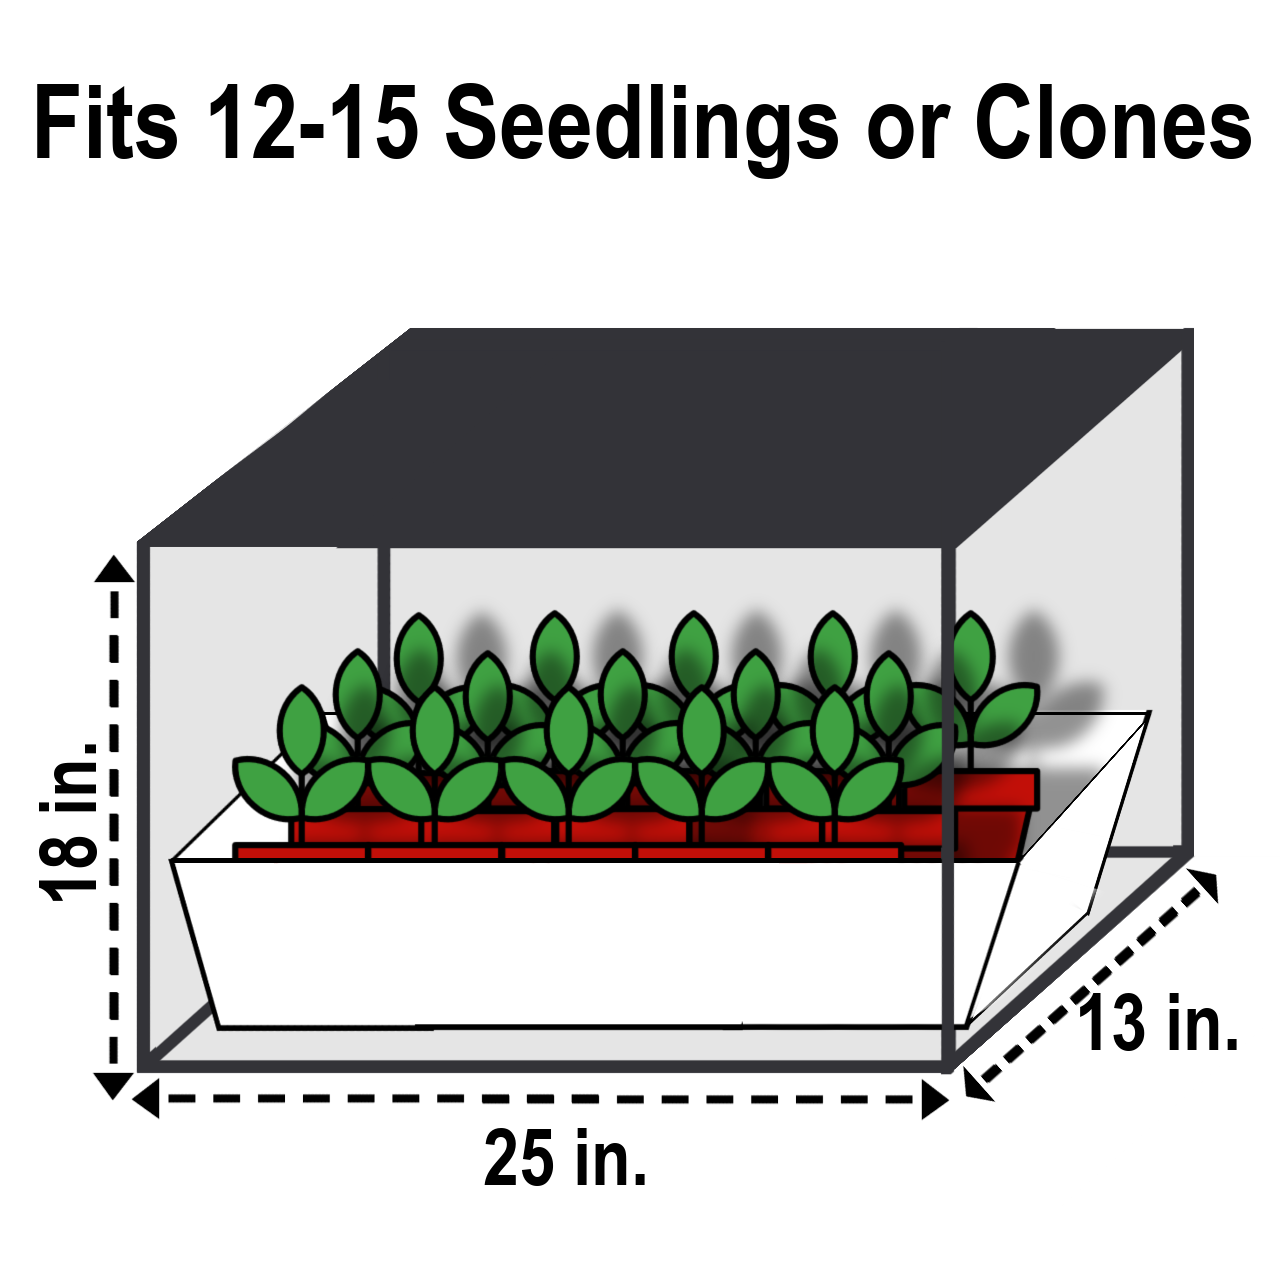
Packing too many plants into a tent creates airflow dead zones in the canopy, dramatically raises bud rot risk during flowering, and makes training and maintenance difficult. A 4×4 with 2–3 well-trained plants consistently outperforms the same tent with 6 crowded, undertrained ones. Fewer plants, more training = better results.
Ceiling Height & Room Clearance
How tall does my ceiling need to be for a grow tent?
Ceiling Height Breakdown
| Component | Space Required | Notes |
|---|---|---|
| 6-ft grow tent | 6.0 ft | Interior growing height is roughly 5.5 ft after floor/ceiling clearance |
| Inline fan above tent | +0.75–1.0 ft | Fan body height plus mounting hardware |
| Ducting flex room | +0.25 ft | Minimum bend clearance for duct above tent |
| Subtotal | ~7.0–7.25 ft | Bare minimum — no adjustment headroom |
| Recommended ceiling | 8.0 ft | Provides light adjustment room and avoids strain |
Standard residential 8-foot ceilings are workable for 6-foot tents with modest effort. 7-foot ceilings require using a shorter tent (4–5 ft models) or mounting the fan outside the tent through the top duct port — both options reduce your usable interior growing height and complicate light hang management during flower stretch.
The inline fan and carbon filter add 8–14 inches of required height above the tent — a dimension that surprises many first-time builders who measure tent height only. Measure your ceiling to tent floor, subtract 12–14 inches for the fan assembly, and that's your tent's maximum height. When in doubt, mount the fan outside the tent through the top port to reclaim interior space.
How much clearance do I need around a grow tent?
- 12 inches minimum on all sides: Allows airflow around the tent exterior — important when exhaust creates positive pressure in a small room
- Front access clearance: Leave at least 24–36 inches in front of the main zipper door for comfortable entry — you'll be accessing this every day
- Rear and side access: 12 inches allows you to inspect the back of the tent for light leaks, check rear plant health, and adjust rear trellis supports without straining
- Pest prevention: Tents against walls create humidity traps and hiding spaces for fungus gnats and spider mites to establish before you notice them
- Heat management: A tent in a confined corner can build ambient heat behind and beside the exhaust port — clearance allows that heat to dissipate rather than recycling back into intake
Tent Quality & Fabric
What's the difference between 600D and 1680D grow tent fabric?
The denier rating is the single most important quality differentiator between budget and premium grow tents — more than zipper count, brand name, or advertised features. A 600D tent at the right price is a perfectly functional choice for a first grow or occasional use. A 1680D tent earns its higher price through significantly longer functional lifespan, better lightproofness over time, and the ability to support heavier hanging loads.
| Denier | Weight | Tear Resistance | Lightproofness | Hanging Capacity | Best For |
|---|---|---|---|---|---|
| 300D–400D | Light | Low | Moderate | Limited | Short-term, budget builds |
| 600D | Medium | Good | Good | Standard | Most home grows — solid value |
| 1680D | Heavy | Excellent | Excellent | High | Long-term, multi-cycle, professional |
What Else to Look For in a Quality Tent
- Double-stitched seams: Single-stitched seams on budget tents are the first failure point — look for double or triple stitching at all corners and duct port openings
- Heavy-duty zipper construction: Zippers are the most common light leak source over time. Heavy coil zippers with double pulls and proper backing fabric maintain light seal through hundreds of open/close cycles
- Metal poles and corner connectors: Plastic corner connectors fail under the combined weight of a heavy LED, carbon filter, and ducting. Metal connectors and steel poles are required for any substantial hanging load
- Observation window: Not essential but useful — lets you check plant status without opening the main door and potentially disrupting the dark cycle during flowering
How do I know if my grow tent is light-proof?
Light leaks during the 12-hour dark cycle are one of the most common and preventable causes of failed flowering in photoperiod strains. Even a small, consistent leak can prevent proper hormonal flowering signals from triggering — or worse, cause hermaphroditism in otherwise stable genetics mid-flower. New tents, tent moves, and any time cables or ducting are rerouted are all reasons to rerun this test.
Light-Proof Test Procedure
- 1Fully assemble the tent with all cables routed, ducting connected, and all ports filled or plugged as they will be during a real grow.
- 2Turn off all room lights and close doors to eliminate ambient light. The darker the room, the more sensitive the test.
- 3Zip yourself inside the tent and remain still for 5 full minutes. Human eyes require 5–10 minutes to fully adapt to darkness — rushing this step misses subtle leaks.
- 4Inspect all zipper seams, duct port edges, cable holes, and corner seams. Even a thin sliver of light visible at distance constitutes a leak requiring attention.
- 5Seal all identified leaks with foam weatherstripping tape, electrical tape, or light-blocking velcro strips before your first light flip.
Moving the tent, rerouting cables or ducting, or replacing components can reopen previously sealed leaks. Run the light-proof test again any time the tent has been substantially reconfigured — especially before flipping to 12/12.
Creating the Ideal Growing Environment
How do I create the ideal environment for cannabis plants in a grow tent?
Temperature Targets by Stage
| Stage | Air Temperature | Notes |
|---|---|---|
| Seedling / Clone | 70–75°F (21–24°C) | Gentle warmth; fragile tissue needs stable conditions |
| Vegetative | 72–82°F (22–28°C) | 82°F is the practical ceiling — above this, heat stress accelerates and VPD climbs beyond optimal |
| Flowering | 65–80°F (18–26°C) | Lower temps in late flower (65–72°F) can enhance terpene and anthocyanin expression |
| Lights-off / Dark period | 60–70°F (15–21°C) | 10°F drop from lights-on is ideal; larger drops stress plants and increase mold risk |
Humidity (RH) Targets by Stage
| Stage | Target RH | Notes |
|---|---|---|
| Seedling / Clone | 65–70% | High humidity compensates for undeveloped root systems |
| Vegetative | 50–70% | Broad range — plants are most tolerant here |
| Early Flowering | 40–50% | Begin reducing RH at the flip to condition plants for denser flower development |
| Late Flowering | 30–40% | Critical for botrytis prevention — see note below |
During the final 2–3 weeks of flower, dense buds trap moisture internally where it cannot evaporate. Dropping RH to 30–40% at this stage is the primary defense against botrytis (grey mold), which can destroy an entire harvest in 48–72 hours. At this stage a dehumidifier is no longer optional — it is harvest insurance.
Light Schedules
| Stage | Light On | Dark | Notes |
|---|---|---|---|
| Seedling / Clone | 18–24 hrs | 0–6 hrs | Gentle light intensity only |
| Vegetative | 16–18 hrs | 6–8 hrs | Consistent daily timing matters more than exact hours |
| Flowering (photoperiod) | 12 hrs | 12 hrs strict | Dark period interruption can re-veg or hermaphrodize the plant |
| Autoflowering | 18–20 hrs | 4–6 hrs | No flip needed — flowers by age regardless of schedule |
CO2 Supplementation — When It's Worth It (and When It Isn't)
CO2 supplementation is frequently recommended in beginner guides without the prerequisites that make it work. The reality: CO2 enrichment only produces a meaningful yield return when two conditions are met simultaneously — your light is delivering at least 600–800 µmol/m²/s PPFD at the canopy, and your grow space is sealed or near-sealed.
In a standard vented beginner tent, the inline fan continuously flushes CO2-enriched air out before plants can use it. Running CO2 in a vented tent is expensive and largely ineffective. Ambient atmospheric CO2 at approximately 400–450 ppm is sufficient for any home grow operating below high-intensity LED PPFD levels. Add CO2 supplementation only after you're running high-output lighting in a controlled sealed environment — not as a first-grow addition.
pH Targets
- Soil: 6.0–6.5 — the range where all major and micro nutrients remain available to soil-dwelling root systems
- Hydroponic / Coco (optimal window): 5.8–6.2 — tighter than soil because there's no buffering medium; allowing intentional drift across the full 5.5–6.5 range ensures all micronutrients cycle through their uptake windows
Ventilation & Fan Sizing
Do I need a ventilation system for my grow tent?
What Ventilation Accomplishes
- Heat removal: Grow lights — even efficient LEDs — generate heat that accumulates at canopy level. Without continuous exhaust, temps can climb 10–20°F above ambient within minutes of lights coming on
- Humidity management: Plants transpire water continuously, raising tent RH. Without exhaust removing this moisture, RH climbs toward condensation — especially dangerous during flowering when dense buds trap moisture internally
- CO2 refresh: Plants consume CO2 during photosynthesis. A sealed, unventilated tent will deplete ambient CO2 to growth-limiting levels within hours of lights turning on
- Odor control: All odor-laden air must pass through the carbon filter before exiting. This requires active pressure differential — the inline fan creates the negative pressure that forces all exhaust through the filter
- Negative pressure maintenance: Proper exhaust keeps tent walls slightly flexed inward, confirming that all outbound air is being pulled through (not leaking around) the carbon filter and sealed ports
Required Ventilation Components
| Component | Function | Sizing Guidance |
|---|---|---|
| Inline exhaust fan | Pulls air through filter and out of tent | CFM = tent volume ÷ 2, × 1.25 for filter resistance |
| Carbon filter | Neutralizes terpene odor molecules via activated carbon | Match diameter and CFM to fan exactly |
| Ducting | Routes exhaust from fan to exit point | Match diameter; minimize bends (each 90° bend reduces airflow ~10%) |
| Oscillating fans (inside tent) | Internal air circulation — distributes heat, humidity, CO2; strengthens stems | 1–2 small clip-on fans per 4×4 tent |
| Passive intake vents | Allow fresh air in to replace exhausted air | Standard in most tents — mesh panels near bottom |
How do I size an inline fan for my grow tent?
CFM Sizing Formula
Fan Size by Tent Size — Quick Reference
| Tent Size | Approx. Volume | Min. CFM (2-min exchange) | Recommended Fan |
|---|---|---|---|
| 2×2×4 ft | 16 cu ft | 10 CFM (×1.25 = 13) | 4-inch inline fan |
| 2×4×5 ft | 40 cu ft | 20 CFM (×1.25 = 25) | 4-inch inline fan |
| 3×3×6 ft | 54 cu ft | 27 CFM (×1.25 = 34) | 4-inch inline fan |
| 4×4×6.5 ft | 104 cu ft | 52 CFM (×1.25 = 65) | 6-inch inline fan |
| 5×5×7 ft | 175 cu ft | 88 CFM (×1.25 = 110) | 6-inch inline fan |
| 4×8×7 ft | 224 cu ft | 112 CFM (×1.25 = 140) | 8-inch inline fan |
Manufacturer CFM ratings are measured in ideal conditions without ducting or filter resistance. In real use, a 6-foot ducting run with two 90° bends and a carbon filter can reduce effective airflow by 30–40% below rated CFM. Buying a fan with 2–4× your calculated minimum gives you speed controller headroom and ensures adequate exchange even as the carbon filter ages and resistance increases.
Do I need an active intake fan, or will passive vents work?
When Passive Intake Is Sufficient
- The room containing the tent is temperature-controlled (cooler than your target canopy temp)
- The tent has standard mesh intake vents on the lower sides or rear
- Your inline exhaust fan creates adequate negative pressure (walls flex slightly inward)
- Ambient room temperature stays below 75°F during lights-on hours
When You Need an Active Intake Fan
- Sealed room or closet: If the tent is in a sealed space without fresh air exchange, passive intake will recirculate the same depleted CO2 air in an increasingly hot loop
- Hot ambient room: In summer or in garages without climate control, if ambient temp is already 80°F+, passive intake pulls that hot air in and makes cooling harder — a small active intake drawing from a cooler adjacent space solves this
- High-wattage lighting: Large LED fixtures (1000W+) or HPS systems generate enough heat that passive intake can't keep up — active intake provides the fresh cool air volume needed to balance the heat load
- CO2 supplementation: Sealed CO2 setups require a fully controlled air exchange system — passive intake is incompatible with sealed CO2 grows
Choosing a Grow Light for Your Tent
What type of grow light should I use in a cannabis grow tent?
| Type | Efficiency | Heat | Lifespan | Verdict |
|---|---|---|---|---|
| Full-Spectrum LED | Highest | Low | 50,000+ hrs | ✓ Recommended for all home tent grows |
| CMH (Ceramic Metal Halide) | High | Medium | ~20,000 hrs | ✓ Excellent spectrum; good alternative to LED |
| HPS / MH | Medium | High | ~10,000 hrs | ⚠ Legacy technology — not recommended for new builds |
| T5 Fluorescent | Low | Very Low | ~20,000 hrs | ✓ Clones, seedlings, and propagation only |
HPS and MH lights are mentioned here for reference — they were the standard for decades and remain in use in large, well-ventilated commercial rooms. In a home grow tent, their heat output creates a significant cooling challenge that complicates environmental management, drives up electricity cost, and requires more powerful ventilation to offset. If you're building a new tent setup, start with LED.
Matching Light Wattage to Tent Size
| Tent Size | Recommended LED Wattage | Notes |
|---|---|---|
| 2×2 ft | 100–150W | A 150W LED fills a 2x2 at flowering PPFD adequately |
| 2×4 ft / 3×3 ft | 200–300W | A 100W LED underpowers a 3x3 — don't treat these sizes as interchangeable |
| 4×4 ft | 500–600W | 600W from a quality brand hits 600–900+ µmol/m²/s across most of the canopy |
| 5×5 ft | 800–1000W | May require two fixtures for even canopy coverage |
| 4×8 ft | 1200–1600W | Two 600–800W fixtures in a rail or fixed mount |
For a deep dive into PPFD targets by stage, DLI, spectrum science, and light selection across all growth stages, see Module 06 — Grow Lights Guide.
Controlling Humidity & Temperature
How do I control humidity and temperature inside a cannabis grow tent?
If Temperature Is Too High
- Increase exhaust fan speed: Faster air exchange removes heat more quickly — most significant single adjustment available
- Add oscillating fans: Internal air movement breaks up hot spots at canopy level where heat accumulates under the light. This constant gentle movement triggers thigmomorphogenesis — the plant's stress-response mechanism that reinforces cell walls, producing thicker, stronger stems that support heavier bud development.
- Run lights during cooler overnight hours: Ambient temps are naturally lower at night, leveraging the temperature differential to reduce the cooling load during lights-on hours — the mechanism that makes "lights at night" a genuine strategy, not just a workaround
- Improve intake air temperature: If the room containing the tent is itself too warm, duct intake air from an air-conditioned space or run a portable AC unit adjacent to the tent
If Temperature Is Too Low
- Use a small space heater with a thermostat set to the target minimum — thermostatic control prevents overheating
- Reduce exhaust fan speed during lights-off to retain residual warmth from lighting equipment
- Insulate the tent's exterior if in a cold garage or basement in winter (see cold climate section below)
If Humidity Is Too High
- Use a dehumidifier: The only reliable mechanical solution for sustained high RH — especially critical in late flower when hitting 30–40% RH is non-negotiable for botrytis prevention. The final 2–3 weeks RH reduction to 40–45% is specifically Botrytis (bud rot) prevention — at this stage a dehumidifier stops being optional and becomes essential, especially in humid climates or dense canopies.
- Increase exhaust fan speed: Faster air exchange removes moisture-laden air before it accumulates — effective for moderate RH management in veg
- Improve internal circulation: Oscillating fans reduce humidity pooling in the canopy — stagnant air pockets between dense buds are where botrytis takes hold first
- Water plants earlier in the day: Soil and coco transpiration peaks 2–4 hours after watering — watering at lights-on rather than lights-off reduces peak nighttime humidity spikes
If Humidity Is Too Low
- Use a humidifier — the only reliable solution for sustained low RH in veg and seedling stages
- Reduce exhaust fan speed slightly to minimum needed for temperature and CO2 management — this is the only practical short-term workaround if a humidifier is unavailable
Environmental problems in grow tents build over hours — not instantly. A smart environmental controller (like AC Infinity's CLOUDLINE series) can be programmed to ramp fan speed automatically when temp exceeds 82°F or RH exceeds 60%. This prevents the slow-building problems that emerge between manual checks, which is especially valuable for beginners who haven't yet developed intuition for how quickly tent conditions shift with lights on/off cycles and plant growth progression.
Can I set up a grow tent in a garage or basement in a cold climate?
Cold Climate Tent Challenges and Solutions
Temperature management during lights-off: In unheated garages, temperatures can drop to 40–50°F or lower during winter lights-off periods. Cannabis plants at these temps experience cold stress that slows growth, increases disease susceptibility, and can cause permanent root damage. A thermostatically controlled space heater inside or adjacent to the tent set to a 60°F floor is the standard solution.
Winter exhaust heat loss: Every cubic foot of warm, humid air your inline fan exhausts outside is replaced by cold, dry outdoor air. In Minnesota winters, this can significantly increase heating costs and makes humidity management harder (cold air holds less moisture, so intake air in winter is very dry). Options: duct exhaust into the interior living space rather than outside (odor control must be confirmed working first), or use a heat recovery ventilator (HRV) in a permanent room build.
Condensation on tent walls: When the warm, humid interior tent air contacts the cold fabric exterior (cooled by the cold ambient garage air), condensation forms on the inside walls and drips. This raises floor moisture and can promote mold along the tent base. Solution: insulate the tent's exterior with reflective foam insulation panels during cold months to keep the fabric wall temperature closer to interior tent temperature.
- Never place the tent directly against an exterior wall: Cold transfer through concrete block or exterior wall panels will chill one side of the tent and create a persistent cold zone on that canopy edge
- Insulate the floor beneath the tent: Concrete floors are cold heat sinks — a foam insulation mat under the tent floor prevents ground-level cold from chilling root zones in pots sitting on the tent floor
- Use a thermostatically controlled heater during lights-off: Target a 60°F minimum during dark periods — plants can tolerate it but won't thrive below this threshold
- Monitor temp differential between lights-on and lights-off: Keep the swing to 10°F or less if possible — large temperature swings stress photoperiod plants and encourage powdery mildew
Grow Tent Kits & Accessories
Does a grow tent kit come with everything I need to grow cannabis?
What's Typically Included in a Grow Tent Kit
- Grow tent with frame, Mylar interior, and ports
- LED grow light (entry to mid-range in most kits; wattage varies widely — verify coverage area)
- Inline fan and carbon filter as a matched diameter set
- Flexible aluminum ducting
- Ratchet rope hangers for light and filter
- Higher-end kits may also include: oscillating clip-on fans, trellis netting, smart environmental controller, or fabric pots
What's NOT Included — Buy These Separately
- Growing medium: Soil, coco coir, rockwool, or hydroton — the kit hardware is media-agnostic
- Seeds or clones: No kit includes genetics — sourced separately
- Nutrients: Veg and bloom base formulas, cal-mag supplement, pH up/down solutions
- pH meter: Essential — required before any water or nutrient solution goes near a plant
- EC/PPM meter: Required for hydroponic and coco grows; strongly recommended for soil
- Pots or containers: Unless specifically included in a premium kit
- Timer: Some kits include a basic mechanical timer; a digital timer is worth the upgrade
Kit Component Breakdown — What Each Part Does
| Component | Function | Upgrade Consideration |
|---|---|---|
| Grow tent | Sealed, reflective growing environment | 600D adequate; 1680D if running multiple cycles long-term |
| LED grow light | Provides photosynthetically active light at target PPFD | Verify PPFD map, not just stated wattage |
| Inline fan + carbon filter | Air exchange and odor control | Smart speed controller adds meaningful automation value |
| Oscillating fans | Internal circulation; stem strengthening via thigmomorphogenesis; humidity distribution | Two small clip-on fans in a 4×4 outperform one large stationary fan |
| Trellis netting | Canopy support and SCROG training structure | Doubles as a SCROG net if woven during late veg |
| Smart controller | Automates fan speed, humidity response, temperature alerts | AC Infinity CLOUDLINE T-series is the standard recommendation |
Best Grow Tent Setup for Beginners
What's the best grow tent setup for a first-time cannabis grower?
Beginner Tent Size Recommendation
The 2×4 is the best starting point if you want to keep costs and complexity low — compact, easy to manage, works in a closet or small spare room, and requires only a 200–300W LED. The 4×4 is the right choice if you want more capacity from your first grow and have the room for it. Both sizes have the widest selection of compatible equipment and the most online community support.
Component Checklist — Beginner Build
| Component | 2×4 Tent | 4×4 Tent |
|---|---|---|
| LED Wattage | 200–300W | 500–600W |
| Inline Fan | 4-inch, 200+ CFM | 6-inch, 400+ CFM |
| Carbon Filter | 4-inch matched to fan | 6-inch matched to fan |
| Pots | 3-gallon fabric pots | 3–5 gallon fabric pots |
| Growing Medium | Pre-amended cannabis soil or buffered coco + perlite | Pre-amended cannabis soil or buffered coco + perlite |
| Timer | 24-hr digital (not mechanical) | 24-hr digital (not mechanical) |
| Meters | pH meter + digital thermometer/hygrometer | pH meter + EC meter + digital thermometer/hygrometer |
What Makes This Setup Beginner-Friendly
- Full-spectrum LED: No ballast, no separate veg/bloom bulbs, no excessive heat — plug in, hang, and set height. Modern LEDs work well at all stages from seedling to harvest without any configuration changes
- Fabric pots with quality soil: Fabric air-prunes roots and drains consistently — much harder to overwater than plastic pots. A pre-amended cannabis soil provides 3–5 weeks of nutrition without feeding, giving beginners time to learn the plants before adding nutrient complexity
- 4 or 6-inch fan + matched carbon filter: Sized correctly for the tent, this combination handles both temperature and odor without daily adjustment. A speed controller makes dialing in the right flow rate easy
- Optional smart controller: An environmental controller from AC Infinity is the single most impactful upgrade available to a beginner — it removes the failure mode of not monitoring conditions frequently enough and automates the two most common manual interventions (fan speed up when hot, fan speed down when cold)
Grow Tents & Starter Kits — Quick-Reference FAQ
What size grow tent should I start with for cannabis?
The 2×4 ft tent is the best first grow for most beginners — compact, manageable, and works in limited spaces. The 4×4 is the step up if you want more capacity and have room for it. Both are extensively documented and have the widest equipment compatibility. Avoid starting with anything larger than 5×5 — environmental control becomes significantly more challenging as tent volume increases.
How do I size an inline fan for my grow tent?
Multiply your tent's length × width × height (in feet) to get cubic feet. Divide by 2 for a 2-minute air exchange target. Multiply by 1.25 to offset carbon filter resistance. For a 4×4×6.5 ft tent: 104 ÷ 2 × 1.25 = 65 CFM minimum. A 6-inch inline fan rated at 400+ CFM gives you substantial headroom above that floor — headroom you'll need as the carbon filter ages and airflow resistance increases.
What is the correct air exchange rate for a cannabis grow tent?
The entire tent air volume should exchange completely every 1–3 minutes. Five minutes is too slow — heat and humidity build significantly between exchanges at that rate. This is why fan CFM ratings that seem excessive relative to simple tent volume calculations are appropriate in practice: filter resistance, ducting bends, and real-world airflow dynamics all reduce effective CFM below rated values.
What's the difference between 600D and 1680D grow tent fabric?
Denier (D) is the thread density rating — higher means denser, heavier, more durable fabric. 600D is standard and adequate for most home grows. 1680D is the professional tier: more tear-resistant, maintains better lightproofness across many open/close cycles, and supports heavier hanging loads without sagging. If you're building a setup intended to run for multiple years, 1680D is the correct investment.
Does a grow tent kit include everything I need?
Kits cover hardware: tent, LED light, inline fan, carbon filter, and hangers. They do not include growing medium, seeds or clones, nutrients, pH solutions, pH meter, or EC/PPM meter. Budget $100–$250 for consumables and measurement tools separately. Kits from reputable brands like AC Infinity may also include smart environmental controllers — verify kit contents carefully before purchasing.
Can I use a grow tent in a cold garage or basement?
Yes — with deliberate preparation. Key requirements: a thermostatically controlled space heater to prevent lights-off temps from dropping below 60°F; floor insulation under the tent to prevent cold concrete from chilling root zones; tent exterior insulation in extreme cold to prevent condensation on tent walls; and a plan for exhaust management (in Minnesota winters, exhausting warm air outside creates real operating cost and humidity challenges worth planning around before the first grow).
Tents, Lights, Fans & Everything Between
Shop complete starter kits or build your own setup component by component — or ask Grōbot to put together a shopping list for your specific space and budget.